Install the DataArchiver Outlook Add-In


Click on a link below to go to a specific section of the software installation:

Install Requirements

The DataArchiver Outlook Add-In is installed locally on an Outlook client, and is supported for use with the following agents:
  • Exchange Compliance Archiver Agent
  • Exchange Mailbox Archiver Agent
  • Exchange Public Folder Archiver Agent
  • Exchange Mailbox iDataAgent

Verify that the computer in which you wish to install the software satisfies the minimum requirements specified in:

The following procedure describes the steps involved in installing the DataArchiver Outlook Add-In. If you choose to install multiple components simultaneously, refer to the appropriate procedures for installation requirements and steps specific to the component. Note that when you install multiple components, the sequence of the install steps may vary. Also, keep in mind that when installing the Outlook Add-In for use only with the Exchange Compliance Archiver Agent or the Exchange Mailbox iDataAgent, certain tasks and steps in this procedure may not apply, as they are specific to migration archiving-related functions. For example, the OFL Configuration section can be skipped, and the normal defaults can be accepted on installation steps targeted only for DataArchiver or WebProxy settings.

In order to use HTTPS secure communications for stub recovery, the DataArchiver WebProxy Agent for Exchange must be installed on an IIS server in your network. See Install the DataArchiver WebProxy Agent for Exchange for the procedure to install this component.

In order to use the DataArchiver Outlook Add-In component, you must install one of the supported agents listed below. For procedures on installing these agents, see:

Review the following Install Requirements before installing the software:

General

  • This version of the software is intended to be installed in a CommCell where the CommServe and MediaAgent(s) version is 8.0.0.
  • Close all applications and disable any programs that run automatically, including anti-virus, screen savers and operating system utilities. Some of the programs, including many anti-virus programs, may be running as a service. Stop and disable such services before you begin. You can re-enable them after the installation.
  • Verify that you have the software installation disc that is appropriate to the destination computer’s operating system.
    Make sure that you have the latest software installation disc before you start to install the software. If you are not sure, contact your software provider.
  • If you are installing this component on a cluster, keep in mind that the DataArchiver for Outlook Add-In can only be installed on the physical node since the Outlook client is available only on the physical node. Refer to the local install procedure below to install this component on the physical node.

Configure the Client for Java Updates During Installation

  • The client computer can be configured to automatically download Java updates from the CommCell Console during the software installation. To do so, create the sGUIUpdateURL registry key on each client computer prior to installing the software. This key should include the IIS web alias for the CommCell Console from which you wish to download updates. Once this key is created and the software is installed, the latest Java updates from the CommCell Console will be available on the client computer.

    Note that if you choose to select a CommCell Console installed on a computer other than the CommServe computer, you must configure the CommServe computer's CommCell Console to use the alternate computer for Java updates. See Configure an Alternate Computer for Add-In Java Updates for step-by-step instructions.

OFL Configuration

Before installing the DataArchiver Outlook Add-In you must publish some special forms in the Exchange Server Organizational Forms Library (OFL) from a computer that has Outlook installed. These forms provide special icons necessary for users to identify migration archiving candidates and message stubs. Steps 1 through 5 are for creating the OFL, and Steps 6 through 8 are for publishing the forms. If you have already created an OFL, then you can use the existing one and don’t need to create a separate OFL. In that case, just follow Steps 6 through 8.

Creating the OFL for Exchange 2000/2003:

  1. Open the Exchange System Manager and expand the folders node.
  2. Right-click the Public Folders tree and select View System Folders from the context menu.
  3. Right-click the EFORMS REGISTRY system folder and select New -> Organizational Form from the context menu.
  4. Name the new Organization Form "DataArchiver Organizational Forms" and make sure that the Language field is set to English (USA), select Apply then click OK.
  5. Exit the Exchange System Manager.

Creating the OFL for Exchange 2007:

Refer to the CreateOFL instructions (located in the Intel32\Windows\Exchange\CreateOFL folder on the Resource Pack) for information on creating a custom Public Folder using the Exchange Management Shell. Afterwards, run the CreateOFL tool to create the OFL. Once the OFL has been created, continue on to the procedure for Publishing the Forms below.

Publishing the Forms:

  1. Next you will need to publish the forms using the PublishForm tool and OFT forms (located in the windows\Exchange\DMEPublishForm folder on the Resource Pack). After identifying the location of the latest version of the PublishForm tool and forms, double-click the publishform.exe file from the appropriate folder listed above, then click Publish.

    NOTE: In the event that this step fails, it may be due to Outlook and Exchange Server being installed on the same computer, which is not recommended by Microsoft. In such a situation, we recommend that you perform this task from a computer that has Outlook but not Exchange Server installed.

  2. The publish form program will prompt for a profile to use in order to publish the forms to the DataArchiver Organizational Forms (or previously existing OFL) folder. The profile used to publish the forms must have owner privileges to that folder.
  3. Close the publish form program.

See Tools and Utilities for more information on the Resource Pack.

Install Checklist

Collect the following information before installing the software. Use the space provided to record the information, and retain this information in your Disaster Recovery binder.
1. Install folder location:________________________________________________________________

See Select Components for Installation for more information.

2. Outlook's auto archive/personal storage features (Enabled or Disabled): ____________________

See DataArchiver Outlook Add-In Options for more information.

3. Allow end-user to select/de-select messages for archiving (Enabled or Disabled): ____________________

Prompt user before message recovery (Enabled or Disabled): ____________________

Allow end-user to browse/search archived copies of their messages/folders (Enabled or Disabled): ____________________

Allow end-user to erase archived copies of their messages/folders (Enabled or Disabled): ____________________

Allow end-user to offline archive local copies of archived messages/folders (Enabled or Disabled): __________________

See DataArchiver Outlook Add-In Options for more information.

4. Recovery Mode for stubs (Overwrite or Append): ____________________

Recover stubs from PST file to Recovered Items folder (Enabled or Disabled): ____________________

See DataArchiver Outlook Add-In Options for more information.

5. URL and Port number for the WebProxy server:_______________________________________________

See DataArchiver Outlook Add-In Options for more information.

Before You Begin

  • Log on to the client as local Administrator or as a member of the Administrators group on that computer.

Install Procedure

Getting Started

1. Place the software installation disc for the Windows platform into the disc drive.

After a few seconds, the installation program is launched.

If the installation program does not launch automatically:

  • Click the Start button on the Windows task bar, and then click Run.
  • Browse to the installation disc drive, select Setup.exe, click Open, then click OK.

NOTES

  • If you are installing on a x64 version of Windows 2008 Server Core R2, go to the AMD64 folder and run Setup.exe.
 
2. In this screen, you choose the language you want to use during installation. Click the down arrow, select the desired language from the pull-down list, and click Next to continue.  
3. Select the option to install software.

NOTES

 
4. Select the option to install software on this computer.

NOTES

  • The options that appear on this screen depend on the computer in which the software is being installed.
 
5. Read the Welcome screen.

Click Next to continue, if no other applications are running.

 
6. Read the virus scanning software warning.

Click OK to continue, if virus scanning software is disabled.

 
7. Read the license agreement, then select I accept the terms in the license agreement.

Click Next to continue.


Select Components for Installation

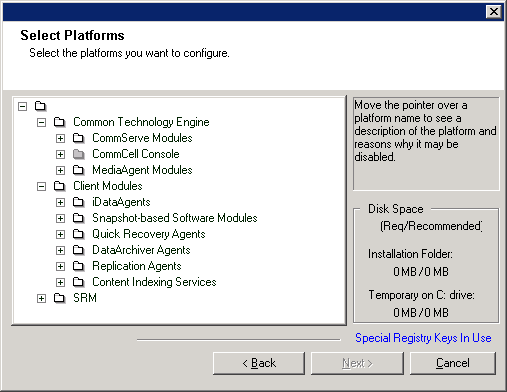
8. Select the component(s) to install.

NOTES

  • Your screen may look different from the example shown.
  • Components that either have already been installed, or which cannot be installed, will be dimmed. Hover over the component for additional details.
  • The Special Registry Keys In Use field will be enabled when GalaxyInstallerFlags registry keys have been enabled on this computer. Hover over the field to see which keys have been set, as well as their values. For more information, see Registry Keys.

Click Next to continue.

To install the DataArchiver Outlook Add-In, expand the Client Modules folder, and the DataArchiver Agents folder, then select the following:

  • DataArchiver Outlook Add-In
9. Click YES to install Microsoft .NET Framework package.

NOTES

  • Follow the on-screen prompts for installing the Microsoft .NET Framework package.
  • If you are prompted to install the Service Pack for the Microsoft .NET Framework, click Yes.
  • This prompt is displayed only when Microsoft .NET Framework is not installed.
  • Once the Microsoft .NET Framework is installed, the software automatically installs the Microsoft Visual J# 2.0 package.
10. Click Yes to install the Java Runtime Environment (JRE) or click No if you would like to use the JRE Version already available in your computer.

NOTES

  • This prompt will be displayed only if the computer is running a JRE version prior to the one supplied in this installation program or no JRE version is available at all. See System Requirements - CommServe for more information on JRE versions.
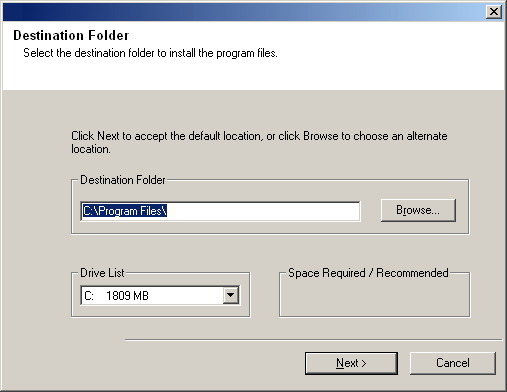
11. Specify the location where you want to install the software.

NOTES

  • Do not install the software to a mapped network drive.
  • Do not use the following characters when specifying the destination path:
     / : * ? " < > |
    It is recommended that you use alphanumeric characters only.
  • If you intend to install other components on this computer, the selected installation directory will be automatically used for that software as well.
  • If a component has already been installed, this screen may not be displayed if the installer can use the same install location as previously used.
  • If you intend to use the SnapProtect  feature for Windows File System iDataAgent, the agent should be installed on a non-system drive and not a filer volume.

Click Browse to change directories.

Click Next to continue.
DataArchiver Outlook Add-In Options

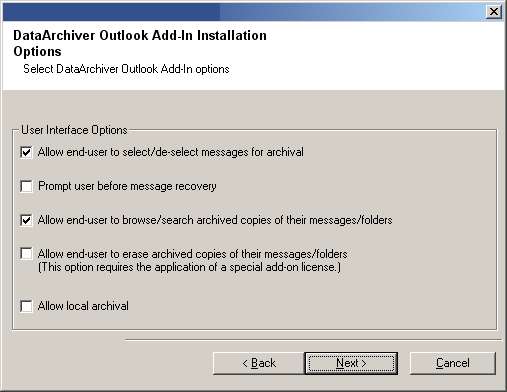
12. Select the option to Disable Outlook's AutoArchive / Personal Storage features (if applicable), then click Next to continue.

NOTES

  • This option allows you to disable Outlook’s AutoArchive and Personal Storage features. It is recommended that you disable these features, otherwise messages that are archived into Personal Storage (.PST) files by Outlook will not be archived by the Exchange Mailbox Archiver Agent.
  • This option is only supported for use with the Exchange Mailbox Archiver Agent.
13. Select any of the following options:
  • Allow end-user to select/de-select messages for archival
    This option allows you to enable the ability of end-users to add or remove messages/items from the archive list. This option is enabled by default, and is only supported for use with the Exchange Mailbox Archiver Agent.
  • Prompt user before message recovery
    This option allows you to enable a confirmation prompt when recovering a message or item from Outlook.
  • Allow end-user to browse/search archived copies of their messages/folders
    This option allows you to enable the ability of end-users to browse and search for archived copies of their messages. This option is enabled by default, and is supported for use with the Exchange Mailbox Archiver Agent and the Exchange Compliance Archiver Agent. This option must be selected for Exchange Compliance Archiver to support Compliance Searches from Outlook Add-In.
  • Allow end-user to erase archived copies of their messages/folders
    This option allows you to enable the ability of end-users to erase archived copies of their messages and folders, provided that the Erase Data feature license is present on the CommServe. This option is only supported for use with the Exchange Mailbox Archiver Agent.
  • Allow local archival
    The option allows you to enable the Offline Archive feature so that full copies of archived messages or items are maintained in local cache on the Outlook client so that end-users can recover archived data even when not connected to the Exchange Server.

Click Next to continue.

NOTES

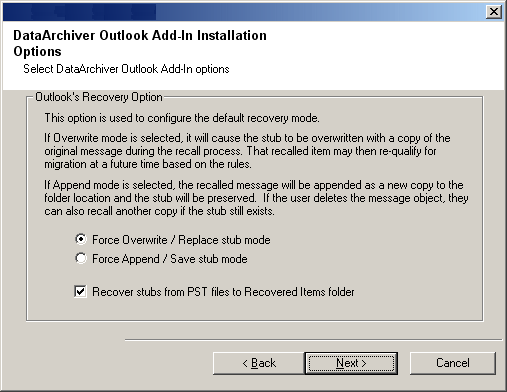
14. Configure the default recovery mode.
  • Force Overwrite / Replace stub mode
    This option causes the system to overwrite the stub with a copy of the original message during a stub recovery.
  • Force Append / Save stub mode
    This option causes the system to append a copy of the original message to the same folder from which it was migrated and will not delete the stub.
  • Recover stubs from PST files to Recovered Items folder
    This option allows users to recover messages from stubs residing within archived PST files into the Recovered Items folder of their mailbox.

Click Next to continue.

NOTES

15. Specify the Connection Type.

NOTES

  • Direct connectivity is the default method of communication to perform stub recovery.
  • The HTTPS connectivity option routes communications for stub recovery through an IIS server on which the DataArchiver WebProxy Agent for Exchange has been installed.
  • If you choose Direct Connectivity and later decide to switch to HTTPS connectivity, execute the regsvr32 DMProxyClient.dll command from the command line (located in the <software_installation_path>\Base folder) prior to performing the switch.

Click Next to continue.

If you select Direct connectivity, skip to the next step.

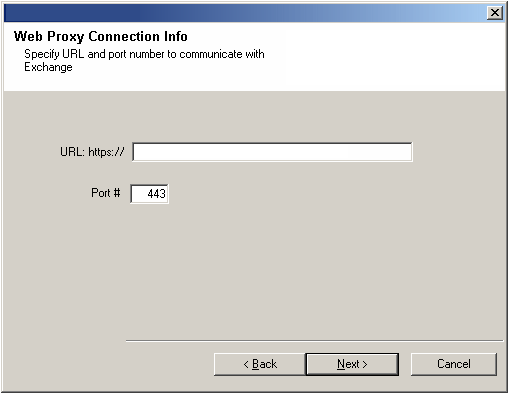
16. Specify the URL and Port number for the WebProxy server you have set up.

NOTES

Click Next to continue.

Download and Install Latest Packs

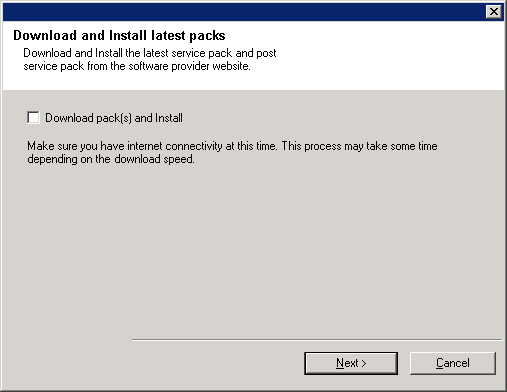
17. Select Download Pack(s) and Install to download and install the latest service packs and post packs from the software provider.

NOTES

  • Internet connectivity is required to download updates.
  • This step is applicable when installing on the first instance.
  • Updates are downloaded to the following directory: 
    <software installation>/Base/Temp/DownloadedPacks
    .
    They are launched silently and installed automatically for the first instance.

Click Next to continue.
Verify Summary of Install Options

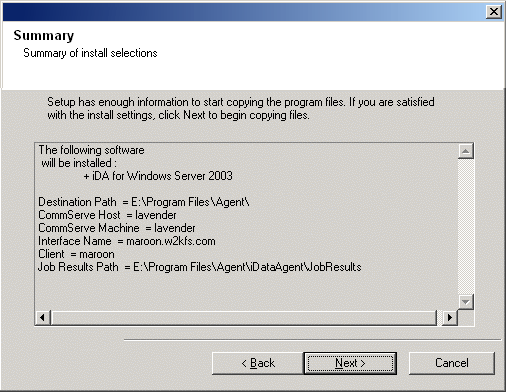
18. Verify the summary of selected options.

NOTES

  • The Summary on your screen should reflect the components you selected for install, and may look different from the example shown.

Click Next to continue or Back to change any of the options.

The install program now starts copying the software to the computer. This step may take several minutes to complete.
Setup Complete

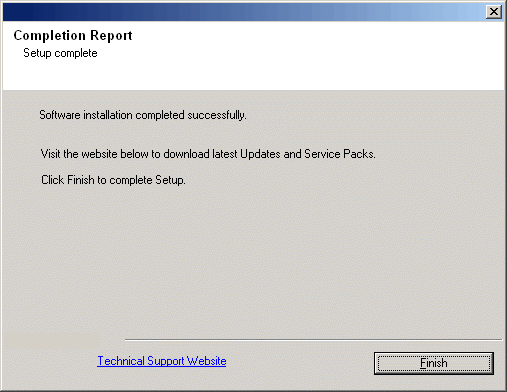
19. Setup displays the successfully installed components.

NOTES

  • The Setup Complete message displayed on your screen will reflect the components you installed, and may look different from the example shown.
  • If you install an Agent with the CommCell Console open, you need to refresh the CommCell Console (F5) to see the new Agents.
  • If Reboot Now button is displayed make sure to reboot the computer before performing any other operations from the computer.

Click Finish to close the install program.

The installation is now complete.
Post-Install Considerations

General

  • Install post-release updates or Service Packs that may have been released after the release of the software. If you are installing a Service Pack, verify and ensure that it is the same version as the one installed in the CommServe.

Outlook Add-In

  • The Outlook Add-In's language default is for the Outlook Language Setting. If applicable, modify the language setting (i.e., set to OS Language Setting) through the UseOSLocale registry key.
  • Before using the Outlook Add-In, ensure that the port number used by the Client Event Manager Service is properly configured. Typically, the install program configures this automatically; however, when using custom port numbers you will need to make sure that the port number configured on the Exchange Server under the nEVMGRCPORT registry key matches the port number configured on the Outlook client under registry key nEvMgrCPortNumber. This requirement also applies to multi-instance installs, in which case, you will need to locate the nEVMGRCPORT registry key under the appropriate instance on the Exchange Server. For general information on port number requirements, see Network TCP Port Requirements.

  • You can configure the software to download Java updates periodically from the CommCell Console. See Configuring Java Updates for more information.