|
The procedure on this page describes the steps involved in upgrading the
SQL Server iDataAgent in the
virtual servers (active and passive nodes) in a clustered environment.
This procedure provides steps for upgrading the SQL Server
iDataAgent only.
The windows File system iDataAgent
will automatically be upgraded when you upgrade this Agent. For information
specific to Windows File system iDataAgent,
see Upgrade the Windows File
System iDataAgent - Clustered Environment.
If multiple components are installed on a computer, then ensure that all
applicable components are selected for upgrade. In such a situation, the upgrade
sequence may vary. Refer to the appropriate procedures for upgrade
requirements and steps specific to the component.
Verify that the computer in which you wish to upgrade the software
satisfies the minimum requirements specified in
System Requirements -
Microsoft SQL Server iDataAgent.
If you are upgrading the software from 7.0.0 to 8.0.0
If you are upgrading the software from 6.1.0 to 8.0.0
- Upgrade the physical nodes prior to upgrading the virtual
server. Similarly upgrade the active node first before upgrading the
passive nodes.
- The upgrade must be initiated on the active node. It is recommended that both the active and passive nodes are available during
the upgrade process. The program provides the option to automatically upgrade
the passive nodes. If necessary, you can also manually upgrade the passive
nodes if they are not available. (See
Manually Upgrading
the Software on a Passive Node for step-by-step instructions.)
- Agent upgrades must be performed in the following order:
- Windows File System iDataAgent must be first upgraded on all the
physical nodes in the cluster prior to attempting any virtual server
upgrades.
- Other Agents can then be upgraded on the virtual server.
|
|
|
|
The following table provides a list of supported upgrade paths for
the current
software version. If the
version currently installed on your computer is not listed here, contact
your software provider for more information.
Installed Version
|
Upgrade to Version 8.0.0
|
Information
|
|
|
|
|
|
6.1.0 |
Supported |
Perform a direct upgrade to
Version 8.0.0. |
|
|
|
|
|
7.0.0 |
Supported |
Perform a direct upgrade to
Version 8.0.0. |
|
|
|
Review the following before upgrading the software:General
- Review the
Upgrade
Strategy before upgrading the software.
- Verify that no jobs are in progress or scheduled to occur while the
software is being upgraded on the client. If jobs are scheduled, either
perform the upgrade at another time or disable all jobs in the client using
the Activity Control tab from the Client Computer Properties
dialog box in the CommCell Console.
Once the upgrade is completed, you can enable the jobs from this dialog box.
- Verify that the CommServe computer is accessible and all services
on the CommServe and the MediaAgent in which you wish to perform the
upgrade are running.
- Verify that the SQL Server instance used by the CommServe is running on the
CommServe computer.
- Verify that all applications (CommCell Console, Service
Control Manager) are
closed.
- Close all applications and disable any programs that run automatically,
including antivirus, screen savers and system utilities. Some programs,
including antivirus software, may be running as a service. Stop and disable
all non-essential services before you begin. You can re-enable them after
the upgrade.
- The files and folders associated with CommCell components should not
be opened by other applications (for example, Windows Explorer, FTP, etc.) on this
computer or from other computers during the upgrade.
- Verify that you have the
software
installation disc that is appropriate to the destination computerís
operating system.
Make sure that you have the latest
software
installation disc before
you start to install the software. If you are not sure, contact your
software provider.
|
|
|
- Ensure that you are logged on as the Domain User with
administrative privileges to all nodes in the cluster.
- If the SQL Server service is running using any account other
than the Local system account, you will need the user name and
password of that account.
- Ensure you have the user name and password of a Windows account with
SQL system administrator privileges (this account is used by the SQL
iDataAgent to perform jobs on
the SQL Server instance) for all SQL Server instances to be configured.
|
|
|
Upgrade the Virtual Node
|
| 1. |
In this screen, you choose the language you want to use during installation.
Click the down arrow, select the desired language from the pull-down list, and click Next to continue.
|
|
| 2. |
Select the option to install software. NOTES
|
|
| 3. |
Select the option to install software on this computer. NOTES
- The options that appear on this screen depend on the computer in which
the software is being installed.
|
|
| 4. |
Read the Welcome screen.
Click Next to continue, if no other applications are
running.
|
 |
| 5. |
Read the virus scanning software warning.
Click OK to continue, if virus scanning software is disabled.
|
 |
| 6. |
Read the license agreement, then select I accept the terms
in the license agreement. Click Next to continue.
|
 |
| 7. |
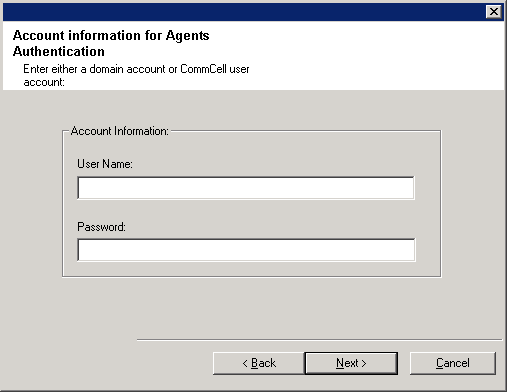
Enter the username and password information for an external
domain user account or a CommCell user account. This authorizes the installation
of an agent on the CommCell.
NOTES
- This window is only displayed when the Require Authentication for Agent
Installation option is selected in the CommCell Properties. Users must belong to a User
Group with Administrative Management capabilities to enable this feature. For more
information, see
Authentication for Agent Installs.
Click Next to continue.
|
 |
| 8. |
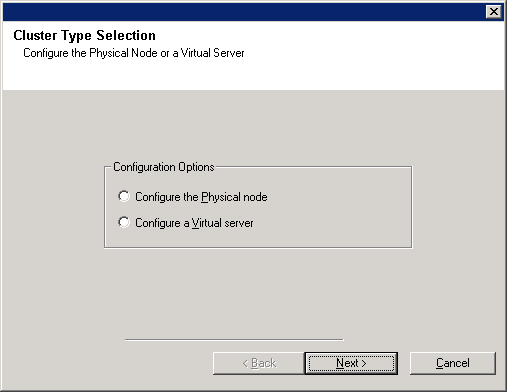
Select Configure a Virtual Server. Click Next to continue.
|
 |
| 9. |
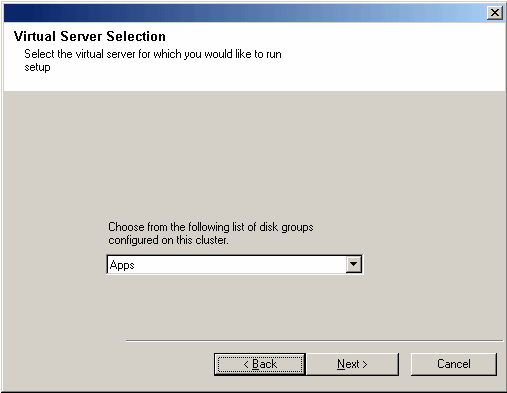
Select the disk group in which the virtual server resides. Click Next to
continue.
|
 |
| 10. |
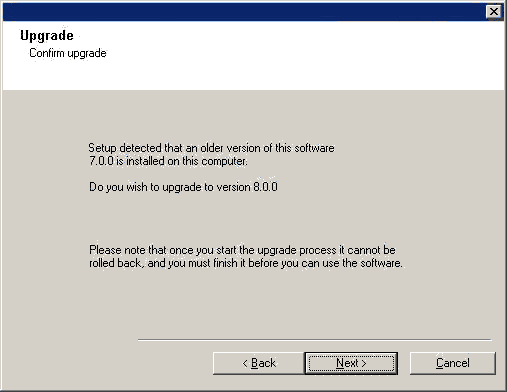
Click Next to continue with the upgrade. NOTES
- New components from this version can only be installed after upgrading
the existing components.
- The older version number depends on the version in the computer and may
look different from the example shown.
|
 |
| 11. |
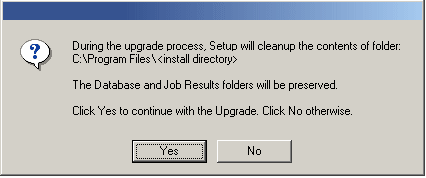
Click Yes to continue. This will not save any files (such as command
line scripts) or folders from the <software installation path> folder. NOTES
|
 |
| 12. |
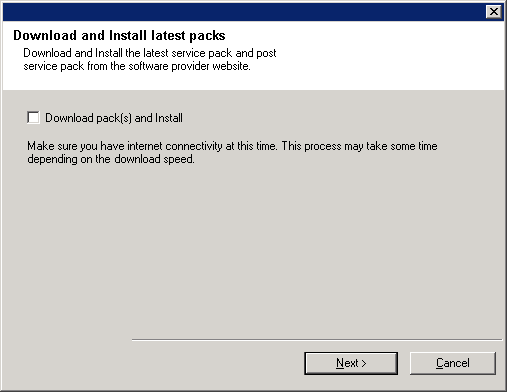
Select Download Pack(s) and Install to download and install the latest service packs and post packs from the software provider.
NOTES
- Internet connectivity is required to download updates.
- This step is applicable when installing on the first instance.
- Updates are downloaded to the following directory:
<software installation>/Base/Temp/DownloadedPacks.
They are launched silently and installed automatically for the first instance.
Click Next to continue.
|
 |
| 13. |
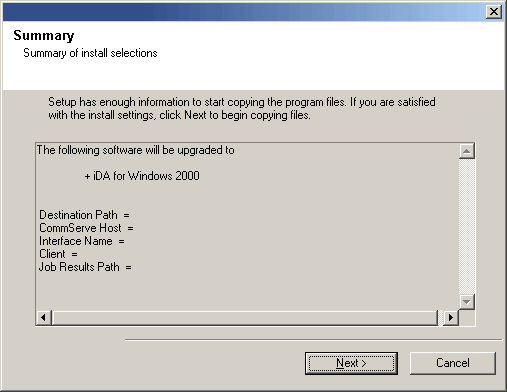
Verify the summary and Click Next to continue.
NOTES
- The Summary on your screen will reflect the components installed on
the computer, and may look different from
the example shown.
The upgrade program now starts the upgrade process.
This step may take several minutes to complete.
|
 |
| 14. |
To install/upgrade the software on the remaining nodes of the cluster, click Yes.
To complete the install for this node only, click No.
|
 |
| 15. |
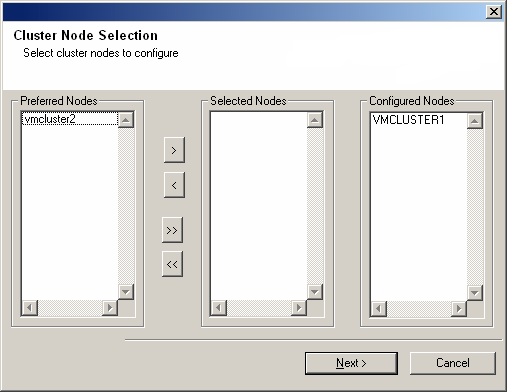
Select cluster nodes from the Preferred Nodes list and click the arrow
button to move them to the Selected Nodes list.
NOTES
- The list of Preferred Nodes displays all the nodes found in the
cluster; from this list you should only select cluster nodes configured to
host this virtual server.
- Do not select nodes that already have multiple instances installed. For
more information, see
Multi Instancing.
When you have completed
your selections, click Next to continue.
|
 |
| 16. |
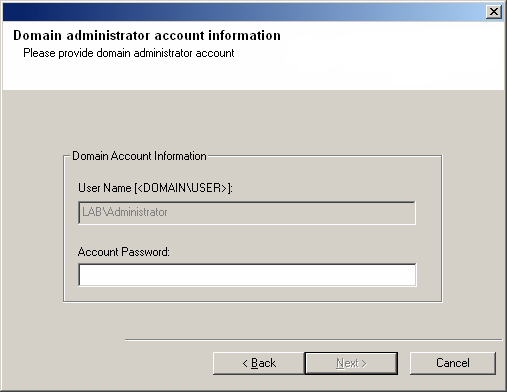
Type the User Name and Password for the Domain Administrator
account, so that the installer can perform the remote install/upgrade of the cluster
nodes you selected in the previous step.
Click Next to continue.
|
 |
| 17. |
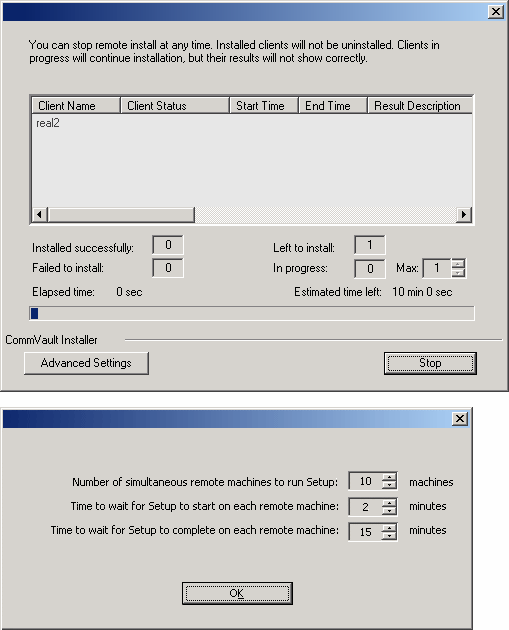
The progress of the remote upgrade for the cluster nodes is displayed; the
upgrade can be
interrupted if necessary.
Click Stop to prevent upgrade to any nodes after the current ones
complete.
Click Advanced Settings to specify any of the following:
- Maximum number of nodes on which Setup can run simultaneously.
- Time allocated for Setup to begin executing on each node, after which the
upgrade attempt will fail.
- Time allocated for Setup to complete on each node, after which the
upgrade attempt will fail.
NOTES
- If, during the remote upgrade of a cluster node, setup fails to complete or is interrupted, you
must perform a local upgrade on that node. When
you do, the upgrade begins from where it left off, or from the beginning
if necessary. For procedures, see
Manually Upgrading
the Software on a Passive Node.
|
 |
| 18. |
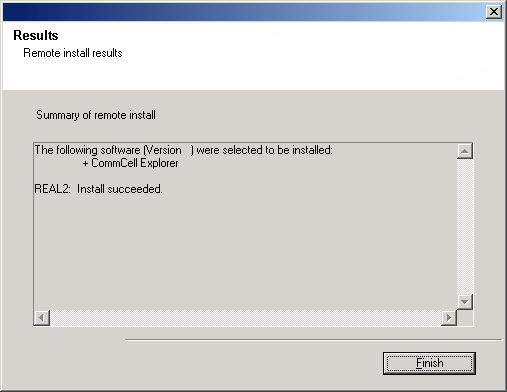
Read the result for the passive node upgrade to verify whether the passive
node upgrade was successful.
NOTES
- If the passive node upgrade fails, you must manually upgrade the
passive node once the active node upgrade is complete. (See
Manually Upgrading the
Software on a Passive Node for step-by-step instructions.)
- The Result message displayed on your screen will reflect the status
of the passive node upgrade, and may look different from the example.
Click Next to continue.
|
 |
|
19. |
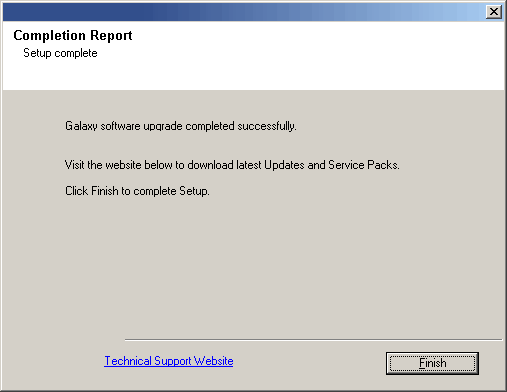
Click Finish to complete the upgrade. NOTES
- The Completion Report will reflect the components upgraded on the
computer, and may look different from
the example shown.
The upgrade is now complete.
|
 |


