Before You Begin
|
|
|
To configure a direct-attached library with similar drive types
|
|
1. |
Display
the Library and Drive Configuration window.
|
|
2. |
Detect the devices. Use
Detection or
Exhaustive Detection as required.
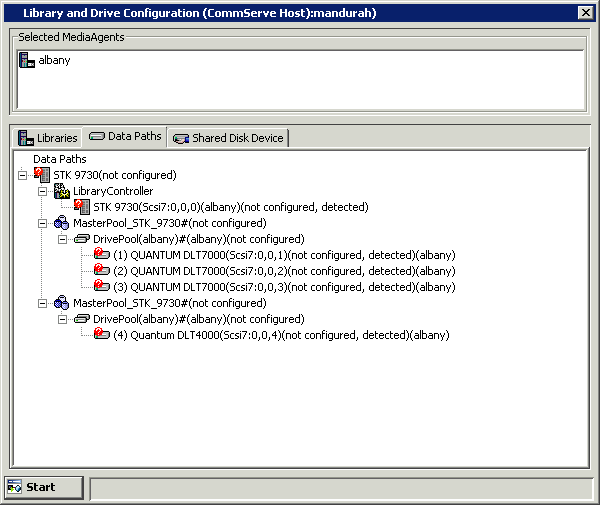
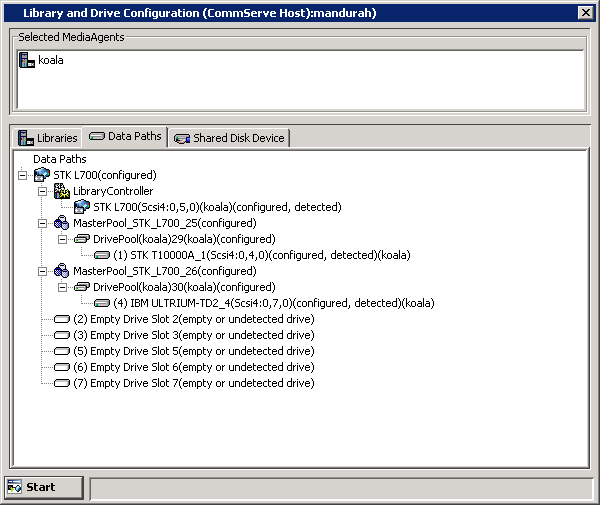
Note that the Library and Drive Configuration
window displays a master drive pool (with a drive pool and the associated
drives) for the library.
|
 |
|
3. |
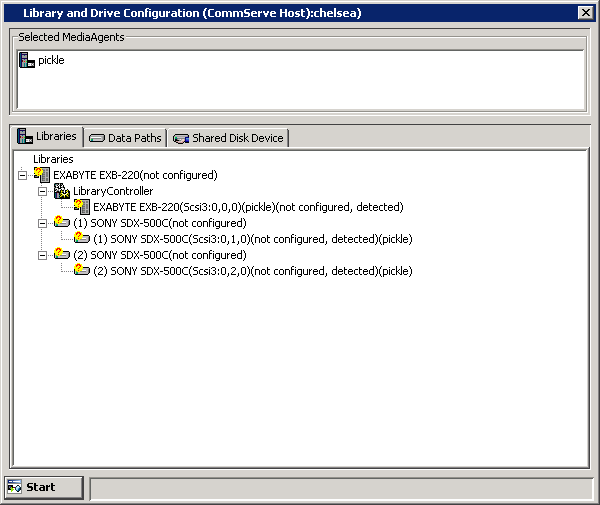
Locate the library that you want to configure. If the library was never configured, the library status is displayed
as not configured.
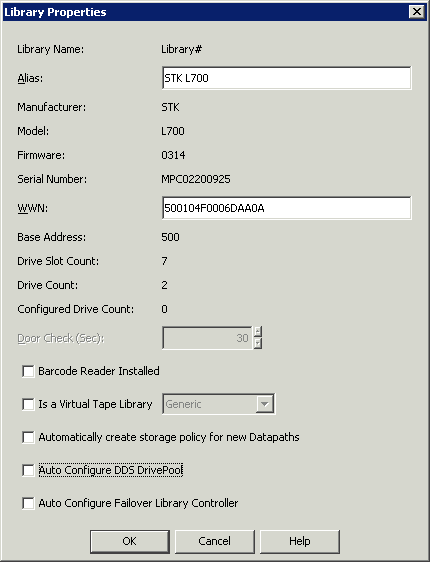
If you want to modify library properties, right-click the library
and select Properties.
From the Library Properties
window, you can change the following properties:
- Alias: Allows you to specify
a descriptive name for the library. This name is displayed in the
CommCell Browser for the library. We recommend that you give each
library a descriptive name for easier system administration.
- Door Check Seconds: This interval,
expressed in seconds, determines how frequently the system checks
to see whether the library door is open. If the door is open during
a check, the system conducts a full inventory of the library after
the door is closed. This way, if media were manually inserted or
removed from the library while the door was open, the inventory
is updated. This value is editable only before the library is configured.
When you are satisfied with your changes, click
OK.
|
|
4. |
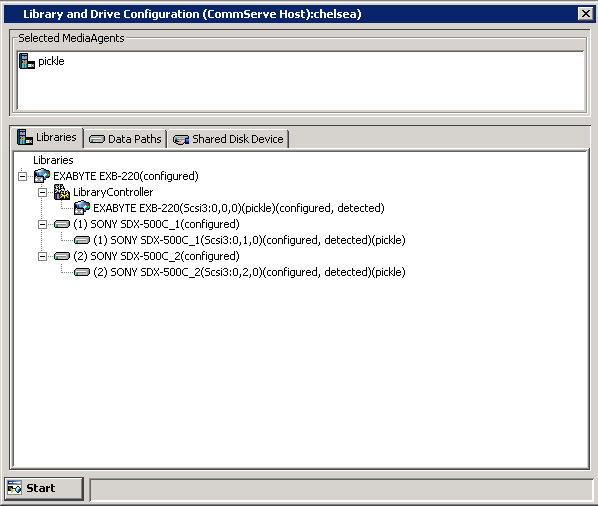
Configure the library as described in
Configure Devices.
The status of the drive pools and their constituent drives changes to
configured.
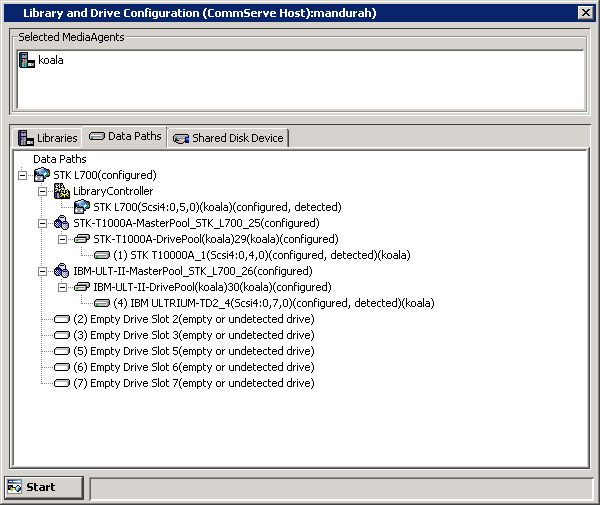
The Library tab provides
the physical view of the devices (library and drives).
|
 |
|
|
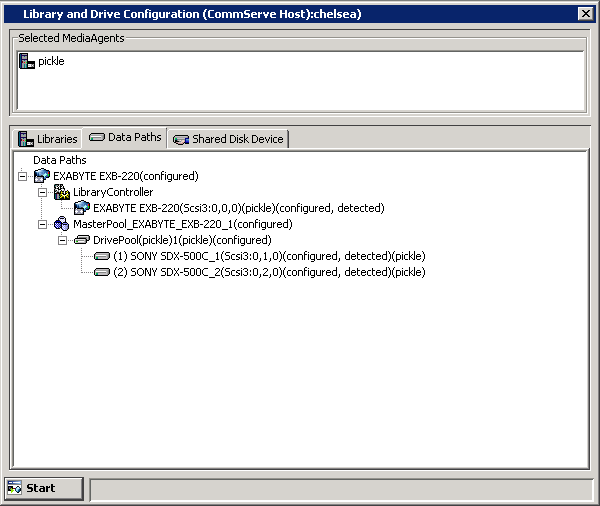
The Data Paths tab provides a logical view of the data path used to access
the devices - library, master drive pool, drive pool, drive.
|
 |
Before You Begin
|
|
This feature requires a Feature License to be available in the CommServe® Server.
Review general license requirements included in
License Administration. Also,
View All Licenses provides step-by-step
instructions on how to view the license information.
|
To configure a library with mixed drive types
|
| 1. |
Display
the Library and Drive Configuration window.
|
| 2. |
Detect the devices as described in
Detect Devices.
NOTES
- Do not perform an exhaustive detection.
If the library supports
SCSI 3 drive identification, the system automatically detects the devices and displays them with detection status detect
success, in the Library and Drive
Configuration window. Note that the Library and Drive
Configuration window displays a master drive pool (with a drive
pool and the associated drives) for each of the drive types in the
library. |
 |
| |
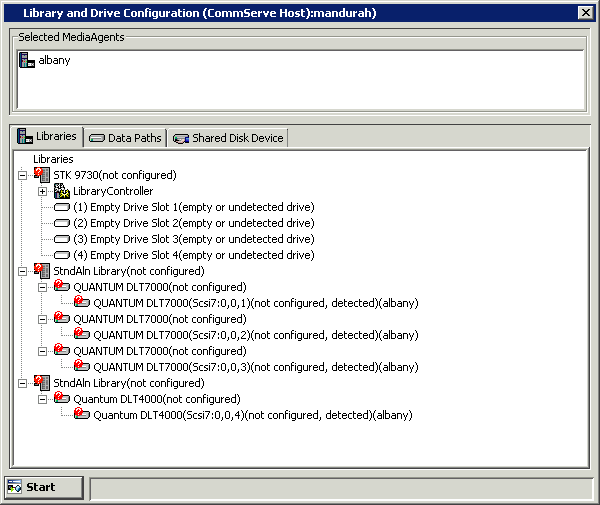
If the library does not support
SCSI 3 drive identification, the system
detects the Library with Empty Drive Slots
and the drives as StndAln Library. |
|
| |
Map the drives to the appropriate drive slots, by dragging the standalone
drives and dropping them on the appropriate drives. NOTES
Physically verify the drives and the appropriate drive slot numbers
before performing this operation in the Library and Drive Configuration window.
The Library tab provides
the physical view of the devices (library and drives).
|

|
| |
The Data Paths tab provides a logical view of the data path used to access
the devices - library, master drive pool, drive pool, drive.
|
 |
| 3. |
Right-click the library and open the Library Properties
window. Disable
the option to Automatically create storage
policy for new DataPaths.
|
|
| 4. |
Configure the library as described in
Configure Devices.
If this Discover
Media Options dialog box appears during the configuration process, click No. |
 |
| |
The status of the library changes to configured
in the Library and Drive Configuration
window.
The Library tab provides
the physical view of the devices (library and drives).
|
 |
| |
The Data Paths tab provides a logical view of the data path used to access
the devices - library, master drive pool, drive pool, drive.
|
 |
| 5. |
Optionally, we recommend that you rename the Master Pools and Drive Pools
with appropriate names, based on the drive type. This will help you to
easily identify them later. |
|
| |
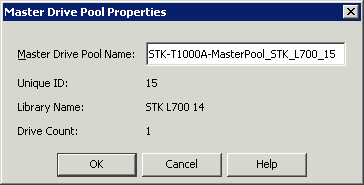
To rename a Master Pool, right-click the
MasterPool from the Data Path tab and then click Properties.
Type the new name and click OK to save. |
|
| |
To rename a Drive Pool, right-click the
DrivePool from the Data Path tab and then click Properties.
Type the new name and click OK to save. |
 |
| 6. |
The changed names are reflected in the Library and Drive Configuration
window. Exit the Library and Drive Configuration
window. To exit, click the Start menu
and then click Exit. |
|
| 7. |
From the CommCell Console, define the
barcode patterns
associated with the storage and cleaning media for each drive type. We
highly recommend the usage of a specific barcode pattern for the media
associated with each of the drive type in the library. This will help
you to easily manage and administer the media in the library. (See
Managing Barcodes
in a Library for more information.) |
 |
| 8. |
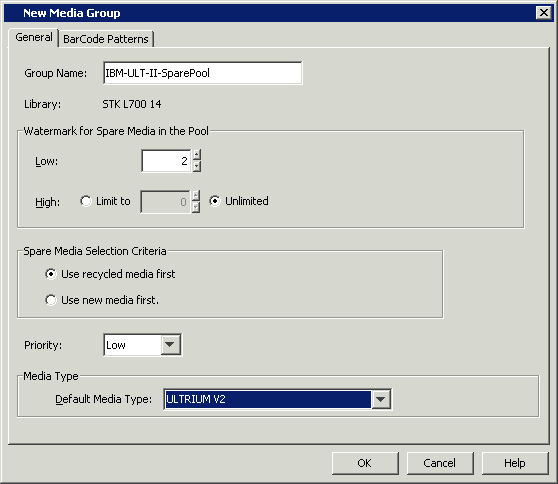
Create new scratch media pools for the media associated with the various
drive types. We recommend that you use appropriate names based on the
drive type for each of the scratch media pools. Select the appropriate
media type from the Default Media Type
list. |
|
| 9. |
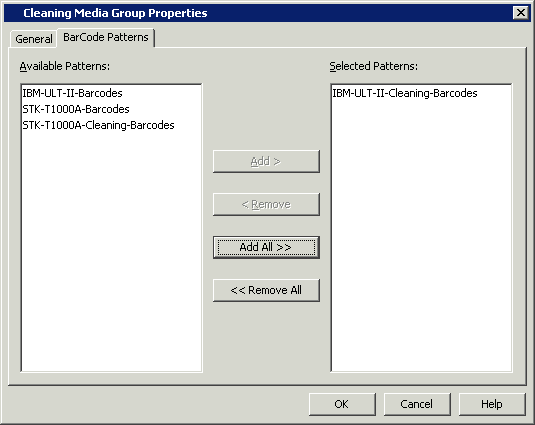
Associate the appropriate barcode pattern in each of these scratch media pools. |

|
| 10. |
Create new cleaning media pools for the cleaning media associated with the
various drive types. We recommend that you use appropriate names based
on the drive type for each of the cleaning media pools. Select the
appropriate media type from the Default Media
Type list. |
 |
| 11. |
Associate the appropriate barcode pattern in each of these cleaning media pools. |
|
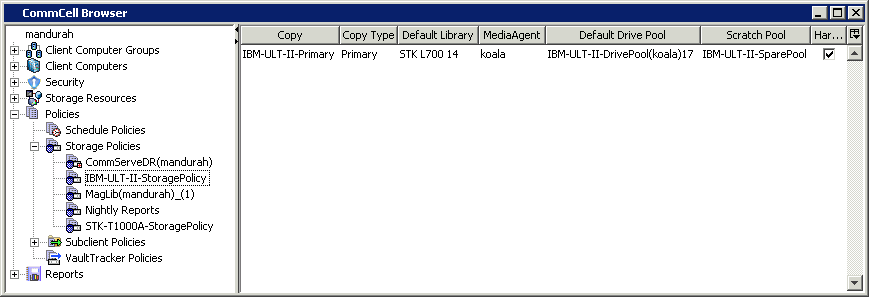
| |
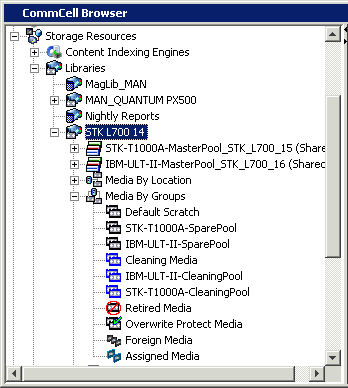
The sample image shows the scratch and cleaning media pools with
appropriate names associated with drives used in this example. |
|
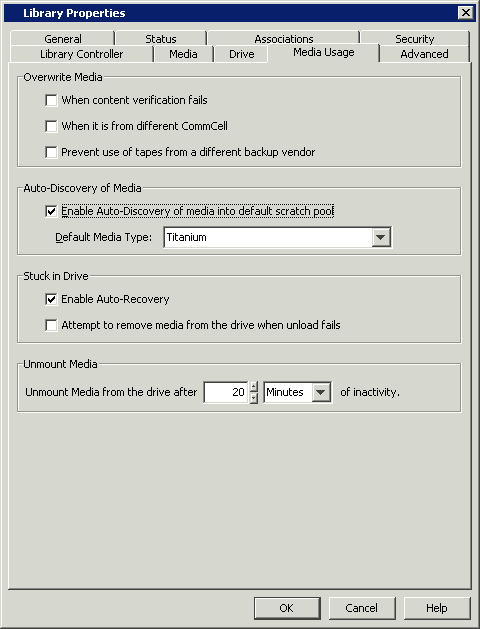
| 12. |
Open the Library Properties and enable the
Auto-Discovery of Media into default scratch pool option.
Select any one of the media as the Default
Media Type.
- If media is already available in the library, they will be
automatically moved into the appropriate scratch pools. If the media is
not moved, perform a
Full Scan
or
Discover Media operation.
- If media is not available in the library, the media will be
automatically moved into appropriate scratch pools when you
Import
Media.
If you import media that does not match the specified
barcode patterns defined for the scratch pools, or is not of the media
type associated with the defined scratch pools, the media will be moved
to the default scratch pool. If necessary manually move them to the
appropriate scratch pools.
|
|
| 13. |
Create new Storage Policies using the appropriate naming convention as
recommended earlier. Associate the Storage Policy Copies to use the
appropriate drive pools and scratch pools. If you have existing storage policies, re-associate them to the
appropriate drive pools and scratch pools. |
|
| |
|
Post Configuration Considerations
|
|
If you are configuring libraries with mixed drive types in a SAN do not
enable the options to automatically configure the data paths in the Storage Policy Copy.
(See
To automatically configure the data paths in the Storage Policy Copy
for more information.) |