Managing storage resources is a critical job for any organization, which can
be challenging because these resources are distributed across the network. SRM Reports
simplify this complex task by presenting a consolidated view of all storage resources,
including logical and physical components, providing unified tools to analyze storage
requirements and plan storage infrastructure for the purposes of asset management,
capacity management, content management, and historical data management across the
entire enterprise.
SRM
reporting provides a sleek, versatile, and easy-to-use reporting
framework that enables you to easily and effectively choose, view, and analyze
vital data. Reports are generated by selecting Options
and
either displaying the report immediately or scheduling it run daily, weekly,
monthly, etc. Reports can be saved in various output formats (HTML, EXCEL, PDF)
and in a supported language. When scheduling or running a report, notifications
can also be configured so it can be emailed, sent via an SNMP trap, or an RSS
feed. Customized reports per need basis can be saved as template reports as
well.
Customized reporting is available through the selection of filter criteria
(e.g., individual columns, specific clients, specific client computer groups,
etc.). Each report in turn allows selecting the following Filters:
Client Selection. Select one or more Clients and/or Client Computer Groups
to generate a report. This is required.
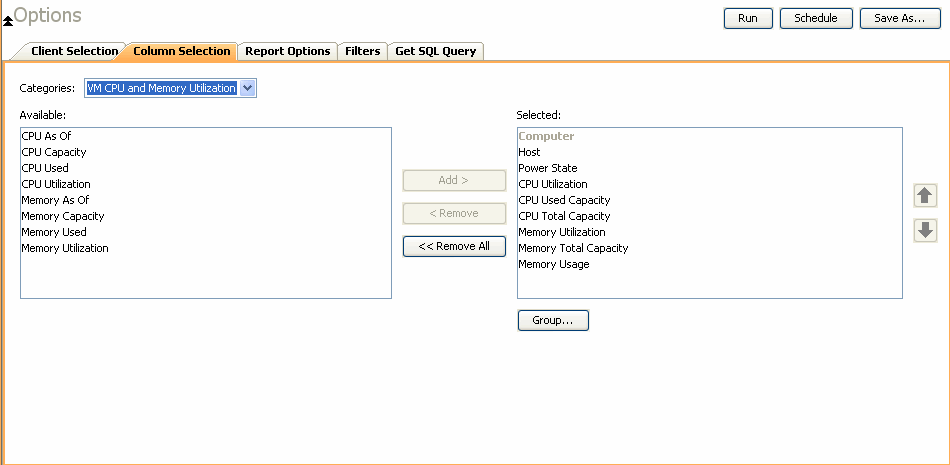
Column selection. The columns vary according to the report
selected (e.g., Microsoft SharePoint). Select a category (e.g., Disk
Details) first to display
the available columns (e.g., Allocated Space) for that category. Then select one of more columns to
include in the report. For the initial templates, the columns are
preselected, but can be adjusted as necessary.
Report Options. Controls how data is presented in the report with
these options:
General:
Determine the Data Size Units (e.g., Bytes, KB, MB, GB, MB, TB, PB) that
are used in Tables and Adhoc Queries. Or, select to have
the data sizes converted automatically.
In Limit number of Rows to Output, enter the number of rows to
display in the report. Default is 100.
For the the columns that have been selected, determine the sorting order
for each by selecting ASC for ascending, DESC for descending,
or OFF for no sorting order.
Chart Options:
Enter the Data Size Units (e.g., Bytes, KB, MB, GB, MB, TB, PB).
Enter the Maximum number of Bar Points per chart you want displayed, or select Draw all Bar Points to have all possible bar points drawn. Default is 10.
Filters. For the columns selected, a SQL Query can also be applied to further refine the data in the report.
Get SQL Query. For the filter criteria specified, selecting
Get Query will display the SQL query that will be used to get the data
and generate the report. The query that is displayed is Read-only and can be
used in a third-party SQL application, such as SQL
Server Management Studio.
Once the report is generated, you can group and filter the data, add and remove labels, save the report in various output formats, schedule it and have it emailed or sent to an SNMP trap or RSS feed, or save the report as a template for running it at a later point.
When reports are run or scheduled, notifications can be configured so
the report can be emailed, sent in an SNMP trap, a page, or sent in an RSS feed.
A Run Command can be executed as well when a report is scheduled or run.
Reports can be e-mailed to selected recipients. The recipient can be either a
CommCell user, a CommCell user group, a domain or external user (e.g., yahoo,
gmail, etc.), or a pager address. If more than one recipient is specified, separate
the addresses with a comma.
To send an email notification:
Click Select [Email/Pager] for notification.
Create the message to send:
Click Use default message to send the default message as
displayed on the screen.
Customize the message by selecting a
token from the pulldown
menu and clicking Add Token. The
tokens will be converted
to text in the body of the email message.
Reports can be sent by a CommServe, using the SNMP protocol, to other
computers in the form of SNMP traps, provided that the SNMP Enabler software is
installed on the CommServe computer. See
SNMP Enablers for more information. SNMP traps can be customized by adding
tokens to the trap.
To send an SNMP Trap notification:
Click Select [SNMP] for notification.
Create the SNMP Trap to send:
Click Use default message to send the default trap as
displayed on the screen.
Customize the trap by selecting a
token from the pulldown
menu and clicking Add Token. The
tokens will be converted
to text in the trap.
A message can be sent to the Event Viewer on the CommServe
when a report is run or scheduled. Event
Viewer notifications can be customized by adding
token arguments to the message. The
tokens will be included in the body of the alert
notification message.
To send an Event Viewer notification:
Click Select [Event Viewer] for notification.
Create the message to send:
Click Use default message to send the default message as
displayed on the screen.
Customize the message by selecting a
token from the pulldown
menu and clicking Add Token. The
tokens will be converted
to text in the message.
A notification when a report is run or scheduled can be sent by configuring a Run Command. The
script can be run on the CommCell or a client machine. The script can
optionally be configured with arguments.
To send an Run Command notification:
Click Select [Run Command] for notification.
Click either Run on CommCell or Run on Client.
Click Change to specify a Windows User Account with the
appropriate privileges to access the scripts directory. User impersonation
requires that the specified user have write permissions to the scripts
directory; otherwise, the user impersonation account may not take effect.
This is especially true if the associated computer is not part of a domain
and if the user is not a domain user.
Click Use Local Drive or Use Network Share for the
location of the script.
Click Browse to specify a Command Script Location.
Optionally, click Browse to specify arguments for the script. In
the Run Command Script Arguments dialog box, select a token and click Add
Token. Click Close when finished.
Click Use default message to send the default message as
displayed on the screen.
Customize the message by selecting a
token from the pulldown
menu and clicking Add Token. The
tokens will be converted
to text in the message.
A notification when a report is run or scheduled can be sent for Archiving
Operations using SRM. If a supported Archiver Agent is installed on the client
computer and an On Demand Archive Set is configured with SRM enabled, the list
of files and directories will be read and an archive operation will be performed
on the default subclient of the archive set.
To run a Data Archiver operation notification:
Click Select [Run Data Archiver] for notification.
A message can be sent in an Really Simple Syndication (RSS) feed when a
report is scheduled or run. The RSS feed can be automatically
integrated with your Web Browser. RSS Feeds can be customized by adding tokens
to the feed.
To send an RSS Feed notification:
Click Select [RSS Feed] for notification.
Create the message to send:
Click Use default message to send the default message as
displayed on the screen.
Customize the message by selecting a
token from the pulldown
menu and clicking Add Token. The
tokens will be converted
to text in the message.
Enter the feed location in Select/Enter the FeedLocation
field. Default is alerts.rss.
Run-time SQL queries can also be applied to the data to provide
further filtering, such as to display files of a certain size or with a
particular file extension (e.g., mp3).
The full SQL query can be generated
if necessary after adding the condition and selecting the Get SQL Query
tab. This can be used in a third-party tool (e.g., SQL Server
Management Studio) and used there to collect and report data.
Forecasting is prediction of data usage in future, based on the usage pattern in the past. Since Prediction allows visualizing data usage in future, it helps make business decisions accordingly. Prediction is available on history reports and can be done on Daily/weekly/Monthly data. In the graphs,
the predicted data is shown in the shaded area.
With trend analysis, you can predict and eliminate problems before they
occur. For example, using the File System Usage History template, you will be able
to use historical data that has been collected to predict when the infrastructure can no longer handle
current data levels and when new hardware may be needed. Predictive reporting
can also help in scheduling regular updates to avoid unexpected emergency
downtime by lessening the possibility of servers crashing because disks are low
on space.
Prediction is available only for templates and columns that provide
historical data.
To generate a SRM Report with predictive trending:
The following procedure is an example of enabling the Trending options for a
Windows File System Using History report:
1.
From the CommCell Browser, click Reports, and then click SRM Report
Manager.
2.
Click File Systems and then click Windows. Then click
Usage and History and then the File System Usage History
template.
3.
Click the Client Selection tab and select the client computers or
client computer group. This is a required step.
4.
Click Column Selection tab.
For an out-of-the-box template, the columns are displayed here. To
change the columns, select a category and click Add or
Remove to move the columns between the Available and Selected boxes. Clicking Remove All will remove all
previously selected filters for the reports.
5.
Click Report Options tab and enable Include Trending. For this
example, the default selections are used:
Interval between data points is Daily and 1 day.
Predict for the next 3 days Using 2 days of data in
the past.
6.
Click Run to generate the report immediately and view the results.
The predicted data is shown in the shaded area.
File Level Analytics allows you to see properties of files (e.g., file size,
file name, type, file locations) in your storage environment by clicking on data
points such as volume level. A detailed view of all the folders
and files for that volume is displayed. The data can be sorted by size of files, or type, for
example, to identify large files that can be deleted to increase your storage
capacity. This can be combined with Filters where you can filter the
data further to display files of a certain size or with a particular file
extension (e.g., mp3). For more information, see
SRM File Level Analytics.
When viewing a report in the CommCell Console, you can copy any chart to the
clipboard in .bmp format by right-clicking the
chart and selecting Copy Chart. This allows you to easily copy a chart into
other applications like emails, presentations.
File Categories are used to generate reports on groups of files and are configurable
for each SRM File System Agent (Windows, UNIX, NetWare, and NAS). Each File Category
is comprised of an editable list of file types. After performing an Analysis level
data collection job, you can generate reports with detailed information based on
these File Categories.
For example, the Multimedia Types category contains a list of file types that
are commonly associated with media. After an Analysis level data collection job,
you can generate reports which detail how much space is dedicated to media files
on a given client.
If you edit the File Categories for a given agent, you must run another Analysis
level data collection job before reports will reflect the changes.
The following table details the default file categories reported by each SRM
Agent. Refer to
File Type Categories for Reports to make changes to these lists. Default File Categories are configurable
only for SRM File System Agents (Windows, UNIX, NetWare, and NAS.)
For Junk File Types in UNIX Agents, the extensions represent regular
expressions used to match file names. For example, core* will try to
match all file names which begin with the word “core”.
Time Categories are supported by the SRM File System Agents (Windows, UNIX, NetWare,
SharePoint, and NAS) to allow custom grouping within time-based distribution reports,
such as the File Distribution by Modification Time report.
When custom Time Categories are defined, time-based distribution reports will
group information by Time Category, and additional sorting can be performed using
the Time Category as one of the parameters. This allows information to be grouped
in a manner that is meaningful to a particular environment.
When Time Categories are modified, it is necessary to first run an All File System
Resources (Analysis) data collection job on affected clients to update the SRM database,
and then new reports must be run. The pre-existing reports in the database will
continue to show data based on the old Time Category definitions; if you modify
Time Categories and then generate reports without running an Analysis data collection
job, the data reported will be incorrect.
The category count can be specified for reports of the top 'N', such as the Largest
File report, affecting the number of entries to be displayed, e.g., top 10, top
20, etc. This parameter is specified separately for each Agent with Top 'N' reports,
so that you can, for instance see the top 50 in all such reports for Windows, and
the top 10 for UNIX reports.
If Top 'N' Category Counts for Reports are changed for returning more rows,
data collection job must be run for the changes to take effect.
The following reports can be configured for category counts:
SRM Agent
Reports
Windows File System
Largest Files
Least Recently Used Files
Oldest Files
Network Attached Storage
Largest Files
Least Recently Used Files
Oldest Files
Novell NetWare
Largest Files
Least Recently Used Files
UNIX File System
Largest Files
Least Recently Used Files
Microsoft SharePoint
Top 10 Documents by Size
Top 10 Documents by Version Size
Top 10 Lists by Document Size
Before an SRM Report can be generated and viewed, a data collection job needs to be run.
SRM Reports can be scheduled to follow Data Collection;
this can be accomplished by configuring a Schedule as described below.
After data collection,
you can generate an SRM report by specifying
filter criteria.
This criteria includes client computers, columns, display units, etc. Optionally, filters can be defined using SQL queries for more refined filtering. Once the criteria is specified,
a report can be generated.
After specifying criteria for the report, these options are available to view or schedule the
report:
Click Run to generate the report
immediately and view the results in the CommCell
Console. Minimally, at least one client computer needs to be selected.
Click Schedule to generate and schedule the report on a daily, weekly,
monthly, yearly, or even one time basis. Specify the report language (see
Languages - Support
for the list of languages supported in Reports), format (HTML, EXCEL, PDF),
and location. Additionally, notifications
(e.g., email, SNMP Trap, RSS Feed) can be configured.
When scheduling, patterns can also be applied to the
report so it runs on a specific time, repeated every so many days, or run
for a particular number of times. Some reports allow
enabling Forecasting by specifying default trending interval and number
of data points on which the trending interval is based. For more information on
trending, see Forecasting.
Click Save As... to save the report filter criteria, schedule
information, notifications to a template so it can be used to generate a
report at a later date. All report templates are saved under My Reports.
SRM Reports allow you to easily view and analyze data related to various
aspects of the different entities in an enterprise. The information available in
each report is based on the types of data and information it gathers.
From the CommCell Console, the SRM Report Manager provides these types of
reports:
Computer Inventory
Cost Analysis
Applications
Initial templates are provided for each type (e.g., Cost History by Application,
Capacity by File System, etc.) where columns have been preselected. The only
requirement before generating and displaying the report is to specify one or
more client computers. For most reports, a data collection job must also have
been run prior to generating the report.
Reports can be customized by adding or removing columns in the initial
templates or specifying additional Filter Criteria.
Data for the Cost History and Usage History reports (e.g., Cost History by
Application, Usage History by Application) is compiled at regular intervals by a
background process on the SRM Server. The default interval is one week, which
means the Cost History reports will show one data point per week, no matter how
often data collection is scheduled for them; thus, data collection for these
reports should be synchronized to the summary interval. You can configure the
interval using the
SRM Options
(General) dialog box which is located in the control panel of CommCell
Console.
For a newly installed SRM Server, no data will appear in these reports until
either the default interval, or a user-specified interval has elapsed from the time
of installation, at which time the first summary process will run, and data will
be available for these reports.
Entities with ‘+’ in the name field are not supported by SRM. SRM will
only report on fixed disk assets. Removable disks and their contents are not
reported.
Reports exported to TIFF format, which is an image format, may yield
unpredictable results with charts, page margins, and page breaks.
To generate SRM reports, a user must have admin rights. Admin rights can
be provided at the CommCell Console by adding user to the built in
Master group.
See
NSS Pool Characteristics for information on how NSS pool characteristics are summarized in the Attributes column of the
Poolsreport for the SRM NetWare Proxy Agent.