Verify that the computer in which you wish to upgrade the software satisfies the minimum requirements specified in System Requirements.
Note the usage of the following terms used in this procedure:
- Local computer is the computer from which the upgrade program is launched.
- Remote computer(s) are the clients, that are selected for the upgrade.
Remote upgrades allow you to upgrade software on multiple Windows computers at the same time. When performing a remote installation or upgrade, the install program is launched on one computer in the network, referred to as the local computer, but the software is installed over the network to other selected computers, referred to as remote computers. The processor type need not be the same on the local and remote computers; software can be installed from either a 32-bit and 64-bit local computer to remote computers with any mix of 32-bit and 64-bit processors. However, remote install/upgrade is not supported in the following environments:
- To or from Clustered computers
- Workgroup only environments
- From a Windows 2000 32-bit to remote 64-bit computers.
NOTES
- Upgrade the components on the local computer from which the remote upgrade is to be performed, if any components reside on the computer. The local computer cannot be upgraded using the remote install program.
- The CommServe must be upgraded before performing remote upgrades on any of the clients in the CommCell.
- The CommServe upgrade must be performed on the CommServe computer and cannot be upgraded from a remote computer.
Supported Upgrade Paths
The following table provides a list of supported upgrade paths for the current software version. If the version currently installed on your computer is not listed here, contact your software provider for more information.
Installed Version |
Upgrade to Version 8.0.0 |
Information |
| 6.1.0 | Supported | Perform a direct upgrade to Version 8.0.0. |
| 7.0.0 | Supported | Perform a direct upgrade to Version 8.0.0. |
Upgrade Requirements
General
- Review the Upgrade Strategy before upgrading the software.
- Verify that no jobs are in progress or scheduled to occur while the
software is being upgraded on the client. If jobs are scheduled, either
perform the upgrade at another time or disable all jobs in the client using
the Activity Control tab from the Client Computer Properties
dialog box in the CommCell Console.
Once the upgrade is completed, you can enable the jobs from this dialog box.
- Verify that the CommServe computer is accessible and all services on the CommServe and the MediaAgent in which you wish to perform the upgrade are running.
- Verify that the SQL Server instance used by the CommServe is running on the CommServe computer.
- Verify that all applications (CommCell Console, Service Control Manager) are closed.
- Close all applications and disable any programs that run automatically, including antivirus, screen savers and system utilities. Some programs, including antivirus software, may be running as a service. Stop and disable all non-essential services before you begin. You can re-enable them after the upgrade.
- The files and folders associated with CommCell components should not be opened by other applications (for example, Windows Explorer, FTP, etc.) on this computer or from other computers during the upgrade.
- Verify that you have the
software
installation disc that is appropriate to the destination computer�s
operating system.
Make sure that you have the latest software installation disc before you start to install the software. If you are not sure, contact your software provider.
Network Requirements
- Your network must have DNS lookup or some other name resolution facility to connect between the local, remote, CommServe and MediaAgent computers.
- Two-way trust relationships between the domains must be established, if you are accessing computers from another domain.
- The Task Scheduler service must be installed and enabled on the local and remote computers and you must be able to schedule tasks.
- Remote Upgrades are not supported on the following components:
- Clustered computers
- Workgroup environments
- When performing a Remote Upgrade to or from a 64-bit computer, the processor type must be the same on both the local and remote computers.
- The drive containing the software installation disc (local or mapped network drive) from which the upgrade program is run, must be shared and accessible to all the remote computers on which the remote upgrade is performed.
- During the remote upgrade process, you would require a common shared directory that will be used by the upgrade program to write configuration and output log files for each remote client. Ensure that you have a shared directory which is accessible to both the local and remote computers.
- The client computers must be online (powered-on and accessible on the network) to perform a remote upgrade.
Before You Begin
- Log on to the local computer as a user with administrator privileges.
This user must also have administrator privileges on all the remote
client computers that you wish to upgrade.
For example, a member of the Domain Admins group has administrator privileges to all the computers in the domain. On the local computer, the administrator privileges must include the following rights:
- Increase quotas (Adjust memory quotas for a process on Windows 2003 Server and Windows XP.)
- Act as part of the operating system
- Replace a process level token
The remote upgrade program will automatically assign these rights, if the administrator does not have any of these privileges.
- For a database Agent, you may be required or be given the option to shut down the instances/databases for the agent before or during the following procedure. See Shut Down Instances for more information.
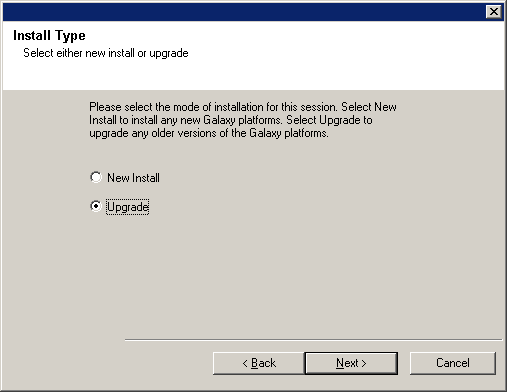
Upgrade Procedure
NOTES
- This screen will only appear when the bAllow32BitInstallOn64Bit registry key has been created and enabled on this computer.
NOTES
- The options that appear on this screen depend on the computer in which the software is being installed.
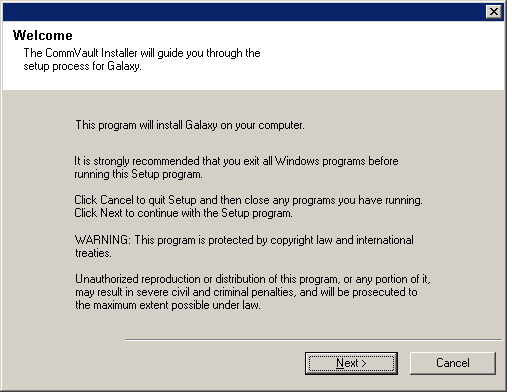
Click Next to continue, if no other applications are running.
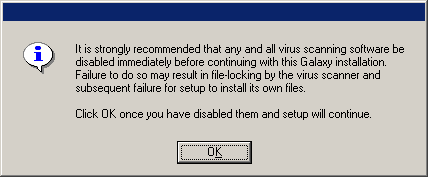
Click OK to continue, if virus scanning software is disabled.
Click Next to continue.

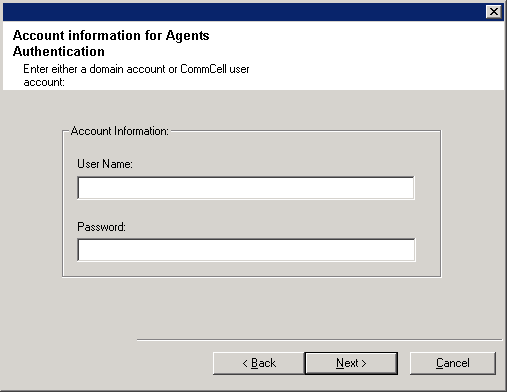
NOTES
- This window is only displayed when the Require Authentication for Agent Installation option is selected in the CommCell Properties. Users must belong to a User Group with Administrative Management capabilities to enable this feature. For more information, see Authentication for Agent Installs.
Click Next to continue.
NOTES
- The upgrade program checks your remote upgrade prerequisites and
checks the Windows user account on the local computer for the necessary
user rights. These rights include:
- Right to increase quotas (Adjust memory quotas for a process on Windows 2003 Server and Windows XP.)
- Right to act as part of the operating system
- Right to replace a process level token
NOTES
- This message will only appear if your account does not have the necessary rights.

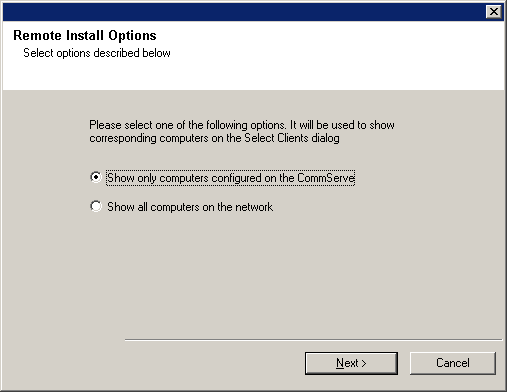
NOTES
- The Show all computers on a network option does not apply to upgrades.
Click Next to continue.
- This is the TCP/IP network name of the CommServe computer. (e.g., computer.company.com).

NOTES
- You cannot perform a remote upgrade on the local computer.
- All the Windows clients are displayed in the list.
- The Clients Requiring Upgrade list includes all clients that
are installed on the selected CommServe, and not yet upgraded. This
includes the following:
- List of clients with components that are not supported by the remote upgrade program.
- Clients that are offline, (not powered on, not available on the network, etc.)
- If you select these computers, the upgrade will fail and an error message will be displayed on the Results dialog box, which is displayed at the end of the remote upgrade. For more information on the Results dialog box, see Step 15.

NOTES
- Username and Password - The username that will be
used by the upgrade program to login to the remote computers is displayed.
If you do not want to use the user, Cancel the upgrade, log out of the computer and then log back on and run the upgrade program using the desired username to perform the remote upgrade.
- UNC Location for Software Installation Discs - The path to the DVD-ROM drive or the folder that contains the software. This folder must be accessible by all the clients that have been included in the remote upgrade list.
- UNC path to store remote install output files - A path to
the folder that will store the log files that are generated after the
remote upgrade. (See Post Upgrade
Considerations for a more detailed explanation of log files associated
with remote upgrades.)
This folder must be accessible by all the clients that have been included in the remote upgrade list.
- Silent reboot of remote clients, if required - When selected,
the upgrade program will automatically restart any remote computers
that require a restart.
Note that the remote upgrade will fail on a client computer that requires a reboot, even if this option is selected. You can, however, re-run the remote upgrade program after rebooting the client computer.
When cleared, the upgrade program is not permitted to restart the remote computers.

Click Next to continue or Back to change any of the options.
NOTES
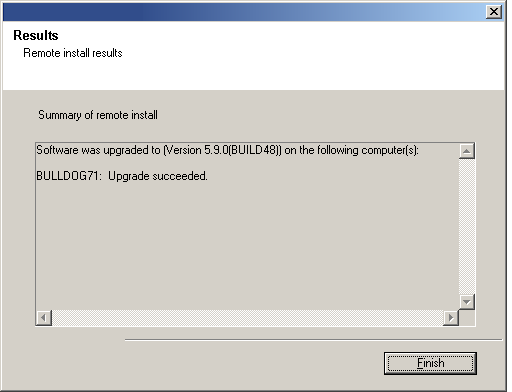
- The upgrade program now starts the upgrade process. This step may take several minutes to complete. A progress indicator will appear and will be updated as the upgrades are completed on each client.

NOTES
- If you see any error messages you can view the log files to get more details about the error. For more information on these log files, see Post Upgrade Considerations.
Click Finish to exit the upgrade program.
The upgrade is now complete.
Post-Upgrade Considerations
All Agents
-
Review the Post-Upgrade Considerations specific to the components that were upgraded using this procedure. (See Upgrades for a list of all Upgrade procedures.)
General
- Install post-release updates or Service Packs that may have been released after the release of the software. If you are installing a Service Pack, verify and ensure that it is the same version as the one installed in the CommServe Server. Alternatively, you can enable Automatic Updates for quick and easy installation of updates in the CommCell component.
- If Activity Control was disabled on the client prior to the upgrade, enable it after the upgrade using the Activity Control tab from the Client Computer Properties dialog box in the CommCell Console.
Remote Upgrade
-
The Remote Install Output Log Files folder contains information that should be reviewed after performing a remote install/upgrade. The setup program stores configuration and output log files in this folder within the following subfolders:
- RemoteInstallConfigs folder contains the configuration input provided during the install/upgrade.
- RemoteInstallLogs folder contains subfolders for each remote client that is installed or upgraded.
If the install/upgrade finished with any errors, the RemoteInstallLogs folder of the corresponding agent(s) will have a log file GalaxyInstallerLog.txt containing the error details. Note that the GalaxyInstallerLog.txt file will not be available if the install/upgrade was successful, or the remote install/upgrade process failed before connecting to the remote client.
- Exchange Mailbox Archiver - To use Outlook Web Access (OWA) for stub recovery after an Exchange Mailbox Archiver remote upgrade, restart the World Wide Web Publishing (W3SVC) Service on the client computer.
Remote Upgrade Errors
- See Remote Install/Upgrade Error Messages for an explanation of any error messages you may encounter in the install logs.