The following procedure describes the steps involved in configuring a
magnetic library.
Before You Begin
|
|
This feature requires a Feature License to be available in the CommServe® Server.
Review general license requirements included in
License Administration. Also,
View All Licenses provides step-by-step
instructions on how to view the license information.
|
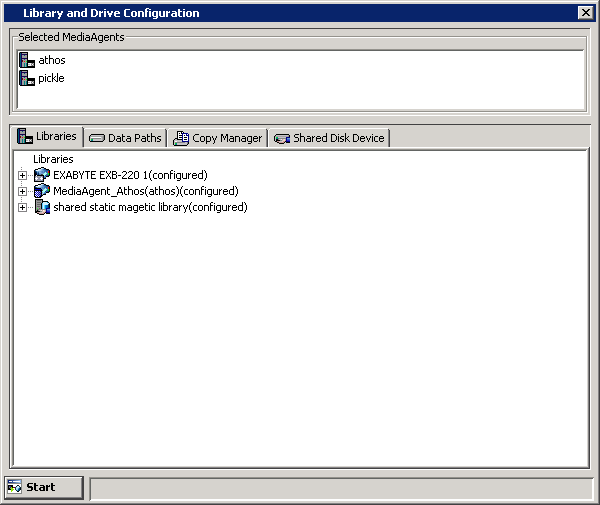
To configure a magnetic library
|
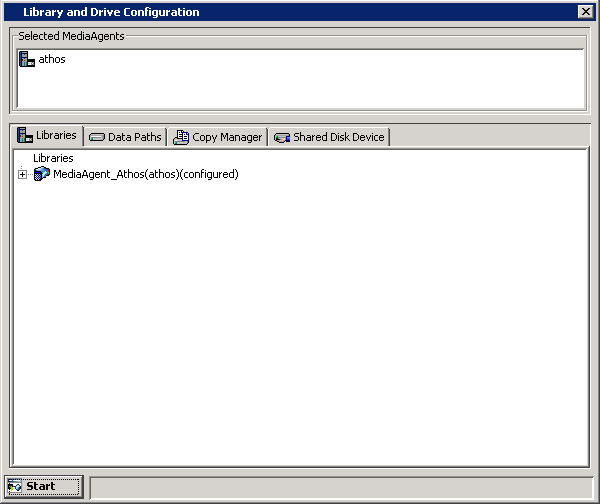
| 1. |
Display
the Library and Drive Configuration window.
|
|
| 2. |
From the Library and Drive Configuration
window, click the Start menu, select Add,
then select Magnetic Library from the
shortcut menu. |
 |
| 3. |
In the Add Magnetic Library dialog box,
select the name of the MediaAgent that will control the library and enter
the following information:
Alias: A
descriptive name for the magnetic library.
Low Watermark: The minimum amount of free space at which a low
watermark warning should be generated for the library.
Automatically create storage policy for new
Datapaths: Select this option to
automatically create a new storage policy when the mount path is added
to this magnetic library.
Click OK. |
 |
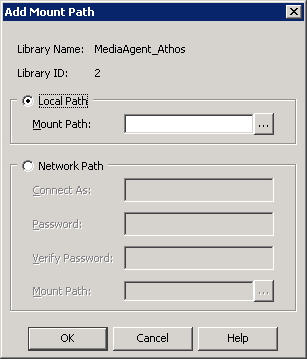
| 4. |
In the Add Mount Path dialog box, select
either Local Path or Network
Path.
-
If you select Local Path, click Browse
to select a mount path, or enter a mount path.
-
If you select Network Path, type the user
name and password to access the network share. Click Browse
to select a mount path, or enter a mount path.
Click OK.
|
 |
| |
The mount path is added to the
specified location. When you add a mount path, the magnetic library appears in the
Library and Drive Configuration window with a status of configured. |
 |
The following procedure describes the steps involved in configuring a shared
magnetic library with static mount paths.
Before You Begin
|
|
This feature requires a Feature License to be available in the CommServe® Server.
Review general license requirements included in
License Administration. Also,
View All Licenses provides step-by-step
instructions on how to view the license information.
|
To configure a shared magnetic library with static mount paths
|
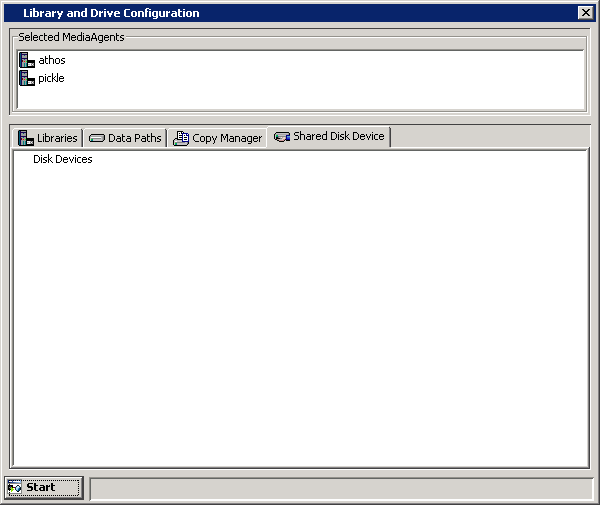
| 1. |
Display
the Library and Drive Configuration window.
|
| 2. |
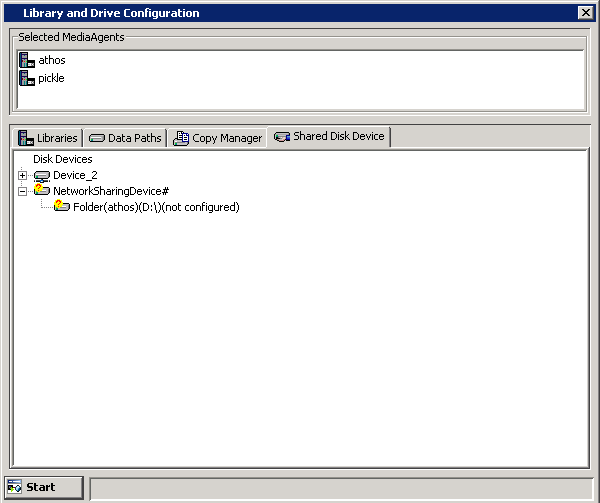
Click the Shared Disk Device tab. |
 |
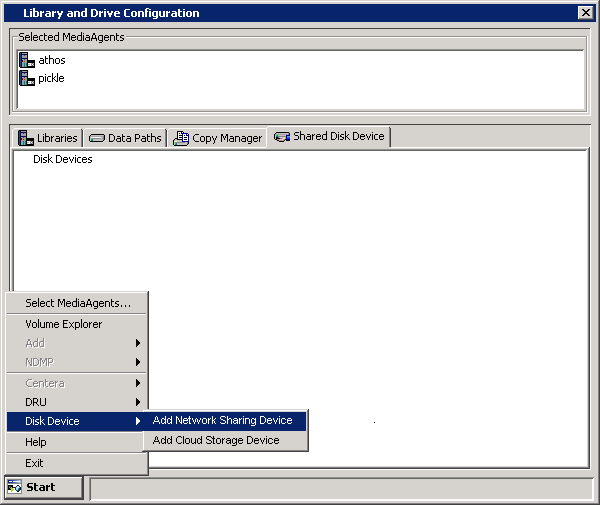
| 3. |
Click the Start menu, select Disk Device,
then choose Add Network Sharing Device. |
 |
| 4. |
In the Add Sharing Folder dialog box, enter/select
the following information: MediaAgent - The name of the MediaAgent
accessing the mount path.
Folder - The network path that will be used by the MediaAgent
to access the mount path
If the MediaAgent is a Windows MediaAgent, you can choose a local
path or a network path, If you use a network path provide the username and
password that must be used by the system to access the device.
When you are finished, click OK.NOTES
When configuring a PolyServe File System, use the local PolyServe exposed
volume instead of using UNC paths as the folder.
|
 |
| 5. |
The system displays the device information with the MediaAgent
accessing the device in the Library and Drive Configuration window. |
 |
| 6. |
If you would like to add another MediaAgent to access the
device, right-click the appropriate NetworkSharingDevice and then
click Add Primary Sharing Folder. Enter/select the necessary information
in the Add Sharing Folder dialog box, as described in Step 4.
Repeat this step to add all the mount paths to the device.
|
 |
 |
Note that if the device is not configured at
this point, the detection information will not be saved when you exit from
the Library and Drive Configuration window. |
| 7. |
Right-click the Network Sharing Device
and then click Configure. |
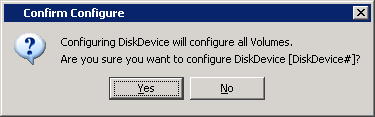
| 8. |
Click Yes in the Confirm Configure prompt.
The status of the folders changes to configured.
|
 |
| 9. |
Optionally rename the Device Name with an appropriate name,
to avoid confusion. To rename, right-click the device and then click
Properties. In the Device Properties dialog box, type a new name.
|
 |
| 10. |
From the General tab of the Library
and Drive Configuration window, click the Start menu, select
Add, then choose Shared Magnetic Library. |
| 11. |
In the Add Magnetic Library dialog box, enter the
following:
Alias: A
descriptive name for the magnetic library.
Low Watermark: The minimum amount of free space at which a low
watermark warning should be generated for the library.
Automatically create storage policy for new
Datapaths: Select this option to
automatically create a new storage policy when the mount path is added
to this magnetic library.
Click OK.
|
 |
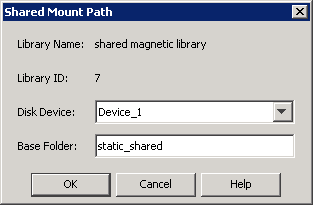
| 12. |
In the Shared Mount Path dialog box, select the
disk device that you wish to associate as the mount path from the Disk
Device list. In the Base Folder box, type the name of the base
folder under which the mount path can store data. Do not include the drive
letter while adding the name of the base folder.
Click OK.
|
 |
| |
The mount path is added to the shared magnetic library. |
 |
|
|
|
|
| 1. |
Place the software
installation disc for the Windows platform into the disc drive. After a
few seconds, the installation program is launched.
If the installation program does not launch automatically:
- Click the Start button on the Windows task bar, and then click Run.
- Browse to the installation disc drive, select Setup.exe, click Open, then click OK.
NOTES
- If you are installing on a x64 version of Windows 2008 Server Core R2, go to the AMD64 folder and run Setup.exe.
|
|
| 2. |
In this screen, you choose the language you want to use during installation.
Click the down arrow, select the desired language from the pull-down list, and click Next to continue.
|
|
| 3. |
Select the option to install software. NOTES
|
|
| 4. |
Select the option to install software on this computer. NOTES
- The options that appear on this screen depend on the computer in which
the software is being installed.
|
|
| 5. |
Read the Welcome screen.
Click Next to continue, if no other applications are
running.
|
|
| 6. |
Read the virus scanning software warning.
Click OK to continue, if virus scanning software is disabled.
|
|
| 7. |
Read the license agreement, then select I accept the terms
in the license agreement. Click Next to continue.
|
|
|
|
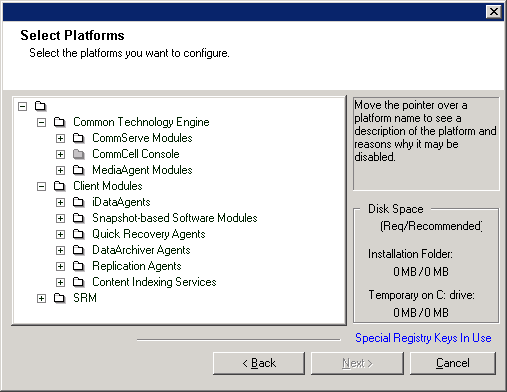
| 8. |
Select the component(s) to install. NOTES
- Your screen may look different from the example shown.
- Components that either have already been installed, or which cannot be installed, will be dimmed.
Hover over the component for additional details.
- The Special Registry Keys In Use field will be enabled when GalaxyInstallerFlags
registry keys have been enabled on this computer. Hover over the field to
see which keys have been set, as well as their values. For more information,
see
Registry Keys.
Click Next to continue.
To install the Shared Dynamic Disk driver, under
Common Technology Engine expand the
MediaAgent Modules and select
Shared Dynamic Disks.
|
 |
|
|
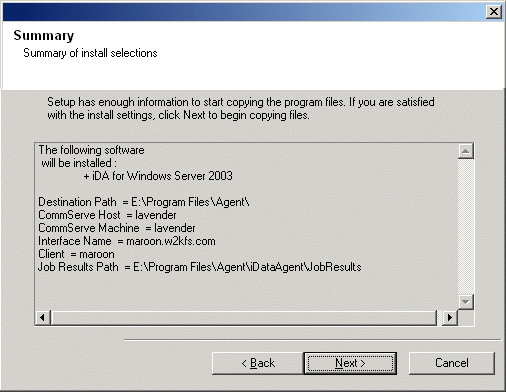
| 9. |
Verify the summary of selected options.
NOTES
- The Summary on your screen should
reflect the components you selected for install, and may look different from
the example shown.
Click Next to continue or
Back to change any of the options.
The install program now starts copying the software to the computer.
This step may take several minutes to complete.
|
 |
|
|
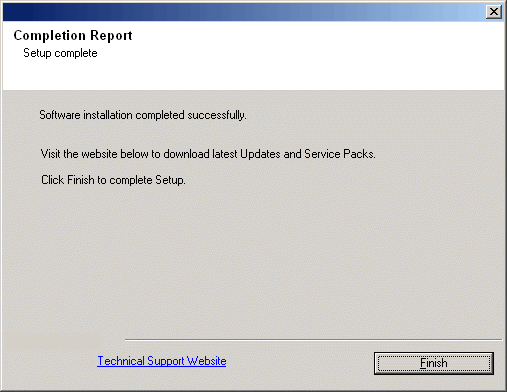
| 10. |
Setup displays the successfully installed components.
NOTES
- The Setup Complete message displayed on
your screen will reflect the components you installed, and may look different
from the example shown.
- If you install an Agent with the CommCell Console open, you need to
refresh the CommCell Console (F5) to see the new Agents.
- If Reboot Now button is displayed make sure to reboot the
computer before performing any other operations from the computer.
Click Finish to close the install program.
The installation is now complete.
|
 |
|
|
| You can now configure the shared disk device as a magnetic library as
described in
Configure Shared Magnetic Libraries With Dynamic Mount Paths. |
The following procedure describes the steps involved in configuring a shared
magnetic library with dynamic mount paths.
Before You Begin
|
- If you have already configured a disk as a shared mount path, it
will be reserved by one of the MediaAgents and therefore will not be
available to other computers. See
Add a New MediaAgent
to an Existing Dynamic Mount Path Configuration to detect the disk
on a new MediaAgent, if the disk is already configured in another MediaAgent.
- Make sure that the disk is setup and configured according to the
guidelines provided in Dynamic Disk Configuration.
- Ensure that the
RegisterAndDetect
registry key is created with the value 'Y' in the MediaAgent computer
in which the disk is configured as a shared magnetic library.
- Verify and ensure that no other applications are accessing the disk
in all the MediaAgents in which it is shared. This includes Windows
Explorer, CommCell Console, Volume Explorer, virus monitoring software,
disk monitoring software, etc.
- You must install the Shared Dynamic Disk Driver in all the MediaAgents
that will share the disk. See
Install the Shared Dynamic Disk Driver for step-by-step instructions.
|
To configure a shared magnetic library with dynamic mount paths
|
| 1. |
Display
the Library and Drive Configuration window.
|
| 2. |
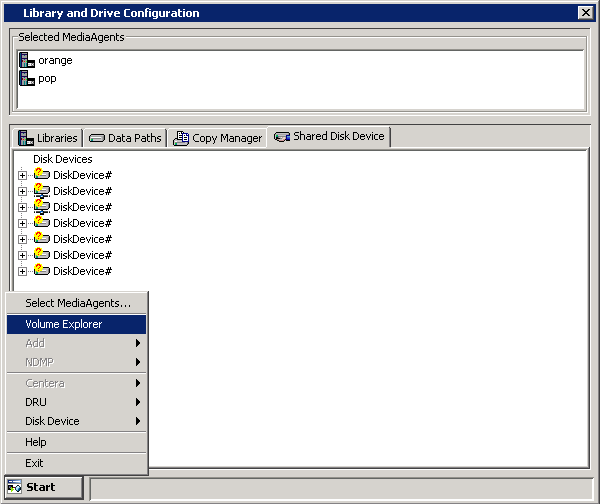
Click the Shared Disk Device tab. |
 |
| 3. |
Click the Start menu, select Volume Explorer. |
 |
| 4. |
Click Yes in the Volume Explorer
prompt warning you that the Volume Explorer is for advanced viewers. |
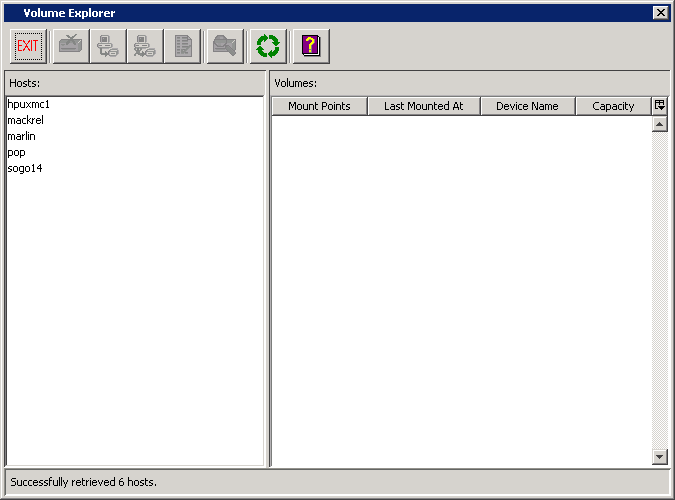
| 5. |
From the Hosts pane, right-click the MediaAgent
in which you wish to configure the shared magnetic library, and then click
Detect. All the volumes attached to the MediaAgent, including local
and shared magnetic volumes are displayed in the Volumes pane.
Note that if the operating system has already mounted the shared device,
the mount points are also displayed, in addition to the device name and
capacity information.
|
 |
| 6. |
Repeat the above step in all the MediaAgents
in which you wish to configure the shared magnetic library and then Exit
the Volume Explorer window. |
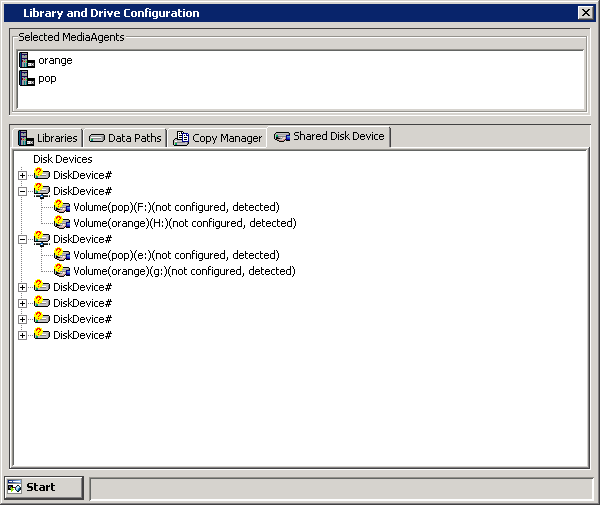
| 7. |
From the Library and Drive Configuration window,
click the Shared Disk Device tab. All the detected volumes will
be displayed.
Determine the devices that you wish to share.
Note that all the detected devices, which includes both the shared and
local volumes are displayed.
|
 |
| 8. |
Right-click the Disk Device that you wish to
configure and then click Configure. |
| 9. |
Click Yes in the Confirm Configure prompt. |
 |
|
Always configure the volumes from the Disk
Device. Do not individually configure the volumes. |
| |
The status of the volumes changes to configured. |
 |
| 10. |
Optionally rename the Device Name with an appropriate name,
to avoid confusion.
To rename, right-click the device and then click Properties. In
the Disk Device Properties dialog box, type a new Device Name.
|
 |
| 11. |
From the General tab of the Library
and Drive Configuration window, click the Start menu, select
Add, then choose Shared Magnetic Library. |
| 12. |
In the Add Magnetic Library dialog box, enter the
following:
Alias: A
descriptive name for the magnetic library.
Low Watermark: The minimum amount of free space at which a low
watermark warning should be generated for the library.
Automatically create storage policy for new
Datapaths: Select this option to
automatically create a new storage policy when the mount path is added
to this magnetic library.
Click OK.
|
 |
| 13. |
In the Shared Mount Path dialog box, select the
disk device that you wish to associate as the mount path from the Disk
Device list. In the Base Folder box, type the name of the base
folder under which the mount path can store data. Do not include the drive
letter while adding the name of the base folder.
Click OK.
|
 |
| |
The mount path is added to the shared magnetic library. |
 |
The following procedure describes the steps involved in configuring a shared
magnetic library with static mount paths.
Before You Begin
|
|
This feature requires a Feature License to be available in the CommServe® Server.
Review general license requirements included in
License Administration. Also,
View All Licenses provides step-by-step
instructions on how to view the license information.
|
To Configure Magnetic Libraries on Replicated Disks
|
| 1. |
Display
the Library and Drive Configuration window.
|
|
| 2. |
Click the Shared Disk Device tab. |
|
| 3. |
Click the Start menu, select Disk Device,
then choose Add Network Sharing Device. |
|
| 4. |
In the Add Sharing Folder dialog box, enter/select
the following information: MediaAgent - The name of the MediaAgent
accessing the mount path.
Folder - The network path that will be used by the MediaAgent
to access the mount path
If the MediaAgent is a Windows MediaAgent, you can choose a local
path or a network path. If you use a network path provide the username and
password that must be used by the system to access the device.
NOTES:
When you are finished, click OK.
Click No in the confirmation dialog box to add another sharing
folder. |
|
| |
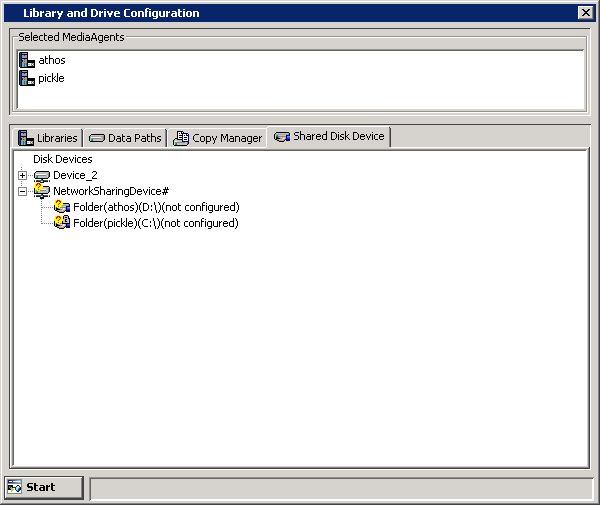
The system displays the device information with the MediaAgent
accessing the device in the Library and Drive Configuration window.
|
 |
| 5. |
Right-click NetworkSharingDevice and then click
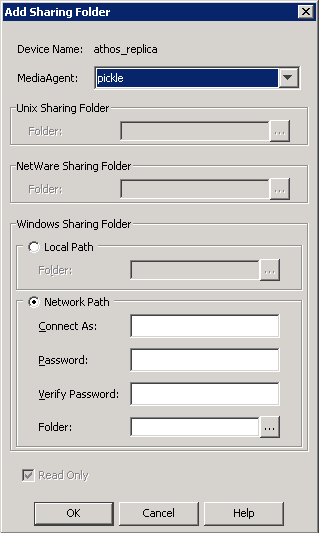
Add Replica Sharing Folder. |
 |
| 6. |
In the Add Sharing Folder dialog box, enter/select
the following information for the MediaAgent residing on the replica sharing
folder. MediaAgent - The name of the MediaAgent accessing the mount
path.
Folder - The path that will be used by the MediaAgent to access
the mount path
If the MediaAgent is a Windows MediaAgent, you can choose a local
path or a network path. If you use a network path provide the username and
password that must be used by the system to access the device.
NOTES:
- Network path is not supported for
MediaAgent Replication
solution; only local paths are supported.
- For MediaAgent Replication solution, this is the destination sharing
folder and cannot be the same as the sharing folder path given in
Step 4.
When you are finished, click OK. |
 |
| |
The system displays the device information with the MediaAgent
accessing the device in the Library and Drive Configuration window.
|
 |
| 7. |
Right-click NetworkSharingDevice and then click
Configure. |
 |
| 8. |
Click Yes to continue. |
 |
| |
The status of the folders changes to configured
in the Library and Drive Configuration window. |
 |
| 9. |
Optionally rename the Device Name with an appropriate name,
to avoid confusion. To rename, right-click the device and then click
Properties. In the Device Properties dialog box, type a new name.
|
 |
| 10. |
From the General tab of the Library and Drive
Configuration window, click the Start menu, select Add,
then choose Replica Magnetic Library. |
 |
| 11. |
In the Add Magnetic Library dialog box, enter the
following:
Alias: A
descriptive name for the magnetic library.
Low Watermark: The minimum amount of free space at which a low
watermark warning should be generated for the library.
Automatically create storage policy for new
Datapaths: Select this option to
automatically create a new storage policy when the mount path is added
to this magnetic library.
Enable Replication: For
MediaAgent Replication solution, select this option to use
ContinuousDataReplicator to replicate data between the source (shared folder
added in
Step 4) and the destination (shared folder added in
Step 6) mount paths. Leave this option unselected if you are using a third
party application to replicate data between shared folders.
Selecting this option will automatically create a new replication set and a
replication pair under ContinuousDataReplicator, when a mount path is added to
this library. These replication sets and replication pairs can be monitored from
the CommCell Console. It is highly recommended not to change the default
settings of the replication sets, or delete the replication sets when the
replication is in progress.
NOTES:
Click OK.
|
 |
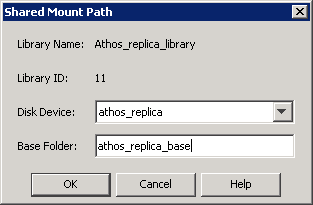
| 12. |
In the Shared Mount Path dialog box, select the
disk device that you wish to associate as the mount path from the Disk
Device list. In the Base Folder box, type the name of the base
folder under which the mount path can store data. Do not include the drive
letter while adding the name of the base folder.
Click OK.
|
 |
| |
The magnetic library is configured. |
 |