|
|
|
Before installing the Exchange Agents, create the
bAllowMultiInstances and
bAllow32BitInstallOn64Bit registry keys. |
| 1. |
Create the
bAllowMultiInstances registry key. NOTES:
- If any 64-bit agent software is already installed on the Proxy Server,
create bAllowMultiInstances registry
key to install the Exchange
iDataAgents on separate
instance.
|
To create the registry key, see the following steps:
- Start the Registry Editor (Regedit.exe or Redegt32.exe)
- Locate the directory under which you want to create a key, e.g.,
HKEY_LOCAL_MACHINE\SOFTWARE\.
- Right click the SOFTWARE and click
New -> Key.
- Name the key as GalaxyInstallerFlags.
- Right click the GalaxyInstallerFlags
and select New -> DWORD value, name it as
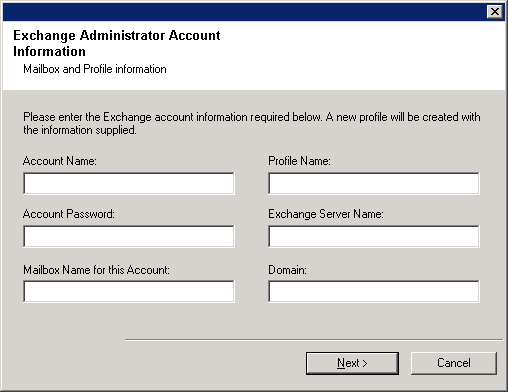
bAllowMultiInstances and by double
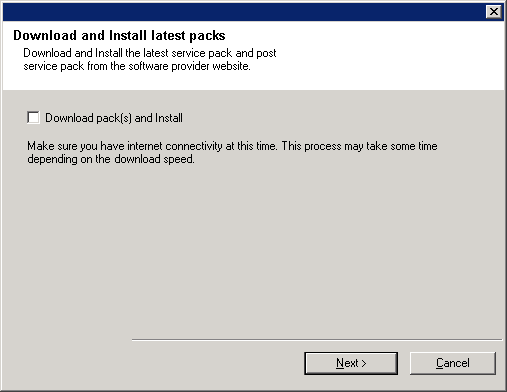
clicking the bAllowMultiInstances
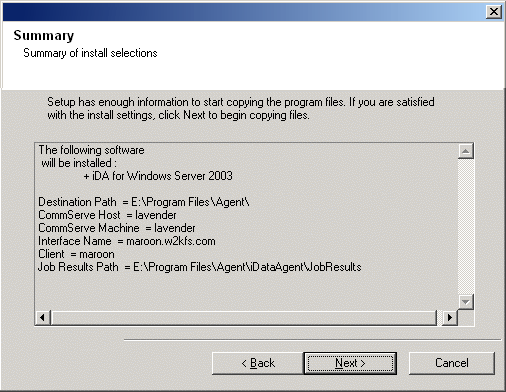
key modify the Value data to 1.
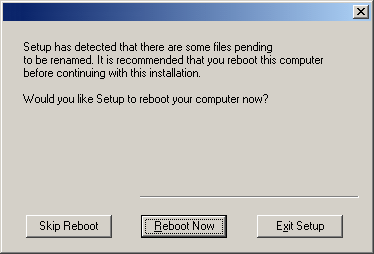
|
| 2. |
Create the
bAllow32BitInstallOn64Bit registry key. |
To create the registry key, see the following steps:
- Start the Registry Editor (Regedit.exe or Regedit32.exe)
- Locate the directory under which you want to create a key, e.g.,
HKEY_LOCAL_MACHINE\SOFTWARE\Wow6432Node.
- Right click the SOFTWARE and click
New -> Key.
- Name the key as GalaxyInstallerFlags.
- Right click the GalaxyInstallerFlags
and select New -> DWORD value, name it as
bAllow32BitInstallOn64Bit and
by double clicking the bAllow32BitInstallOn64Bit
key modify the Value data to 1.
|
|
|
|
|
| 1. |
Place the software
installation disc for the Windows platform into the disc drive. After a
few seconds, the installation program is launched.
If the installation program does not launch automatically:
- Click the Start button on the Windows task bar, and then click Run.
- Browse to the installation disc drive, select Setup.exe, click Open, then click OK.
|
|
| 2. |
In this screen, you choose the language you want to use during installation.
Click the down arrow, select the desired language from the pull-down list, and click Next to continue.
|
|
| 3. |
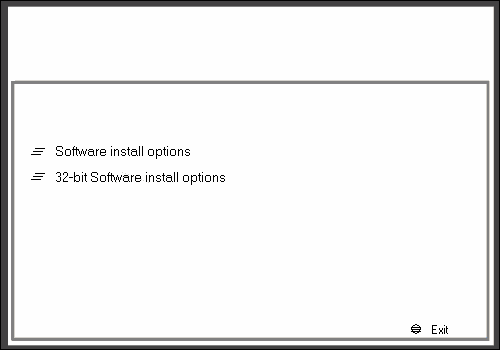
Select the Calypso 32-bit
Software install options to install software. NOTES
|
 |
| 4. |
Select the option to install software on this computer. NOTES
- The options that appear on this screen depend on the computer in which
the software is being installed.
|
|
| 5. |
Read the Welcome screen.
Click Next to continue, if no other applications are
running.
|
|
| 6. |
Read the virus scanning software warning.
Click OK to continue, if virus scanning software is disabled.
|
|
| 7. |
Read the license agreement, then select I accept the terms
in the license agreement. Click Next to continue.
|
|
| 8. |
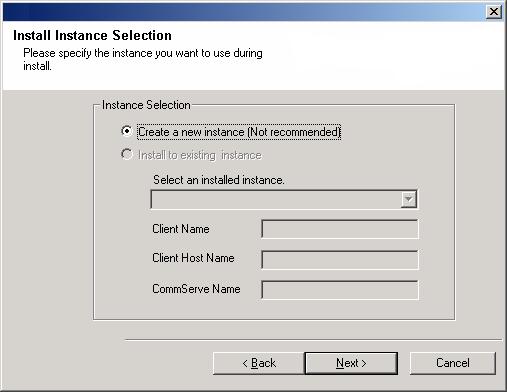
If any agent software is already installed on the Proxy Server, select
Create a new instance option to install the Exchange
iDataAgents on separate
instance. NOTES
|
 |
|
|
| 9. |
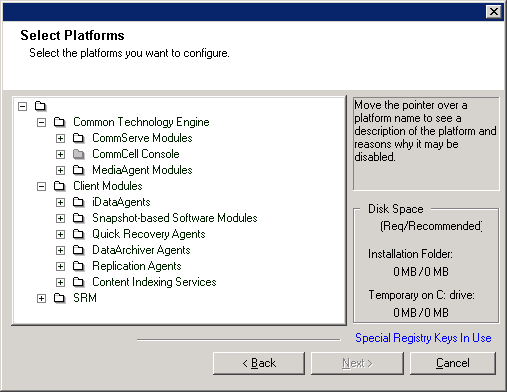
Select the component(s) to install. NOTES
- Your screen may look different from the example shown.
- Components that either have already been installed, or which cannot be installed, will be dimmed.
Hover over the component for additional details.
- The Special Registry Keys In Use field will be enabled when GalaxyInstallerFlags
registry keys have been enabled on this computer. Hover over the field to
see which keys have been set, as well as their values. For more information,
see
Registry Keys.
Click Next to continue.
To install the Exchange Agents expand the Client
Modules folder, the
iDataAgents folder, and the
Exchange iDataAgents folder then
select one or more of the following (as appropriate to your application
version):
- iDA for Exchange Mailbox
- iDA for Exchange Public Folder
When you select the Exchange Agents for install, the appropriate Windows
File System iDataAgent is automatically
selected for install.
To install the Exchange Mailbox Archiver Agent and/or Exchange Public
Folder Archiver Agents, expand the Client Modules folder, the DataArchiver
Agents folder, and then select from the following:
- DataArchiver Agent for Exchange
- DataArchiver for Exchange Public Folder
- Exchange Compliance Archiver
Optionally, select the Data
Classification
by expanding the Client
Modules folder, and the
Supporting
Modules folder. The Data Classification is required to be
installed on off-host proxy computer.
|
 |
| 10. |
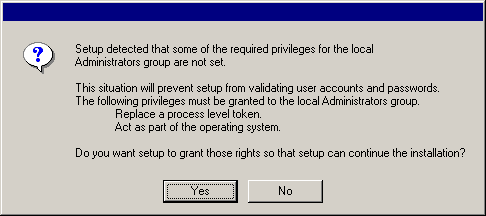
Click Yes to set up the required privileges for the local administrators group.
NOTES
- This option will only appear if the Windows user account used to install
the software does not have the required administrator rights (e.g., if the
operating system was newly installed).
- If you choose to click Yes, the install program will automatically assign the
required rights to your account. You may be prompted to log off and log
back on to continue the installation.
- If you choose to click No, the installation will be aborted.
- You will be prompted at the end of the
installation to decide if you want these privileges to be revoked.
|
 |
 |
The install program checks
your Windows user account for the following necessary operating system
rights:
- Right to increase quotas (this is referred to as adjust memory
quotas for a process on Windows Server 2003).
- Right to act as a part of the operating system.
- Right to replace a process level token.
|
| 11. |
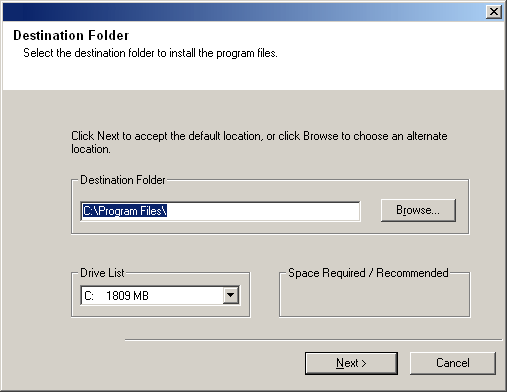
Specify the location where you want to install the software. NOTES
- Do not install the software to a mapped network drive.
- Do not use the following characters when specifying the destination path:
/ : * ? " < > |
It is recommended that you use alphanumeric characters only.
- If you intend to install other components on this computer, the selected installation directory will be automatically used for that software as well.
- If a component has already been installed, this screen may not be displayed if the installer can use the same
install location as previously used.
Click Browse to change directories.
Click Next to continue.
|
 |
|
|
| 12. |
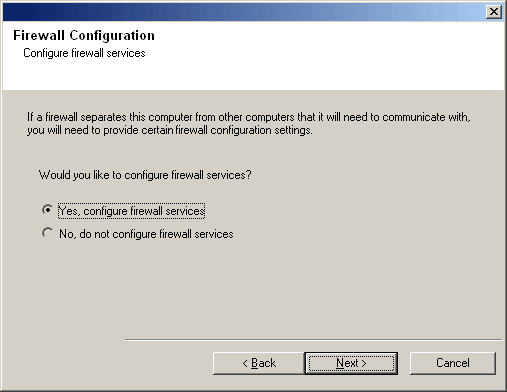
Select from the following:
- If this Client communicates with the CommServe Server and/or MediaAgent across a
firewall, select Yes, configure firewall services, and then click
Next to continue.
Proceed to the next Step.
- If firewall configuration is not required, click No, do not configure
firewall services and then click Next to continue. Proceed to
the next section.
NOTES
- Operating systems, such as Windows 2008 and Windows Vista, may have more
than one profile present. When you select No to configure firewall
services, verify that firewall settings are not enabled in the profile(s).
- If the system detects firewall settings are present in the profile(s),
you must select from the following:
- Disable firewall for ALL profiles: Employ caution when
choosing this option; firewall settings will be disabled in all
profiles. This requires a system reboot; installation automatically
resumes after reboot.
- No, Firewall is not enabled: Select this option if your
firewall settings allow communication with the CommServe computer.
Click Back to configure firewall services.
|
 |
| 13. |
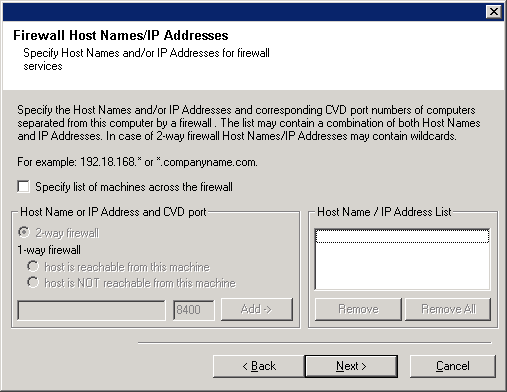
Click the Specify list of machine across the firewall option and then
specify the list of hosts separated from this computer by a firewall. Make sure
you correctly describe whether the firewall allows two-way communication (but on
a limited range of ports), or one-way communication (with either only remote
host being able to make connections to this computer, or vice versa).
For all one-way firewalls allowing incoming connections and those one-way
firewalls allowing outgoing connections without additional port filtering, skip
this step.
Click Next to continue.
NOTES
- Consider the following:
- On the CommServe Server, this list should include all the
MediaAgents and Clients that are on the other side of the
firewall.
- On the MediaAgents/Clients this should include the CommServe
computer, and any other Clients/MediaAgents on the
other side of the firewall with which communications will be
established.
- For each machine on the other side of the firewall that you want to
configure, choose the type of firewall configuration based on the firewall setup in
your environment. Choose from the following options:
- Click on 2-way firewall if you can open certain ports as
bi-directional ports.
- Click 1-way firewall; host is reachable from this machine
on the machine that is on the secure side of the firewall.
- Click 1-way firewall; host is NOT reachable from this machine
on the machine that is on the public / DMZ side of the firewall.
- If you wish to communicate with computers in a clustered
environment, ensure that you add the Host Name/IP Address of all
physical nodes in the cluster (even if no CommCell components are
installed) and all the virtual nodes in which CommCell components are
installed.
- Type the host name or the IP address and the GxCVD port number of the
host name, and
click Add to place it in the Host Name/IP Address List.
|
 |
| 14. |
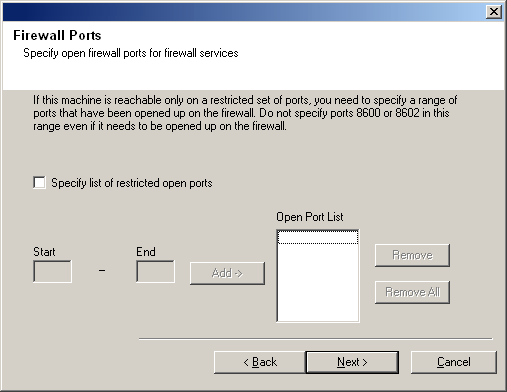
Click the Specify list of restricted open ports option and then
specify the port range. Add the starting and ending port range and then click
Add to place it in the Open Port List. Repeat as needed.
If firewall separating this computer from others allows incoming connections,
but these connections can be made only on a limited set of ports, then configure
the appropriate port range here. For all other scenarios, skip this step.
Note that if you do not specify hostname(s) as well as port number(s), then
the firewall services will not be configured.
NOTES
- Typically in a two-way firewall, the open ports must be indicated for
all computers. In a one-way firewall, the ports must be specified on
computers in the open side, if they are open in a restricted way. Note that
the port ranges are not required for computers that are fully closed in the
one-way firewall. For example, laptops which are configured as clients in
the Workstation Backup Agent.
- In a clustered environment, make sure the firewall ports specified here
are open for communication on all the physical nodes as well as the virtual
nodes.
Click Next to continue.
|
 |
| 15. |
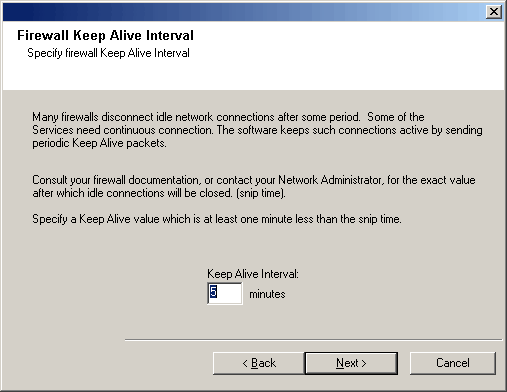
If desired, modify the Keep Alive interval.
Click Next to continue.
|
 |
| 16. |
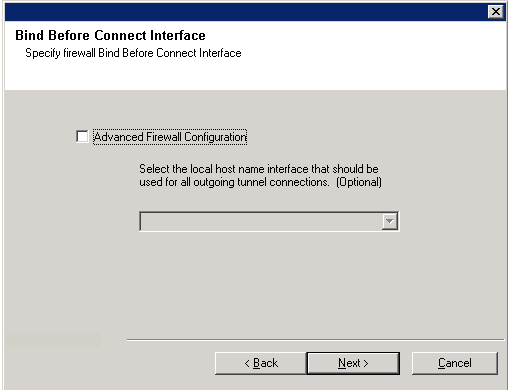
Optionally, select Advanced Firewall Configuration and specify a local
host name interface to use for outgoing tunnel connections through
the firewall. Otherwise, the interface and port is automatically selected for
you by the OS. Click Next to continue.
|
 |
| 17. |
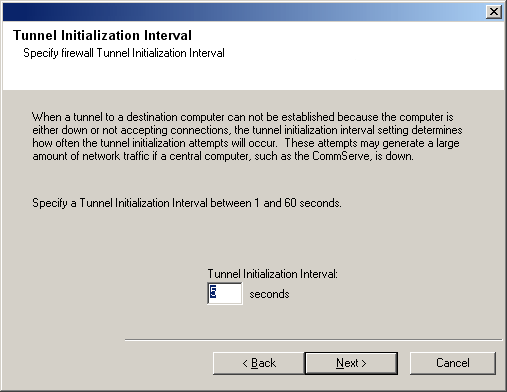
If desired, modify the Tunnel Initialization interval.
Click Next to continue.
|
 |
|
|
| 18. |
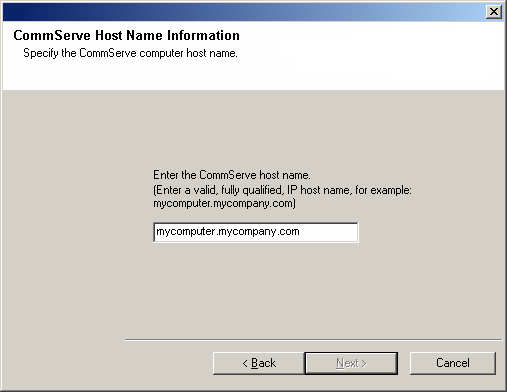
Enter the fully qualified domain name of the CommServe computer. (TCP/IP network
name. e.g., computer.company.com)
NOTES
-
Do not use spaces when specifying a new name for the CommServe Host Name.
- If a component has already been installed, this screen will not
be displayed; instead, the installer will use the same Server Name as previously
specified.
Click Next to continue.
|
 |
| 19. |
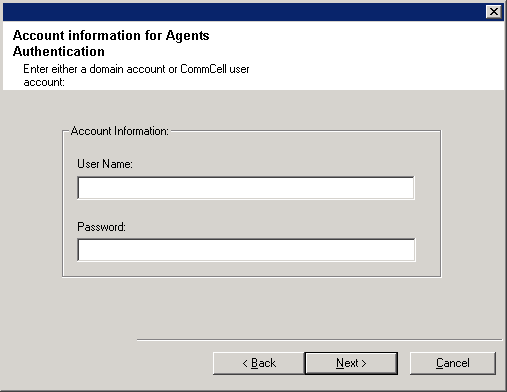
Enter the username and password information for an external
domain user account or a CommCell user account. This authorizes the installation
of an agent on the CommCell.
NOTES
- This window is only displayed when the Require Authentication for Agent
Installation option is selected in the CommCell Properties. Users must belong to a User
Group with Administrative Management capabilities to enable this feature. For more
information, see
Authentication for Agent Installs.
Click Next to continue.
|
 |
| 20. |
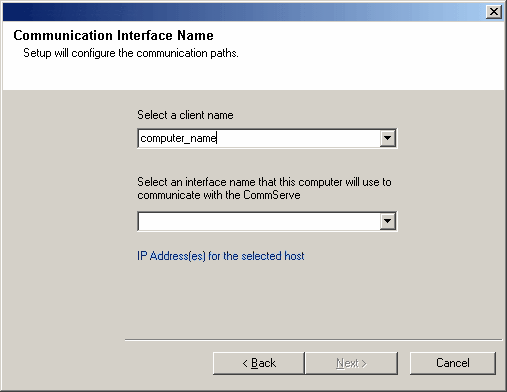
Enter the following:
- The local (NetBIOS) name of the client computer.
- The TCP/IP IP host name of the NIC that the client computer must use to communicate with the CommServe
Server.
NOTES
-
Do not use spaces when specifying a new name for the Client.
- The default network interface name of the client computer
is displayed if the computer has only one network interface. If the
computer has multiple network interfaces, enter the interface name that
is preferred for communication with the CommServe Server.
- If a component
has already been installed, this screen will not be displayed; instead, the
install program will use the same name as previously specified.
Click Next to continue.
|
 |
| 21. |
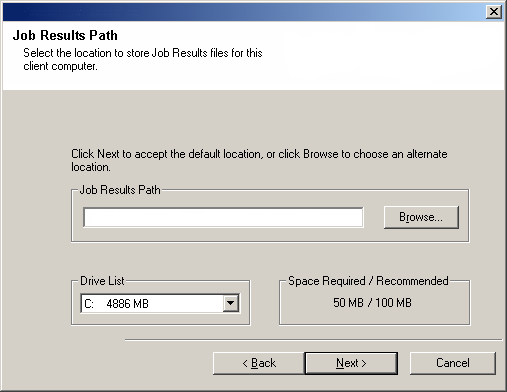
Specify the location of the client's job results directory. NOTES
- The Agent uses the job results directory to store the client's backup and
restore job results.
Click Browse to change directory.
Click Next to continue. |
 |
|
|
| 22. |
Select the storage policy through which you want to back up/archive the
indicated component (subclient, instance, etc.)
NOTES
- A storage policy directs backup data to a media library. Each library
has a default storage policy.
- When you install an Agent, the install program creates a default subclient
for most Agents.
- If desired, you can change your storage policy selection at any time
after you have installed the client software.
- If this screen appears more than once, it is because you have selected
multiple agents for installation and are configuring storage policy
association for each of the installed agents.
Click Next to continue.
|
 |
|
|
| 23. |
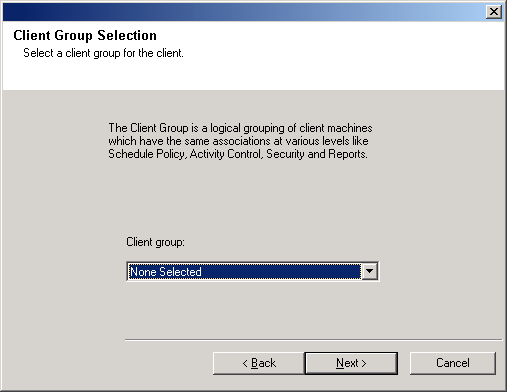
Select a Client Group from the list. Click Next to continue.
NOTES
- This screen will be displayed only if Client Groups are configured in
the CommCell Console. For more information, see
Client
Computer Groups.
|
 |
|
|
| 24. |
If you are installing the Exchange Agents then continue
on with this step, otherwise skip to
Verify Summary of Install
Options.
Enter the following Exchange Administrator information then click Next to continue:
Account Name - Domain user account created with the proper permissions. Do not include the domain name here.
Account Password - The password assigned to the domain user.
Mailbox Name for this Account -
Mailbox associated with the user above.
Profile Name - Created during agent
install. This profile is associated with the domain user's mailbox.
Exchange Server Name - Name of the Exchange
Server that the agent will communicate with for data protection and recovery
operations.
Domain - The Windows domain that the Exchange Server resides in. The installation detects and enters a domain name. If necessary, this field can be modified.
NOTES
-
The Exchange Administrator Account Information dialog will appear only once during the installation of multiple Exchange MAPI-based agents, and the account settings established initially will apply to all of them. To specify different Exchange Administrator Account settings for each Exchange MAPI-based agent, either install the agents separately or manually modify the account information in the Agent properties.
- If you are installing the agent on a 32-bit off-host proxy
computer, or are performing a multi-instance proxy fanning install
i.e., to install multiple instances of these agents on the same
off-host proxy computer to different Exchange Servers, ensure that
you enter the name of the appropriate Exchange Server in the
Exchange Server Name field. In some cases, a pre-populated
default value for this field will appear and may need to be changed
depending on your configuration.
See the
Exchange Agents section in User Accounts and Passwords for more
information.
|
 |
|
|
| 25. |
Select Download Pack(s) and Install to download and install the latest service packs and post packs from the software provider.
NOTES
- Internet connectivity is required to download updates.
- Updates are downloaded to the following directory:
<software installation>/Base/Temp/DownloadedPacks.
They are launched silently and installed automatically.
Click Next to continue.
|
 |
|
|
| 26. |
Verify the summary of selected options.
NOTES
- The Summary on your screen should
reflect the components you selected for install, and may look different from
the example shown.
Click Next to continue or
Back to change any of the options.
The install program now starts copying the software to the computer.
This step may take several minutes to complete.
|
 |
| 27. |
The System Reboot message may be displayed. If so, select one of the following:
- Skip Reboot
This option will be displayed if the install program
finds any files belonging to other applications, that need to be
replaced. As these files are not critical for this installation,
you may skip the reboot and continue the installation and reboot the
computer at a later time.
- Reboot Now
If this option is displayed without the
Skip Reboot
option, the install program has found files required by the software
that are in use and need to be replaced. If Reboot Now is displayed
without the Skip Reboot option, reboot the computer at this point. The
install program will automatically continue after the reboot.
- Exit Setup
If you want to exit the install program, click
Exit
Setup.
|
 |
|
|
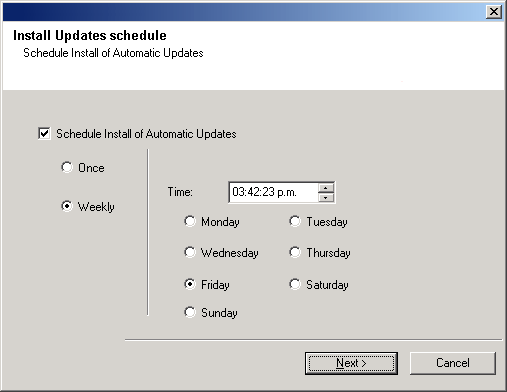
| 28. |
If necessary, select this option to schedule an automatic installation of software
updates.
NOTES
Click Next to continue.
|
 |
|
|
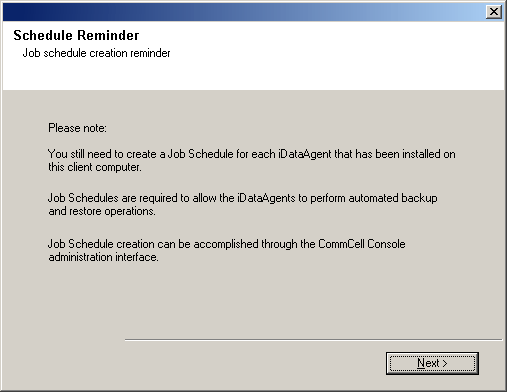
| 29. |
Click Next to continue.
NOTES
- Schedules help ensure that the data protection operations for the
Agent are automatically performed on a regular basis without user intervention.
For more information, see
Scheduling.
|
 |
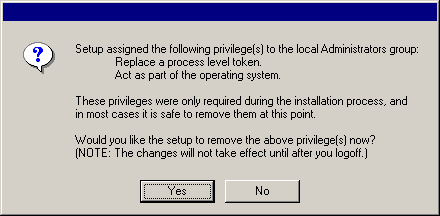
| 30. |
Click Yes to remove the privileges that were assigned earlier by the
install program. If you do not wish to remove them, click No.
NOTES
- This option will only be displayed if you were prompted to assign the
privileges earlier in the installation.
|
 |
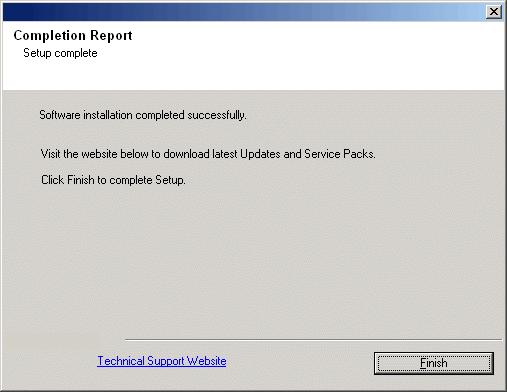
| 31. |
Setup displays the successfully installed components.
NOTES
- The Setup Complete message displayed on
your screen will reflect the components you installed, and may look different
from the example shown.
- If you install an Agent with the CommCell Console open, you need to
refresh the CommCell Console (F5) to see the new Agents.
- If Reboot Now button is displayed make sure to reboot the
computer before performing any other operations from the computer.
Click Finish to close the install program.
The installation is now complete.
|
 |
|
|
General
-
Install post-release updates or Service Packs that may have been released
after the release of the software. If you are installing a Service Pack,
verify and ensure that it is the same version as the one installed in the
CommServe Server. Alternatively, you can enable
Automatic Updates for
quick and easy installation of updates in the CommCell component.
- After installing the Agent, you may want to configure the Agent before running
a data protection operation. The following list includes some of the most common
features that can be configured:
- Configure your subclients - see
Subclients
for more information.
- Schedule your data protection operations - see
Scheduling
for more information.
- Configure Alerts - See
Alerts and Monitoring
for more information.
- Schedule Reports - See
Reports for more
information.
The software provides many more features that you will find useful. See the
Index for a complete list of supported
features.
Agent Specific
-
If you installed the agent in an off-host proxy configuration, or in a 32-bit on
64-bit configuration, and you would like to provide functionality support for
the Outlook Add-In and/or OWA (if applicable), then you
must install the OWA Proxy Enabler on the Exchange Server. For step-by-step
instructions, see Install the OWA Proxy
Enabler or Install the OWA
Proxy Enabler - Clustered Environment - Virtual Server. Afterwards, you must
also configure the Proxy for Exchange field in the Client Properties (Advanced)
tab on the client hosting the Exchange Server to point to the client hosting the
32-bit agents. For more information, see
Configuring the Proxy for Exchange.
- After install, in order to support stub recalls from OWA for
Exchange 2003 Agents, run the
RegisterWSSForm tool located on the Resource Pack.
Disaster Recovery Considerations
- Before you use your agent, be sure to review and understand the associated
full system restore (or disaster recovery) procedure. The procedure for some
agents may require that you plan specific actions or consider certain items
before an emergency occurs. See
Disaster Recovery for more information
regarding your agent.
|


