| The procedure in this page describes the steps involved
in upgrading the CommServe in the virtual servers (active and passive nodes)
in a clustered environment. This procedure provides steps for upgrading
the CommServe only.
If multiple components are installed on a computer, then ensure that all
applicable components are selected for upgrade. In such a situation, the upgrade
sequence may vary. Refer to the appropriate procedures for upgrade
requirements and steps specific to the component.
Verify
that the computer in which you wish to upgrade the software satisfies the
minimum requirements specified in
System Requirements -
CommServe.
|
Verify and ensure that you have permanent license before upgrading the
CommServe. You may encounter irrecoverable failure, if you upgrade using an
evaluation license.
|
If you are upgrading the software from 7.0.0 to 8.0.0
If you are upgrading the software from 6.1.0 to 8.0.0
- Upgrade the physical nodes prior to upgrading the virtual
server. Similarly upgrade the active node first before upgrading the
passive nodes.
- The upgrade must be initiated on the active node. It is recommended that both the active and passive nodes are available during
the upgrade process. The program provides the option to automatically upgrade
the passive nodes. If necessary, you can also manually upgrade the passive
nodes if they are not available. (See
Manually Upgrading
the Software on a Passive Node for step-by-step instructions.)
- Agent upgrades must be performed in the following order:
- Windows File System iDataAgent must be first upgraded on all the
physical nodes in the cluster prior to attempting any virtual server
upgrades.
- Other Agents can then be upgraded on the virtual server.
|
|
|
|
The following table provides a list of supported upgrade paths for
the current
software version. If the
version currently installed on your computer is not listed here, contact
your software provider for more information.
Installed Version
|
Upgrade to Version 8.0.0
|
Information
|
|
|
|
|
|
6.1.0 |
Supported |
Perform a direct upgrade to
Version 8.0.0. |
|
|
|
|
|
7.0.0 |
Supported |
Perform a direct upgrade to
Version 8.0.0. |
|
|
|
|
Review the following before upgrading the software: General
- Ensure that all the clients in the CommCell are at software version 6.1.0 or
above. See
Client
Version for more information.
CommServe Specific
If you are upgrading the software from 6.1.0 to 8.0.0
-
In a clustered CommServe, the Microsoft SQL Server 2005 database
instance must be upgraded as explained in step 14.
Do not upgrade the Microsoft SQL Server before the upgrade.
Verify and ensure that SQL Server 2005 components are not already installed
on the CommServe computer. For example, Microsoft SQL Server Native Client,
Microsoft SQL Server VSS Writer, Microsoft SQL Server 2005 Backward
Compatibility, etc.
If these components are installed, the CommServe upgrade will fail; uninstall
these components before upgrading the CommServe software.
|
- Verify the following setting by viewing the CommServe database
properties using the SQL Server Enterprise Manager.
| |
In
the Data Files and Transaction Log tabs, the Maximum file size should be
preferably set to Unrestricted file growth. If, however, you wish to
establish a value for Restrict the file growth option, make sure that the
value is more than the size of the CommServe Disaster Recovery Backup dump file (<cs_sitename>_FULL.dmp)
located in the CommServe DR folder. |
 |
| |
The
location of the CommServe folder can be viewed from the CommCell Console
Control Panel,
DR Backup dialog box. |
 |
NOTES
- If CommCell Explorer is installed on the CommServe computer, whether in
a non-clustered or clustered environment, it will be automatically upgraded
during the CommServe upgrade. See
CommCell
Explorer for more information.
- If a CommNet Agent was installed on a CommServe that was registered with a
CommNet Server, the CommNet Agent is automatically upgraded to current
version during the
CommServe upgrade.
- It is strongly recommended that you perform a Disaster Recovery Backup
from the CommCell Console before upgrading the CommServe.
-
If the CommServe upgrade fails during the following upgrade process, use the
DBUpgrade utility from
the Resource Pack to perform the upgrade. See
Upgrade the CommServe Using the DBUpgrade Utility for more information.
-
If the QSM software is installed on the CommServe computer, use the QSM
Service Control Manager to manually stop the QSM Services before
upgrading the CommServe software.
|
|
|
- Ensure that you are logged on as the Domain User with
administrative privileges to all nodes in the cluster.
|
|
|
|
1. |
In this screen, you choose the language you want to use during installation.
Click the down arrow, select the desired language from the pull-down list, and click Next to continue.
|
|
| 2. |
Select the option to install software. NOTES
|
|
| 3. |
Select the option to install software on this computer. NOTES
- The options that appear on this screen depend on the computer in which
the software is being installed.
|
|
| 4. |
Read the Welcome screen.
Click Next to continue, if no other applications are
running.
|
 |
| 5. |
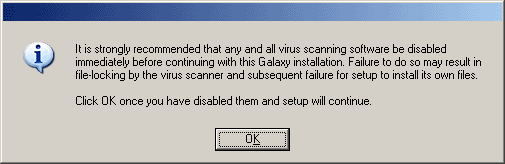
Read the virus scanning software warning.
Click OK to continue, if virus scanning software is disabled.
|
 |
| 6. |
Read the license agreement, then select I accept the terms
in the license agreement. Click Next to continue.
|
 |
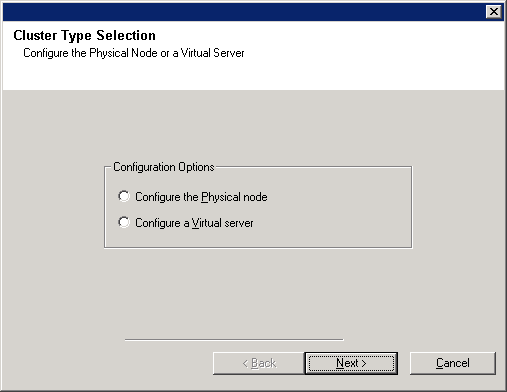
| 7. |
Select Configure a Virtual Server. Click Next to continue.
|
 |
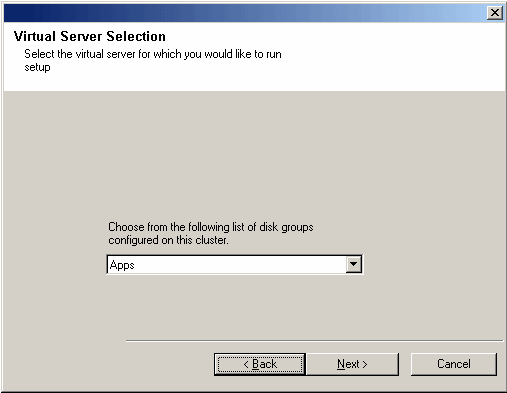
| 8. |
Select the disk group in which the virtual server resides. Click Next to
continue.
|
 |
| 9. |
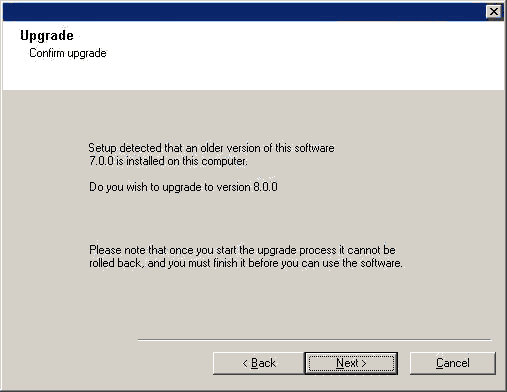
Click Next to continue with the upgrade. NOTES
- New components from this version can only be installed after upgrading
the existing components.
- The older version number depends on the version in the computer and may
look different from the example shown.
|
 |
| 10. |
Click Yes to continue. This will not save any files (such as command
line scripts) or folders from the <software installation path> folder. NOTES
|
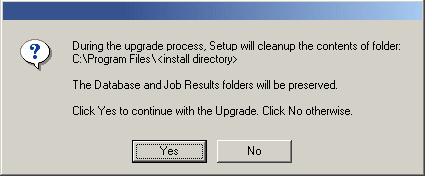 |
| 11. |
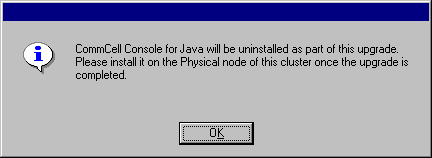
Click OK to continue with the uninstall of the CommCell
Console. NOTES
If installed, the CommCell Console is automatically uninstalled as part
of the CommServe upgrade in a Clustered environment.
|
 |
| 12. |
Click Yes to backup the CommServe database. NOTES
- Clicking No will abort the upgrade.
- The size of the CommServe Disaster Recovery depends on the size of the
CommServe Database Engine in your environment and may may look different
from the example shown.
|
 |
| 13. |
Click OK to continue. |
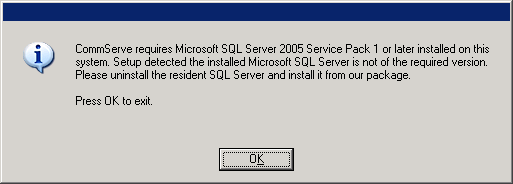 |
| 14. |
Click OK to exit the upgrade process to upgrade
the CommServe Database Engine to Microsoft SQL Server 2005 (Enterprise Edition)
with the appropriate service pack. See
System Requirements -
CommServe for more information. NOTES
- Microsoft SQL Server 2005 can be upgraded from the following location
in the Software
Installation Discs:
\INTEL32\SQL2005\SQL_Enterprise_Edition\Servers\setup.exe
\AMD64\SQL2005\SQL_Enterprise_Edition\Servers\setup.exe
Refer to Microsoft SQL Server 2005 documentation for information
on how to upgrade the SQL Server.
-
Before upgrading the SQL Server, install the .NET Framework package from the
Software Installation
Discs. The package is available in the appropriate
folder for each platform as follows:
32-bit:
INTEL32\Bin\DotNetFramework\2.0\dotnetfx.exe
X64:
AMD64\Bin\DotNetFramework\2.0\NetFx64.exe
- Once you upgrade the Microsoft SQL Server you can resume the upgrade
from this point.
|
 |
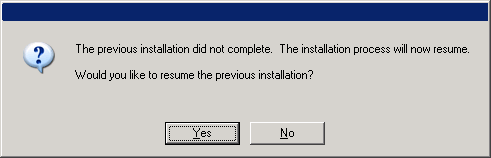
| 15. |
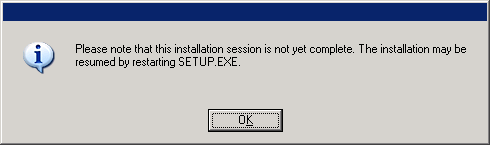
Click Yes to resume the upgrade. NOTES
- This screen will be displayed when you resume the upgrade.
- Clicking No will start the upgrade from the beginning. (Not
recommended)
|
 |
| 16. |
Specify the SQL Server System Administrator password. NOTES
- This is the password for the administrator's account created by SQL
during the installation.
Click Next to continue.
|
 |
| 17. |
Click Yes to install the Java Runtime Environment (JRE) or click No
if you would like to use the JRE Version already available in your computer.
NOTES
- This prompt will be displayed only if the computer is running a JRE
version prior to the one supplied in this installation program or no JRE version is available at all.
See
System Requirements
- CommServe for more information on JRE versions.
|
 |
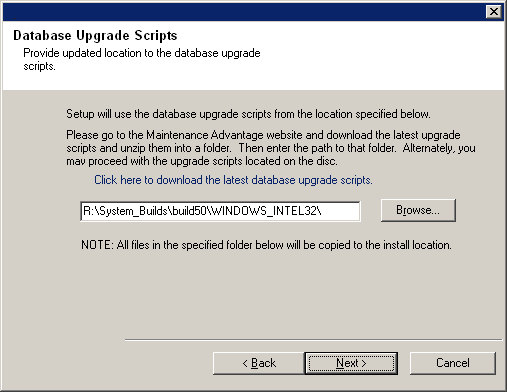
| 18. |
Specify the location from which the database upgrade scripts should be copied
for use during the upgrade process or use the default location. Click Next to continue.
NOTES
- The upgrade program copies the necessary database scripts to the install
location before running them.
- In most cases you can use the default location. If you have been
provided with custom scripts from Customer Support, click the Browse button
to choose the appropriate location in which the custom scripts are
available.
|
 |
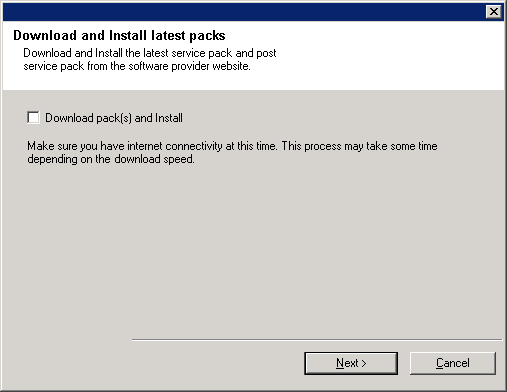
| 19. |
Select Download Pack(s) and Install to download and install the latest service packs and post packs from the software provider.
NOTES
- Internet connectivity is required to download updates.
- This step is applicable when installing on the first instance.
- Updates are downloaded to the following directory:
<software installation>/Base/Temp/DownloadedPacks.
They are launched silently and installed automatically for the first instance.
Click Next to continue.
|
 |
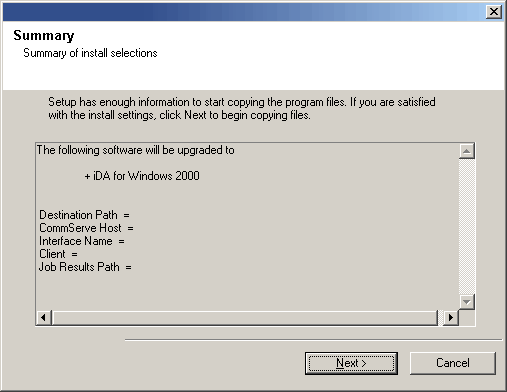
| 20. |
Verify the summary and Click Next to continue.
NOTES
- The Summary on your screen will reflect the components installed on
the computer, and may look different from
the example shown.
The upgrade program now starts the upgrade process.
This step may take several minutes to complete.
|
 |
| 21. |
Click Yes to stop the World Wide Web Publishing Service (W3SVC). NOTES
- Clicking No will abort the upgrade.
|
 |
| 22. |
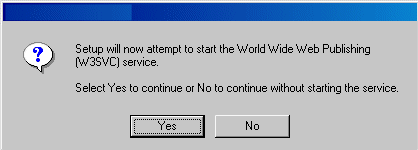
Click Yes to start the World Wide Web Publishing Service (W3SVC). NOTES
- You can continue without starting the service.
|
 |
| 23. |
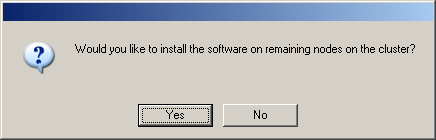
To install/upgrade the software on the remaining nodes of the cluster, click Yes.
To complete the install for this node only, click No.
|
 |
| 24. |
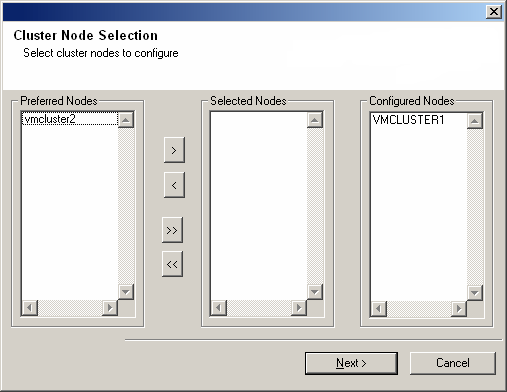
Select cluster nodes from the Preferred Nodes list and click the arrow
button to move them to the Selected Nodes list.
NOTES
- The list of Preferred Nodes displays all the nodes found in the
cluster; from this list you should only select cluster nodes configured to
host this virtual server.
- Do not select nodes that already have multiple instances installed. For
more information, see
Multi Instancing.
When you have completed
your selections, click Next to continue.
|
 |
| 25. |
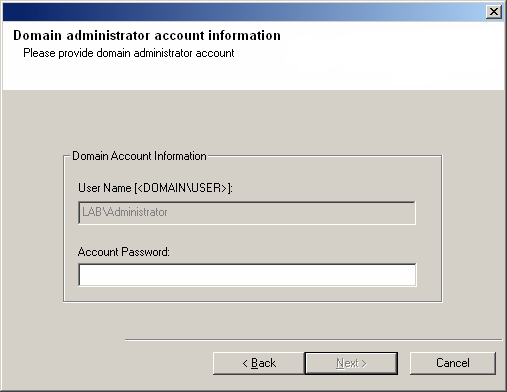
Type the User Name and Password for the Domain Administrator
account, so that the installer can perform the remote install/upgrade of the cluster
nodes you selected in the previous step.
Click Next to continue.
|
 |
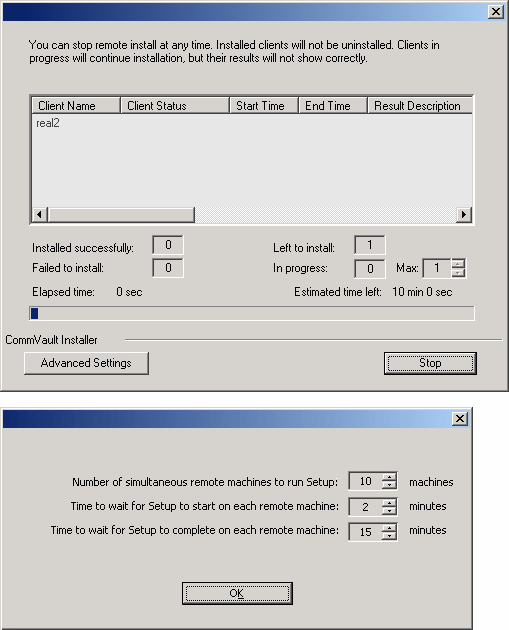
| 26. |
The progress of the remote upgrade for the cluster nodes is displayed; the
upgrade can be
interrupted if necessary.
Click Stop to prevent upgrade to any nodes after the current ones
complete.
Click Advanced Settings to specify any of the following:
- Maximum number of nodes on which Setup can run simultaneously.
- Time allocated for Setup to begin executing on each node, after which the
upgrade attempt will fail.
- Time allocated for Setup to complete on each node, after which the
upgrade attempt will fail.
NOTES
- If, during the remote upgrade of a cluster node, setup fails to complete or is interrupted, you
must perform a local upgrade on that node. When
you do, the upgrade begins from where it left off, or from the beginning
if necessary. For procedures, see
Manually Upgrading
the Software on a Passive Node.
|
 |
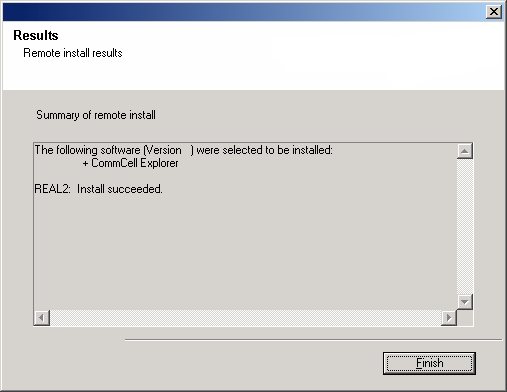
| 27. |
Read the result for the passive node upgrade to verify whether the passive
node upgrade was successful.
NOTES
- If the passive node upgrade fails, you must manually upgrade the
passive node once the active node upgrade is complete. (See
Manually Upgrading the
Software on a Passive Node for step-by-step instructions.)
- The Result message displayed on your screen will reflect the status
of the passive node upgrade, and may look different from the example.
Click Next to continue.
|
 |
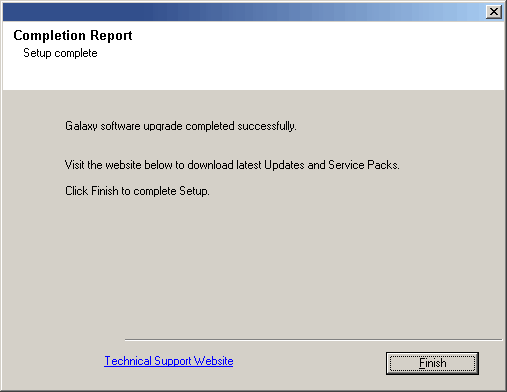
| 28. |
Click Finish to complete the upgrade. NOTES
- The Completion Report will reflect the components upgraded on the
computer, and may look different from
the example shown.
The upgrade is now complete.
|
 |
|
|
General
-
Install post-release updates or Service Packs that may have been released
after the release of the software. If you are installing a Service Pack,
verify and ensure that it is the same version as the one installed in the
CommServe Server. Alternatively, you can enable
Automatic Updates for
quick and easy installation of updates in the CommCell component.
- If Activity Control was disabled on the client prior to the
upgrade, enable it after the upgrade using the Activity Control tab
from the Client Computer Properties dialog box in the CommCell
Console.
-
Some existing features may not function as expected when the CommServe is
upgraded and the Clients/MediaAgents remain in a older version of the software.
See Backwards
Compatibility Issues for more information on such features.
Cluster/Firewall
Registry Keys
- Information from user created registry keys is stored in the
operating systems temp directory during the upgrade. The name of the
file is GalaxyReg_OLD_But_Not_New.txt.
Re-create these registry keys, if necessary.
- The values in all the system created registry keys are set to
default after the upgrade. If any of these values were modified prior to
the upgrade, the modified values are stored in the operating systems
temp directory within
GalaxyReg_MIX_OLD_New_Diff.txt.
-
Following an upgrade of the CommServe to the current release, manually
add the
OracleDeleteAgedBackupPiece registry key on the CommServe. Even if this
registry key was previously added as a matter of course and was on the CommServe, it must be added again following an upgrade of the specified
CommServe.
CommServe Specific
- If the CommServe Cache for the Automatic Update feature is located within the
CommServe install folder, the cache will be lost after the upgrade. Make sure to
repopulate the CommServe Cache after the upgrade.
- If the
bCHECK_AUTOUPDATES registry key was defined in the previous release, its
settings (enabled or disabled) will carry over to the current release. If
enabled, the CommServe CVD will contact the configured Automatic Updates FTP site
at six-hour intervals (360 minutes) to check if the CommServe Update Cache
is up-to-date. If there are missing updates, they will be downloaded as per
the Automatic Update Configuration.
- Upon upgrade, if you had configured a UNIX share for the CommServe Update Cache
in the previous release, the software will automatically point all clients
associated with the configured share to the CommServe Update Cache as the source
for updates. A UNIX share can no longer be configured for the CommServe
Update Cache. Instead, UNIX Clients can be designated as update caches as part of Automatic Updates
Multicache Configuration. Once designated as an update cache, a UNIX client can be configured to push out the latest update packages it receives from the CommServe Update Cache to the clients within the CommCell that are selected to receive their updates from this UNIX update cache. For more information, see
Configure an Update Cache.
- Upon upgrade, if you had enabled the Get Updates From Share
option in the previous release, the software will automatically point all
clients associated with the configured share to the CommServe Update Cache
as the source for updates.
- The user defined senders email address is not retained after the upgrade.
From the Control Panel, open the
E-Mail and IIS Configuration dialog box and specify the e-mail address
in the Senders Address box on the E-Mail Server tab.
If you are upgrading the software from 6.1.0 to 8.0.0
-
After the upgrade, the storage policy copies with the options Copy most recent full backups when Auxiliary Copy starts and
Manually select Full Backups will be converted to the option Do not Automatically select jobs.
Any previous auxiliary copy schedules related to the copies with the option Copy most recent full backups when Auxiliary Copy starts should be deleted, and re-created with the option
Select most Recent Full backup when Auxiliary Copy starts.
-
Find and Retrieve operation schedules
created in the previous release will carry over to this release. However, since
this type of content indexing is now considered a legacy feature, new data will
not be indexed once the CommServe has been upgraded. Therefore, when these
scheduled jobs run, no new data will be found. It is recommended that you delete
those schedules and create new Search and Retrieve schedules in the current
release. For more information, see
Schedule a Search and Restore Operation.
-
After upgrading the CommServe, note that the Time delay in minutes before
starting the VaultTracker policy option, which was located in the Media
Management Configuration (Service Configuration) dialog box, is now
available as Start exporting media x minute(s) from the execution time of
policy option in the
Tracking Policy Details dialog box for each VaultTracker policy. Also, note
that this option will be enabled by default for each VaultTracker policy. If you
do not wish to use this option, you will have to manually disable it for the
specific VaultTracker policy.
-
The following registry keys are now available in the
Media Management Configuration (Service Configuration)
dialog box. (See
Change Media Management Service Configurations for step-by-step instructions
on how to access this dialog box.)
- archiverRestoreHistoryLifeSpan is now the
Days to keep the archiver restore job histories option.
- jobHistoryLifeSpan is now the
Days to keep the backup job histories option.
|