|
|
| The SRM Exchange Agent is installed
on the computer from which the Agent collects data for reporting purposes.
(This computer is referred to as the Client computer in this install
procedure.)
Verify that the computer in which you wish to install the software satisfies
the minimum requirements specified in
System Requirements
- SRM Exchange Agent.
The following procedure describes the steps involved in installing the
SRM Exchange Agent. If you choose to install additional components
simultaneously, refer to the appropriate procedures for installation requirements
and steps specific to the component. Note that when you install multiple
components, the sequence of the install steps may vary.
Review the following Install Requirements before installing the software:
General
Firewall
- If the CommServe® Server, MediaAgent and/or Clients communicate across two-way firewall(s):
- Ensure port 8400 is allowed connections through the firewall.
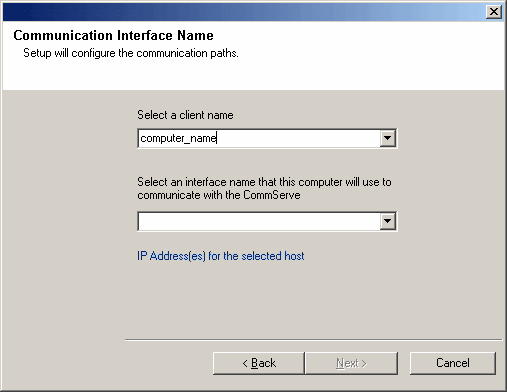
- In addition a range of bi-directional ports (consecutive or
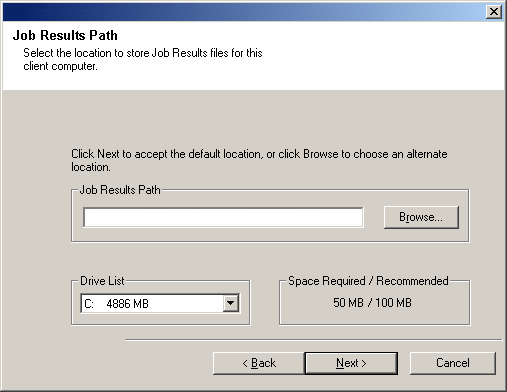
discrete) must also be allowed connections through the
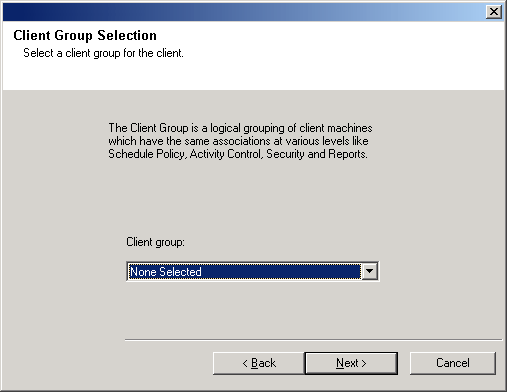
firewall.
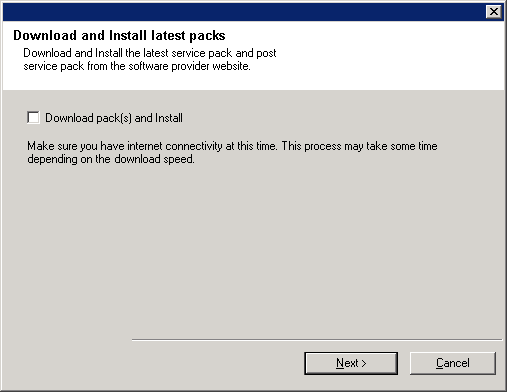
For information on configuring the range of ports, see
Port
Requirements for Two-way Firewall.
- If the CommServe Server, MediaAgent and/or Clients communicate across one-way firewall(s):
- Identify a range of outbound ports (consecutive or discrete) for use
by the software.
For information on configuring the range of ports, see
Port
Requirements for One-way Firewall.
-
If the MediaAgent/Client communicates with the CommServe Server across a one-way
firewall, you must add the MediaAgent/Client host name (or the IP address) in
the CommServe computer before installing the necessary software on the
MediaAgent/Client computer.
Cluster
Check the following on the cluster computer in which you wish to install the
software:
- Cluster software is installed and running.
- Active and passive nodes are available.
- Disk array devices configured with access to the shared array.
- Public Network Interface Card is bound first, before the private Network
Interface Card. (Does not apply to NetWare Cluster.)
Multi Instancing
- By utilizing the Multi Instancing feature, the same Agent and MediaAgent software can
be installed on a computer multiple times, but not all components support Multi
Instancing. This limitation can apply to the component you are installing, or to
one already installed on the computer. Prior to installing multiple instances of
a software component on the same computer, carefully review the information contained in
Multi Instancing, and follow
the instructions in the
How to Use Multi Instancing section for the additional screens that will appear during the installation
process.
|
|
|
| Collect the following information before
installing the software. Use the space provided to record the information,
and retain this information in your Disaster Recovery binder. |
| 1. |
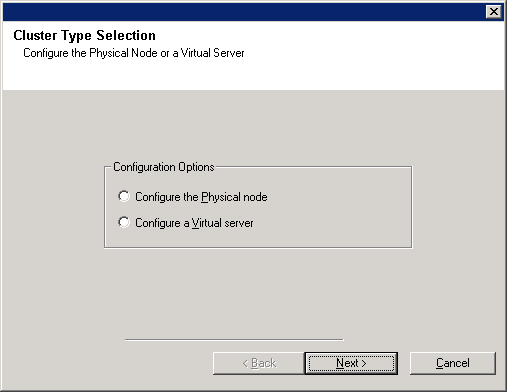
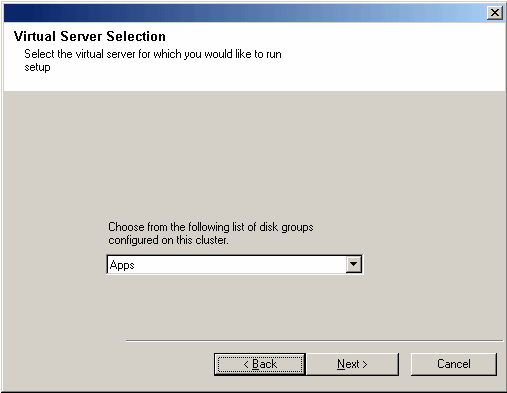
Name of the disk group in which the virtual server resides ____________________________________
See Cluster Selection for more information.
|
| 2. |
Install folder location for SRM software:____________________________________________
See Select Components for
Installation for more information.
|
| 3. |
If the CommServe Server and the client computer communicate across a firewall:
Firewall ports: ______________________________________________________________________
Hostnames and/or IP Addresses and corresponding GxCVD port numbers of
computers on the other side of the firewall:______________
Keep Alive Interval minutes:____________________________________________________________
Hostname for outgoing tunnel
connections:_________________________________________________
Tunnel Initialization Interval
seconds:_____________________________________________________
See Firewall Configuration for more information.
|
| 4. |
CommServe Host Name or the CommServe IP address:______________________________________
See Configuration of Other
Installation Options for more information.
|
| 5. |
Client computer's Host name (NetBIOS name) or IP address____________________________________
See Configuration of Other
Installation Options for more information.
|
| 6. |
Job result folder location:________________________________________________________________
If necessary, Name and Password for the specified folder:_______________________________________
See Configuration of Other
Installation Options for more information.
|
| 7. |
Client Group to which this Client will be associated:_____________________________________________
See Client Group Selection for more information.
|
| 8. |
Time and frequency for Install of Automatic Updates:_________________________________________
See Schedule Automatic Update for more information.
|
|
|
- Log on to active node as the Domain User with administrative
privileges to all nodes on the cluster.
|
| 10. |
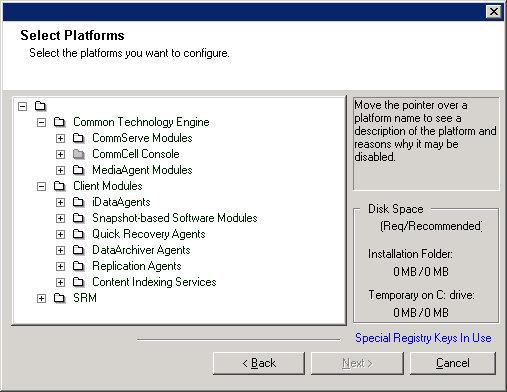
Select the component(s) to install. NOTES
- Your screen may look different from the example shown.
- Components that either have already been installed, or which cannot be installed, will be dimmed.
Hover over the component for additional details.
- The Special Registry Keys In Use field will be enabled when GalaxyInstallerFlags
registry keys have been enabled on this computer. Hover over the field to
see which keys have been set, as well as their values. For more information,
see
Registry Keys.
Click Next to continue.
To install the SRM Exchange Agent, expand the
SRM folder and then select
SRM Exchange Agent.
|
 |
| 11. |
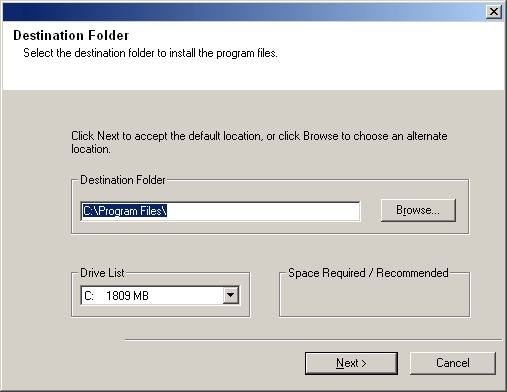
Specify the location where you want to install the software. NOTES
Click Browse to change directories.
Click Next to continue.
|
 |
 |
Proprietary disk resources will not appear in the browse window. To install
to a proprietary disk resource, manually enter the path. After installing to a proprietary disk resource, the error message
CVD failed to set dependency may be generated.
To set the dependency, open the Cluster Administrator and select the CVD that
has just been installed. Click on the Properties
Dependencies tab, and click Modify.
Select the proprietary disk resource and click OK.
Do not select the same destination drive in which the MSCS resides.
|
|
|
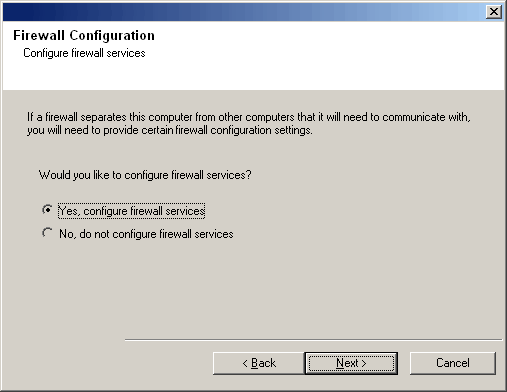
| 12. |
Select from the following:
- If this Client communicates with the CommServe Server and/or MediaAgent across a
firewall, select Yes, configure firewall services, and then click
Next to continue.
Proceed to the next Step.
- If firewall configuration is not required, click No, do not configure
firewall services and then click Next to continue. Proceed to
the next section.
NOTES
- Operating systems, such as Windows 2008 and Windows Vista, may have more
than one profile present. When you select No to configure firewall
services, verify that firewall settings are not enabled in the profile(s).
- If the system detects firewall settings are present in the profile(s),
you must select from the following:
- Disable firewall for ALL profiles: Employ caution when
choosing this option; firewall settings will be disabled in all
profiles. This requires a system reboot; installation automatically
resumes after reboot.
- No, Firewall is not enabled: Select this option if your
firewall settings allow communication with the CommServe computer.
Click Back to configure firewall services.
|
 |
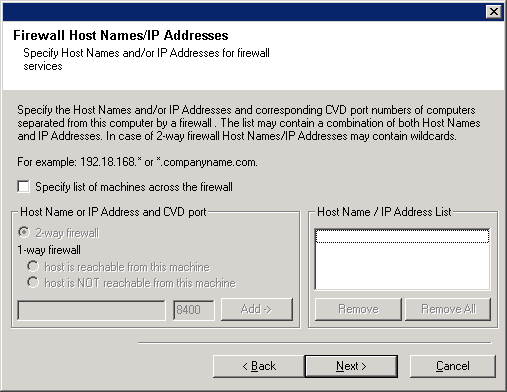
| 13. |
Click the Specify list of machine across the firewall option and then
specify the list of hosts separated from this computer by a firewall. Make sure
you correctly describe whether the firewall allows two-way communication (but on
a limited range of ports), or one-way communication (with either only remote
host being able to make connections to this computer, or vice versa).
For all one-way firewalls allowing incoming connections and those one-way
firewalls allowing outgoing connections without additional port filtering, skip
this step.
Click Next to continue.
NOTES
- Consider the following:
- On the CommServe Server, this list should include all the
MediaAgents and Clients that are on the other side of the
firewall.
- On the MediaAgents/Clients this should include the CommServe
computer, and any other Clients/MediaAgents on the
other side of the firewall with which communications will be
established.
- For each machine on the other side of the firewall that you want to
configure, choose the type of firewall configuration based on the firewall setup in
your environment. Choose from the following options:
- Click on 2-way firewall if you can open certain ports as
bi-directional ports.
- Click 1-way firewall; host is reachable from this machine
on the machine that is on the secure side of the firewall.
- Click 1-way firewall; host is NOT reachable from this machine
on the machine that is on the public / DMZ side of the firewall.
- If you wish to communicate with computers in a clustered
environment, ensure that you add the Host Name/IP Address of all
physical nodes in the cluster (even if no CommCell components are
installed) and all the virtual nodes in which CommCell components are
installed.
- Type the host name or the IP address and the GxCVD port number of the
host name, and
click Add to place it in the Host Name/IP Address List.
|
 |
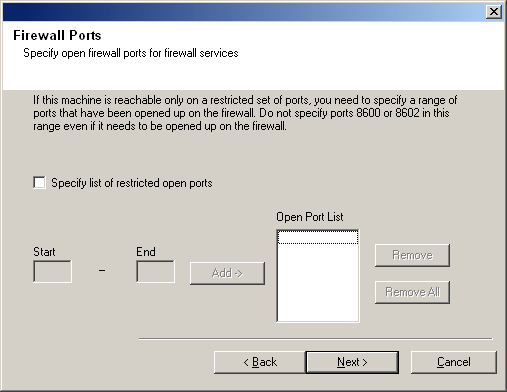
| 14. |
Click the Specify list of restricted open ports option and then
specify the port range. Add the starting and ending port range and then click
Add to place it in the Open Port List. Repeat as needed.
If firewall separating this computer from others allows incoming connections,
but these connections can be made only on a limited set of ports, then configure
the appropriate port range here. For all other scenarios, skip this step.
Note that if you do not specify hostname(s) as well as port number(s), then
the firewall services will not be configured.
NOTES
- Typically in a two-way firewall, the open ports must be indicated for
all computers. In a one-way firewall, the ports must be specified on
computers in the open side, if they are open in a restricted way. Note that
the port ranges are not required for computers that are fully closed in the
one-way firewall. For example, laptops which are configured as clients in
the Workstation Backup Agent.
- In a clustered environment, make sure the firewall ports specified here
are open for communication on all the physical nodes as well as the virtual
nodes.
Click Next to continue.
|
 |
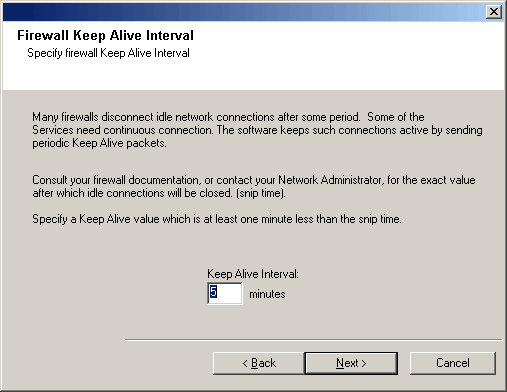
| 15. |
If desired, modify the Keep Alive interval.
Click Next to continue.
|
 |
| 16. |
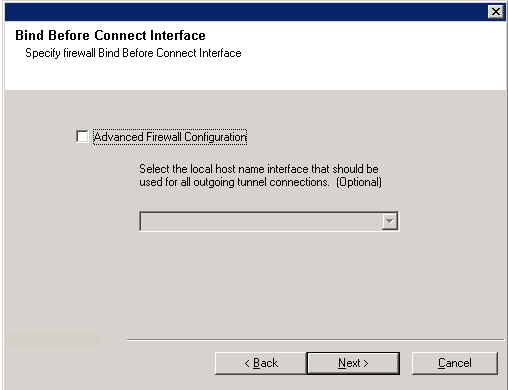
Optionally, select Advanced Firewall Configuration and specify a local
host name interface to use for outgoing tunnel connections through
the firewall. Otherwise, the interface and port is automatically selected for
you by the OS. Click Next to continue.
|
 |
| 17. |
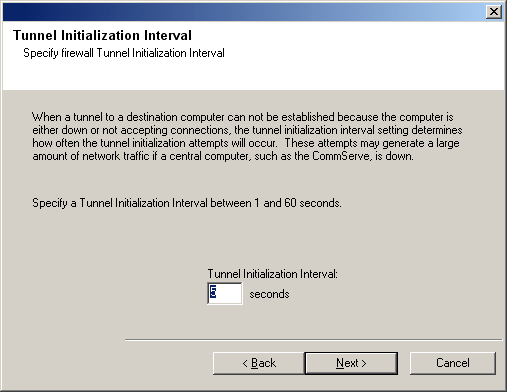
If desired, modify the Tunnel Initialization interval.
Click Next to continue.
|
 |
|

|
If any of the above prompts for firewall configuration is not
displayed, you must configure communication across firewall(s) using
the Firewall Configuration Wizard before running any
operations on this computer. (See
Configure or Modify Firewall Settings on Windows Computers for
step-by-step instructions on using the Firewall Configuration
Wizard.) |
|
|
|
| 18. |
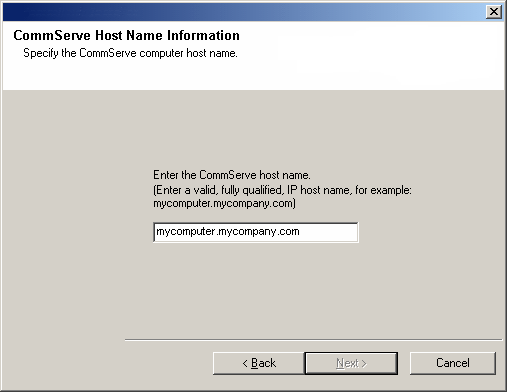
Enter the fully qualified domain name of the CommServe computer. (TCP/IP network
name. e.g., computer.company.com)
NOTES
-
Do not use spaces when specifying a new name for the CommServe Host Name.
- If a component has already been installed, this screen will not
be displayed; instead, the installer will use the same Server Name as previously
specified.
Click Next to continue.
|
 |
| 19. |
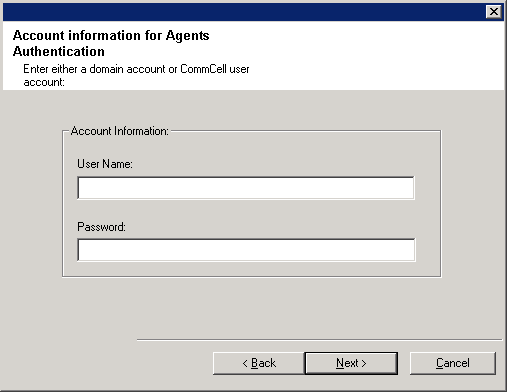
Enter the username and password information for an external
domain user account or a CommCell user account. This authorizes the installation
of an agent on the CommCell.
NOTES
- This window is only displayed when the Require Authentication for Agent
Installation option is selected in the CommCell Properties. Users must belong to a User
Group with Administrative Management capabilities to enable this feature. For more
information, see
Authentication for Agent Installs.
Click Next to continue.
|
 |
| 20. |
Enter the following:
- The local (NetBIOS) name of the client computer.
- The TCP/IP IP host name of the NIC that the client computer must use to communicate with the CommServe
Server.
NOTES
-
Do not use spaces when specifying a new name for the Client.
- The default network interface name of the client computer
is displayed if the computer has only one network interface. If the
computer has multiple network interfaces, enter the interface name that
is preferred for communication with the CommServe Server.
- If a component
has already been installed, this screen will not be displayed; instead, the
install program will use the same name as previously specified.
Click Next to continue.
|
 |
| 21. |
Specify the following and click Next to continue:
- Type the location of the client's job results directory, or click Browse.
NOTES
- The Agent uses the job results directory to store the client's backup and
restore job results.
-
UNC paths are supported for Windows and Exchange Database 2007
iDataAgents with Cluster Continuous Replication
(CCR), but cannot be specified on this screen. After the installation completes,
you can change the Job Results path to a UNC path. For comprehensive information
on UNC paths, see
Using UNC Paths for Job Results Directory.
-
UNC paths are supported for job results directory by the Exchange Database
iDataAgent 2007 and above when configured in Cluster
Continuous Replicator environment. Also note that Windows
iDataAgent is also supported when
configured in this environment.
|
 |
|
|
| 22. |
Select a Client Group from the list. Click Next to continue.
NOTES
- This screen will be displayed only if Client Groups are configured in
the CommCell Console. For more information, see
Client
Computer Groups.
|
 |
| 23. |
Select Download Pack(s) and Install to download and install the latest service packs and post packs from the software provider.
NOTES
- Internet connectivity is required to download updates.
- This step is applicable when installing on the first instance.
- Updates are downloaded to the following directory:
<software installation>/Base/Temp/DownloadedPacks.
They are launched silently and installed automatically for the first instance.
Click Next to continue.
|
 |
|
|
| 24. |
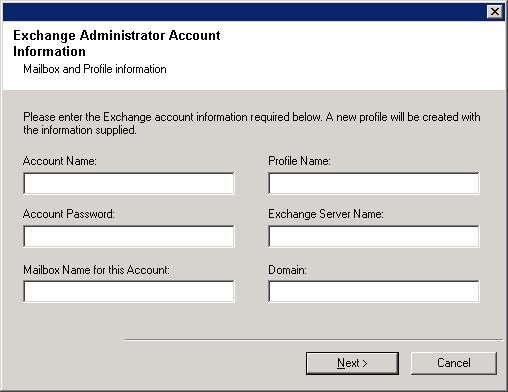
Enter the following Exchange Administrator information then click Next to continue:
Enter the following information:
Account Name: The user name that must be used by SRM to logon to the
Exchange Server.
Account Password: The password for the user account.
Mailbox Name for this Account: The mailbox name for the user account.
Profile Name: The profile name that must be used by SRM to access the
Exchange Server.
Exchange Server Name: The name of the client in which the SRM Agent
for Exchange Server is installed.
Domain: The domain name associated with the client.
Click Next to continue.
NOTES
- The user must be a member of the following groups:
- Domain Users
- Exchange Enterprise Servers
- Exchange Domain Servers
- The user must also be a member of the Local
Administrators on the Exchange Server.
|
 |
|
|
| 25. |
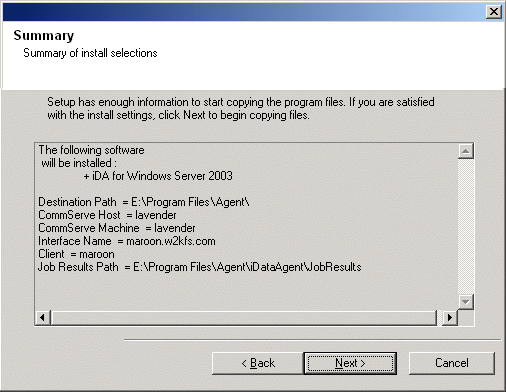
Verify the summary of selected options.
NOTES
- The Summary on your screen should
reflect the components you selected for install, and may look different from
the example shown.
Click Next to continue or
Back to change any of the options.
The install program now starts copying the software to the computer.
This step may take several minutes to complete.
|
 |
| 26. |
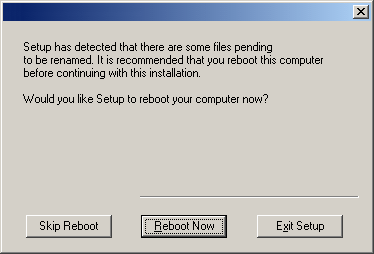
The System Reboot message may be displayed. If so, select one of the following:
- Skip Reboot
This option will be displayed if the install program
finds any files belonging to other applications, that need to be
replaced. As these files are not critical for this installation,
you may skip the reboot and continue the installation and reboot the
computer at a later time.
- Reboot Now
If this option is displayed without the
Skip Reboot
option, the install program has found files required by the software
that are in use and need to be replaced. If Reboot Now is displayed
without the Skip Reboot option, reboot the computer at this point. The
install program will automatically continue after the reboot.
- Exit Setup
If you want to exit the install program, click
Exit
Setup.
|
 |
|
|
| 27. |
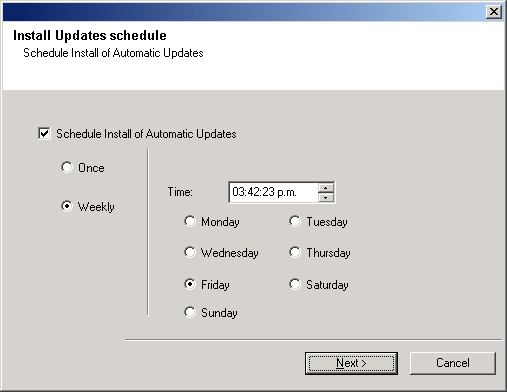
If necessary, select this option to schedule an automatic installation of software
updates.
NOTES
Click Next to continue.
|
 |
|
|
| 28. |
If you are installing/upgrading the software on the physical node in a clustered environment,
use this option to install/upgrade the software on the remaining physical nodes of
the cluster.
- To install/upgrade the software on the remaining nodes of the cluster, click
Yes.
- To complete the install/upgrade for this node only, click No.
See
Install/Upgrade Remaining Cluster
Nodes for step-by-step instructions.
|
 |
| 29. |
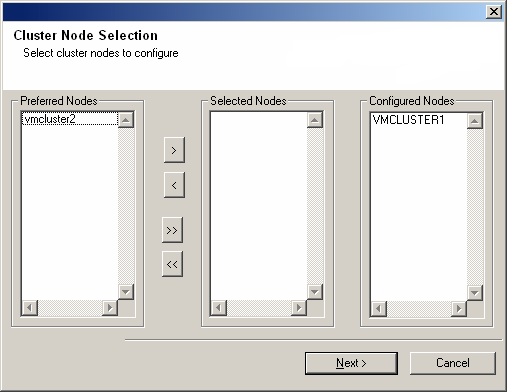
Select cluster nodes from the Preferred Nodes list and click the arrow
button to move them to the Selected Nodes list.
NOTES
- The list of Preferred Nodes displays all the nodes found in the
cluster; from this list you should only select cluster nodes configured to
host this virtual server.
- Do not select nodes that already have multiple instances installed. For
more information, see
Multi Instancing.
When you have completed
your selections, click Next to continue.
|
 |
| 30. |
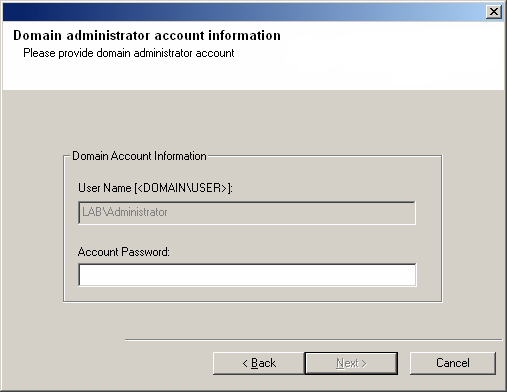
Type the User Name and Password for the Domain Administrator
account, so that the installer can perform the remote install/upgrade of the cluster
nodes you selected in the previous step.
Click Next to continue.
|
 |
| 31. |
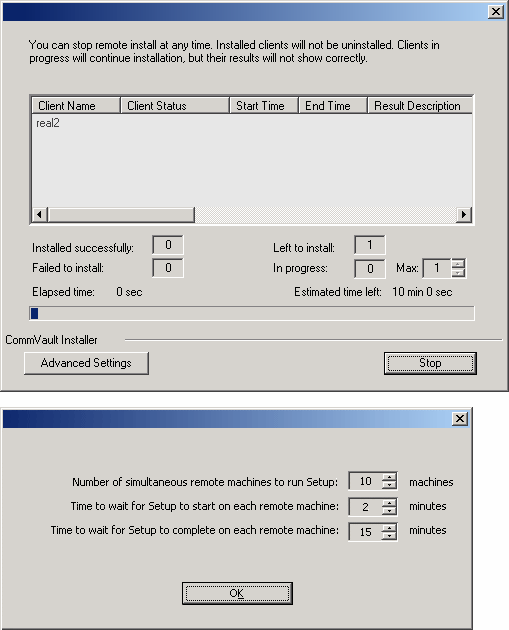
The progress of the remote install for the cluster nodes is displayed; the
install can be
interrupted if necessary.
Click Stop to prevent installation to any nodes after the current ones
complete.
Click Advanced Settings to specify any of the following:
- Maximum number of nodes on which Setup can run simultaneously.
- Time allocated for Setup to begin executing on each node, after which the
install attempt will fail.
- Time allocated for Setup to complete on each node, after which the install
attempt will fail.
NOTES
- If, during the remote install of a cluster node, setup fails to complete or is interrupted, you
must perform a local install on that node. When
you do, the install begins from where it left off, or from the beginning
if necessary. For procedures, see
Manually Installing
the Software on a Passive Node.
|
 |
| 32. |
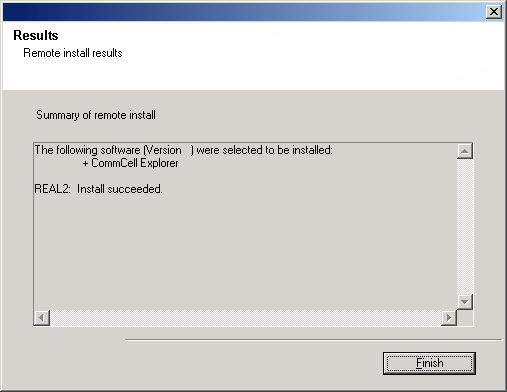
Read the summary for remote installation to verify that all selected nodes were installed
successfully.
NOTES
- If any node installation fails, you must manually install the software on that node once the
current installation is complete. (See
Manually Installing the
Software on a Passive Node for step-by-step instructions.)
- The message displayed on
your screen will reflect the status of the selected nodes, and may look different
from the example.
Click Next to continue.
|
 |
|
|
| 33. |
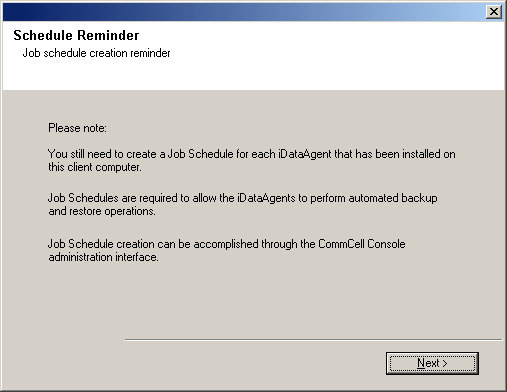
Click Next to continue.
NOTES
- Schedules help ensure that the data protection operations for the
Agent are automatically performed on a regular basis without user intervention.
For more information, see
Scheduling.
|
 |
| 34. |
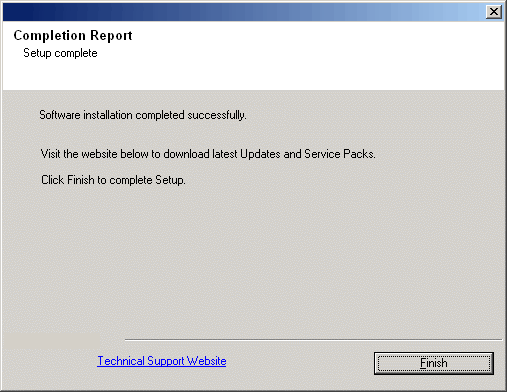
Setup displays the successfully installed components.
NOTES
- The Setup Complete message displayed on
your screen will reflect the components you installed, and may look different
from the example shown.
- If you install an Agent with the CommCell Console open, you need to
refresh the CommCell Console (F5) to see the new Agents.
- If Reboot Now button is displayed make sure to reboot the
computer before performing any other operations from the computer.
Click Finish to close the install program.
The installation is now complete.
|
 |
|
|
-
Install post-release updates or Service Packs that may have been released
after the release of the software. If you are installing a Service Pack,
verify and ensure that it is the same version as the one installed in the
CommServe Server. Alternatively, you can enable
Automatic Updates for
quick and easy installation of updates in the CommCell component.
|
