Use
this procedure to register a cell using the CommNet Console:
On the Setup menu, click Cell
Registration.
From the Cell Registration dialog box,
click Add CommCell (or Modify if reregistering the Cell).
From the Register CommCell dialog box, specify the registration information.
If reregistering the Cell, click the Register CommCell Again - CommCell Administrator
check box and specify the user account name and password. Click OK. The re-registered Cell is displayed in the
Cell Registration
dialog box.
Select the following options to collect the specific data thereby
enabling you to run the corresponding reports. Note that this is only
applicable when registering a CommCell.
Collect Primary Storage Data: Select this option to collect
SRM data from the CommCell, enabling you to run the
Primary
Storage Data Growth Report against this CommCell. Select this option only if
an SRM Server has been installed on the CommCell.
Collect Media and VaultTracker Data:Select this
option to collect media and VaultTracker data from the CommCell,
enabling you to run the
Media
Management Media Information and
VaultTracker
Actions reports against this CommCell.
Click OK.
The newly registered Cell is displayed in the
Cell Registration
dialog box. You can now see information associated with the Cell in the
CommNet Browser.
When you register a CommCell, a CommCell license is used.
Make sure that services are running on the appropriate cell before
registering that cell with the CommNet Server.
CommNet Server can function with several CommCell versions. For more
information, see the Compatibility Matrix.
Use the following steps to
register your cell and generate reports, if the CommNet Server is not reachable
and you are not able to register your cell using the CommNet Console.
The following steps allows you to import multiple CommServe databases to the CommNet Server. SRM databases,
if available in the CommServe, can also be imported to the CommNet Server.
1.
Use the following steps to download the tool:
Click the Download Now button
located on the right to download the ImportCommServDBGui.
Select <install directory>\Base
folder in the CommNet server as the location to save the
.zip file.
Navigate to the location of the
.zip file and unzip the file.
2.
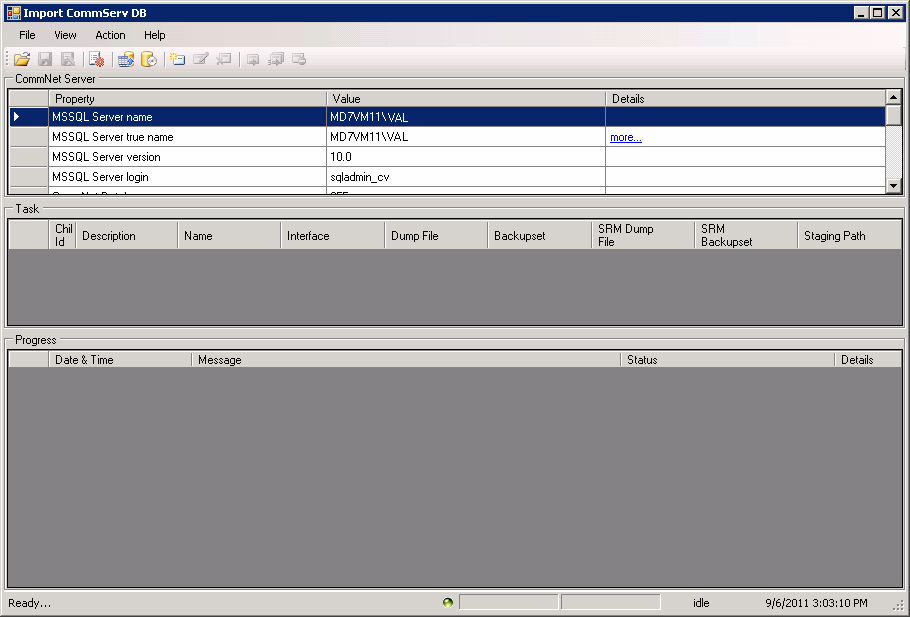
Double-click ImportCommServDBGui.
The Import
CommServe DB Tool is displayed.
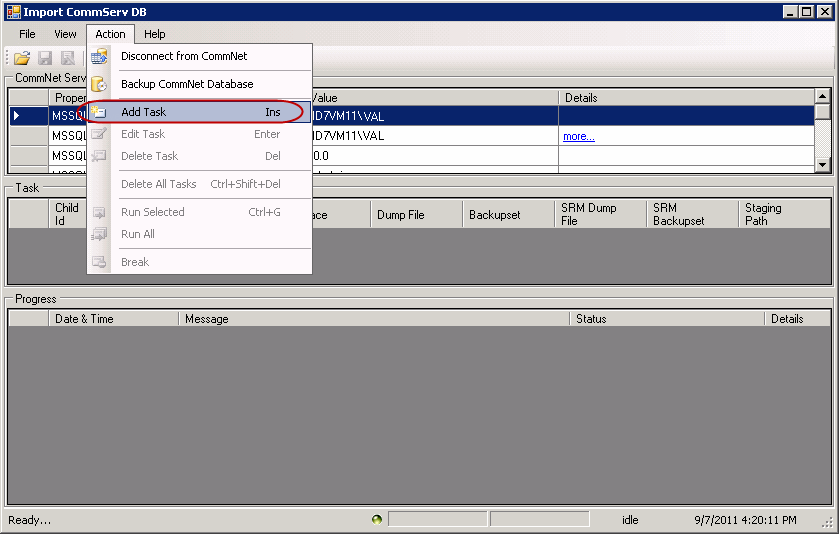
3.
From the Actions menu click Add Task.
The Task
dialog box appears.
4.
In the Description field, type a
description of the Import Task.
The CommCell Properties are
selected automatically, however you may change them if needed.
To edit any of the options under CommCell Properties,
clear the check box, and then type the child ID, display name, or
interface name in the box.
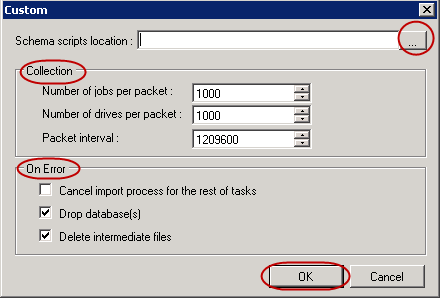
To browse to the CommServe Database Dump file, next to
CommServe Database Dump, click the ellipsis button [...].
You can also browse SRM Server Database
dump file along with the CommServe Database dump using this
dialog box.
Click OK.
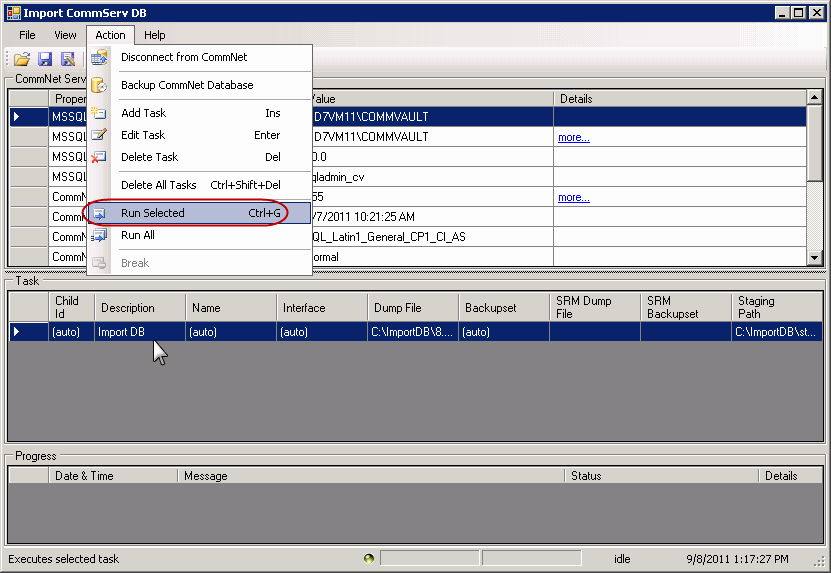
5.
Select and highlight the added task and click Actions
from top menu.
Click Run
Selected.
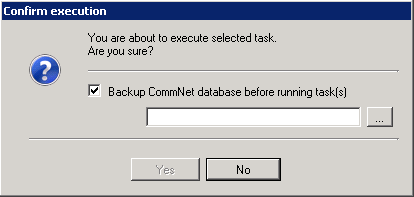
6.
Enter a path to backup CommNet database in Confirm
Execution dialog box and click Yes.
Alternatively, you may
clear the Backup CommNet database before running task(s) and
click Yes to not backup the CommNet database.
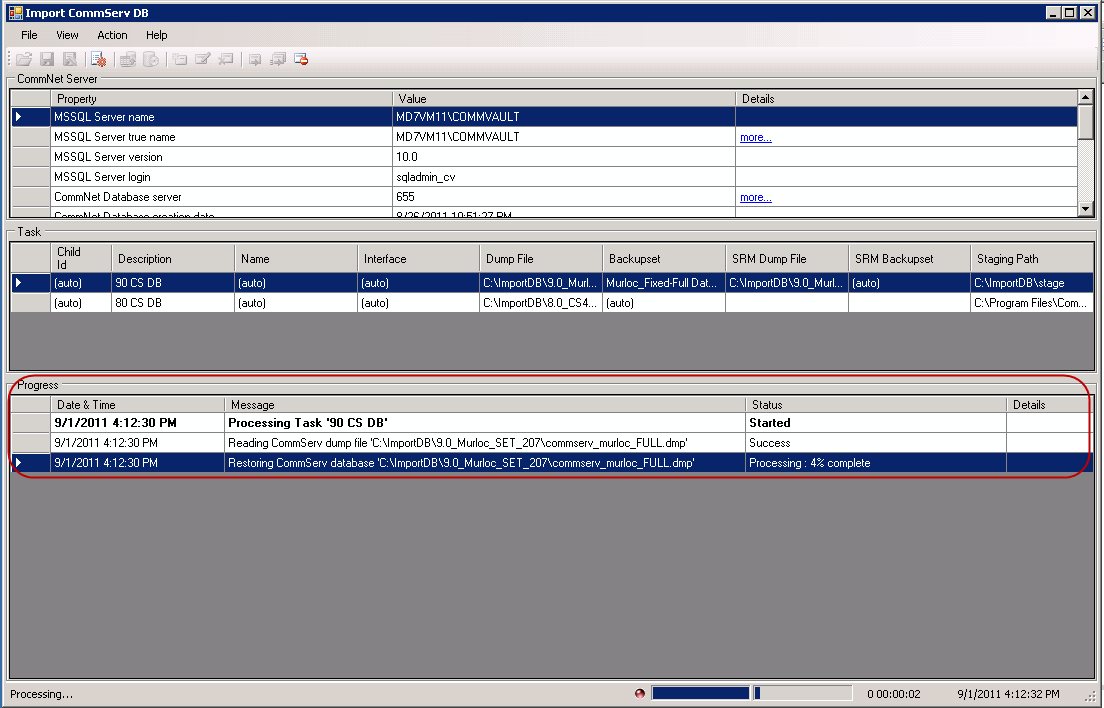
7.
You can view the progress of the import job in the
Progress area.
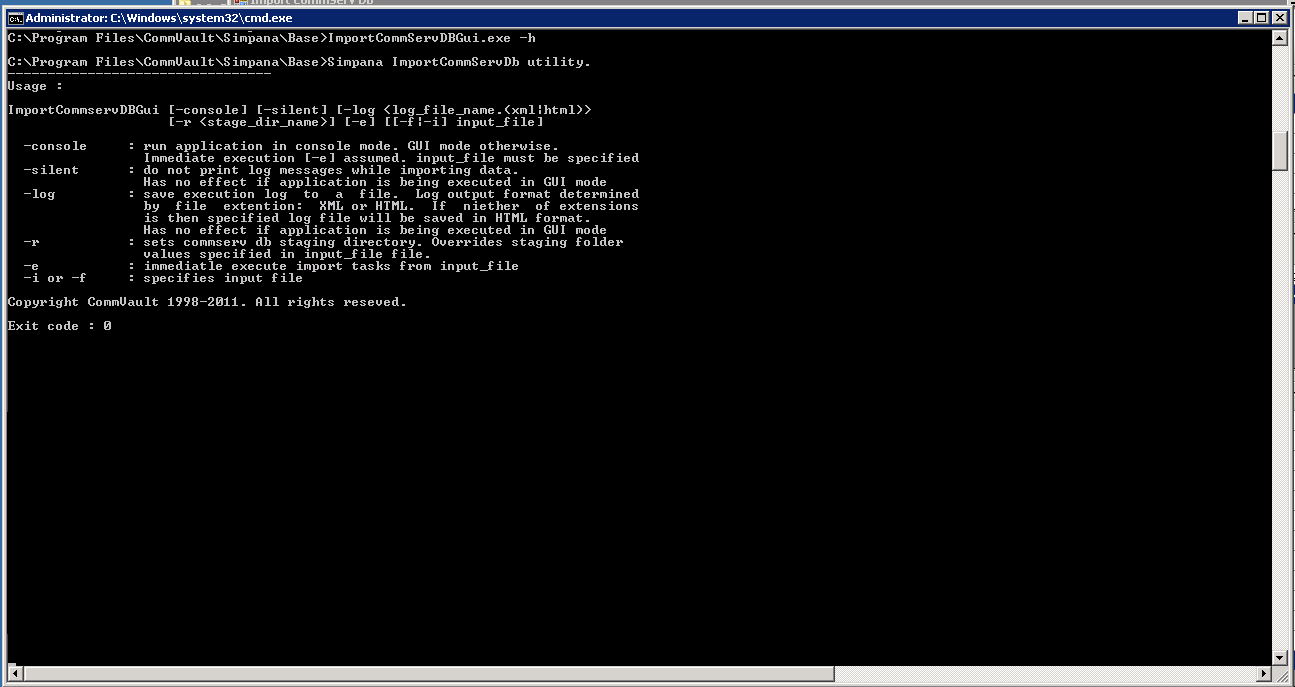
-console Runs the application in console
mode. -silent Does not allow printing of log
messages while importing data. -log Saves
execution log to a file. Log output format is determined by file
extension that is either XML or HTML. -r
Sets CommServe database staging directory. Overrides staging folder
values specified in input file file. -e Immediately executes import tasks from input file. -i or -f Specifies input file.
From the Cell Registration
dialog box, select a CommCell, and then click Remove.
Click OK in the Warning prompt.
In the Enter Confirm dialog box, type Confirm and then click OK. The Cell is removed in the Cell Registration
dialog box.
A CommCell license gets released when you remove a registered
CommCell from
the CommNet domain.
Make sure services are running on the appropriate Cell before removing that
registered Cell.
After removing the registered Cell, you should remove the Cell-Client Groups
that are only associated with the removed Cell. For more information, see
Remove
Cell-Client Group.
Users can unregister a CommCell from the CommNet Server using the CommServe
software. For more information, see Books Online documentation for the
CommServe.
From the Cell Registration dialog box,
highlight the Cell for which you wish to modify the display name from
the Cell(s) list, and then click Modify.
From the
Modify CommCell dialog box,
type the new name in the Display Name box.
Click OK.
Click OK in the Registration Changed prompt. The new name for the Cell is displayed in the Cell Registration
dialog box.
The CommNet Browser uses the Display Name to display the Cell in the
CommNet tree. Hence you can modify the display name to include relevant information
that will help you to easily identify the Cell. For example, include the
physical location of the Cell in the display name.
To modify the description or contact information of a Cell:
On the Setup menu, click Cell
Registration.
From the Cell Registration dialog box,
highlight the Cell for which you wish to modify the description
and/or contact information from the
Cell(s) list, and then click Modify.
Type the contact information in the Contact Information box.
Click OK.
Click OK in the Registration Changed prompt.
You can record relevant reference information about the Cell in the
description and contact information boxes. For example: you can record the contact information, such as
the contact person, telephone numbers, email addresses, etc.
From the Cell Registration dialog box,
highlight the Cell for which you wish to modify the network connection
type from the Cell(s) list, and then
click Modify.
From the
Modify CommCell dialog box, choose the appropriate connection type from the Connection
Type list.
Click OK.
Click OK in the Registration Changed prompt. The system saves the network connection type.
The connection type can be changed when the Cell is not accessible due
to a low bandwidth in the connection.
Select LAN when you have a faster and reliable connection or WAN for slower
and less reliable connections.
Keep in mind that by default the retry
attempts for communication failures on WAN are more. The retry attempts for
communication failures can be established in
CommNet Properties
dialog box.
To modify the CommCell Network Interface Name used to communicate with the CommCell:
On the Setup menu, click Cell
Registration.
From the Cell Registration dialog box,
highlight the CommCell for which you wish to modify the interface name from
the Cell(s) list, and then click Modify.
New network interface name in the CommCell Interface Name box.
Click OK. The system attempts to connect to the CommCell using the new interface
name.
If the connection is established using the new network interface name, the new
interface name for the CommCell is displayed in the Cell Registration
dialog box.
If the connection fails, an error message is displayed.
The CommCell Interface Name may be changed in the following situations:
When the CommCell network interface name is changed.
When you have multiple network interfaces in the CommCell computer, and
you wish to configure another network interface.
To modify
the CommNet Server's Network Interface Name used to communicate with the CommCell:
On the Setup menu, click Cell
Registration.
From the Cell Registration dialog box,
highlight the CommCell for which you wish to modify the CommNet Server's
network interface name used to communicate with the CommCell from the Cell(s)
list, and then
click Modify.
Choose the appropriate interface name from the CommNet Interface
Name list.
Click OK.
Click OK in the Registration Changed prompt. The system saves the new Network Interface Name.
This option is useful if you have multiple network interface cards
(NIC) on the CommNet Server. In such a situation, you can configure some of
the CommCells to communicate through one interface, while others can be
configured to use a different interface.
The authentication password is used as an internal security measure for
CommNet-related
communications. All computers within the CommNet domain will have a default
password that is created when the software is installed on the computer.
You can periodically change this password, to enhance security.
From the CommNet Browser, expand the CommCells' parent node.
Select (highlight) a CommCell.
From the CommCell Tasks window, select Jobs and Resources. The corresponding view
will display in the right-hand side windowpane.
From the right-hand side windowpane, select the Jobs View option.
The CommCell's Job View will display in the right-hand side windowpane.
Right-click any job and select Tasks or View from the
popup menu:
Select Tasks to launch a popup menu allowing you to Resume,
Suspend, or Kill the selected job. Select your option and
confirm.
Select View to launch a popup menu listing those fields to
add or delete from the Jobs View table display. Those items with a
checkmark appearing before the field are active and currently displayed
in the Job View. Click on a field to add it or remove it.
To
manage resources from the CommCell Resources View:
From the CommNet Browser, expand the CommCells' parent node.
Select (highlight) a CommCell.
From the CommCell Tasks window, select Jobs and Resources. The Resources
View
will display in the right-hand side windowpane.
From the right-hand side windowpane, select the appropriate option
to display the information in tree or tableformat. The corresponding
view will display in the right-hand side windowpane.
Right-click any field item and select View to launch a popup menu listing those fields to
add or delete from the Resources View display. Those items with a
checkmark appearing before the field are active and currently displayed
in the Resources View. Click on a field to add it or remove it.
Click on a
Library,
Drive,
Media and/or
MediaAgent to launch a
detail report regarding the selected entity. To close or minimize the detail
report and return to the Resources view, use the window controls.
Right click on a Library, Drive, or MediaAgent and select
Tasks to launch a popup menu to manage the CommCell's resources. Options
available are as follows:
Library: Enable, Disable, or
Reset the library
Drive: Enable, Disable, Reset, or Unmount the
drive
Mountpath: Enable or Disable the mountpath
MediaAgent: Enable or Disable the MediaAgent.
Click the icon next to the Resource View format options, Table View and
Tree View, to initiate the
Filter
Dialog. Use this dialog box to select the specific libraries or
MediaAgents to be included in the Resources View.
To use this filter, the CommNet Browser must be in a paused state, which
stops updates to the current window; to do this, click on the Pause button
in the CommNet Browser tool bar. When finished with this filter, click on
the Play button to resume updates to the current window.